When looking at old jobs in your PlanSwift data folders, you may decide you want to sort or see other custom properties. While you can always add a new column and then add the information that way, there is a way to add properties to a job as you pull them into PlanSwift.
...
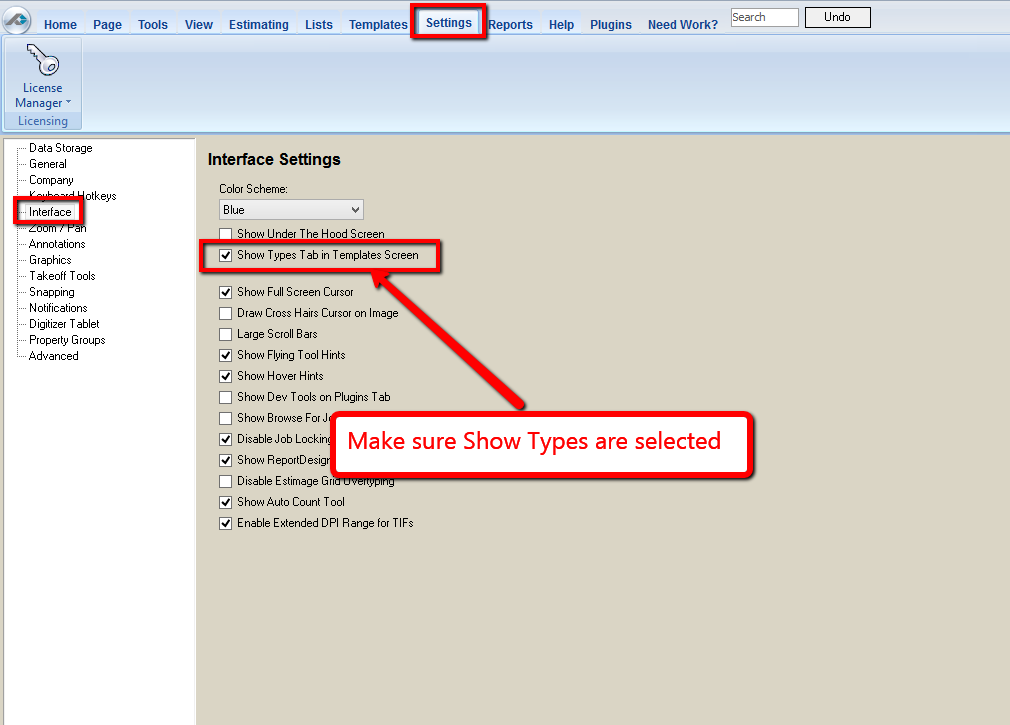
3. Click on Show Types in Templates to select it.

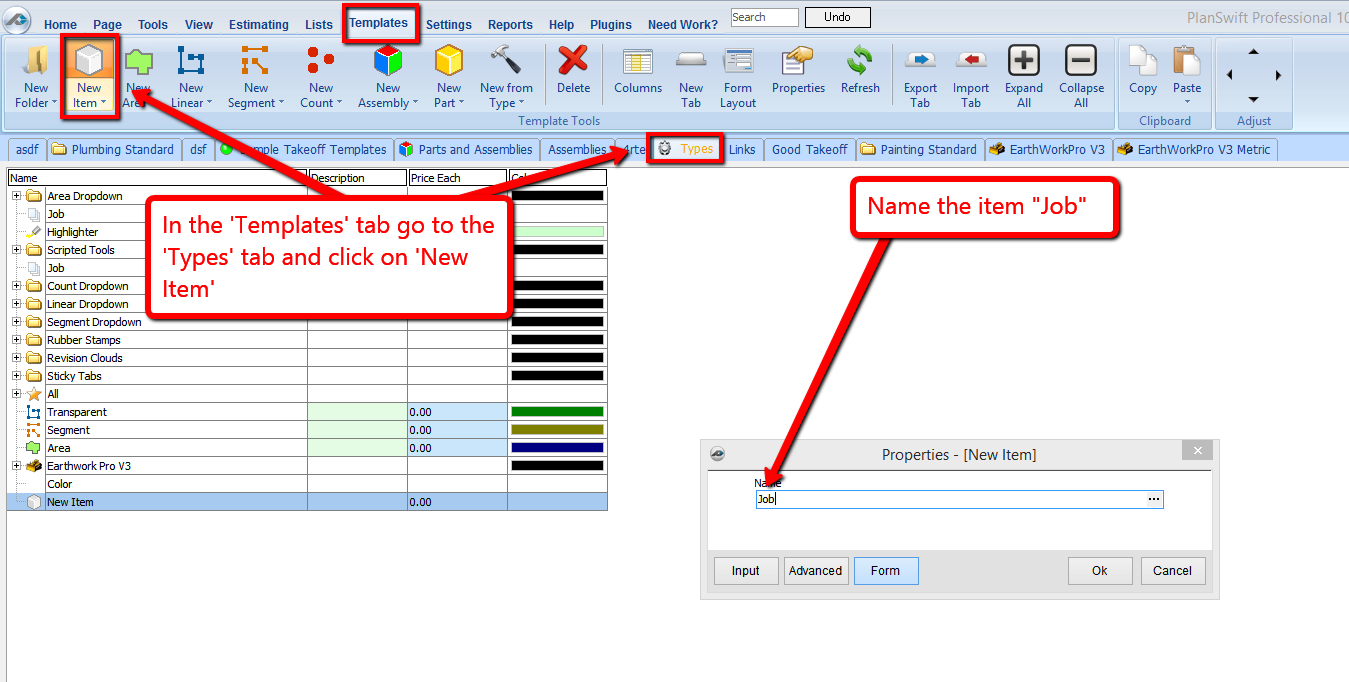
4. Click on the Templates tab. The Types tab should now be visible.
...
5. Click the New Item button and name it Job.

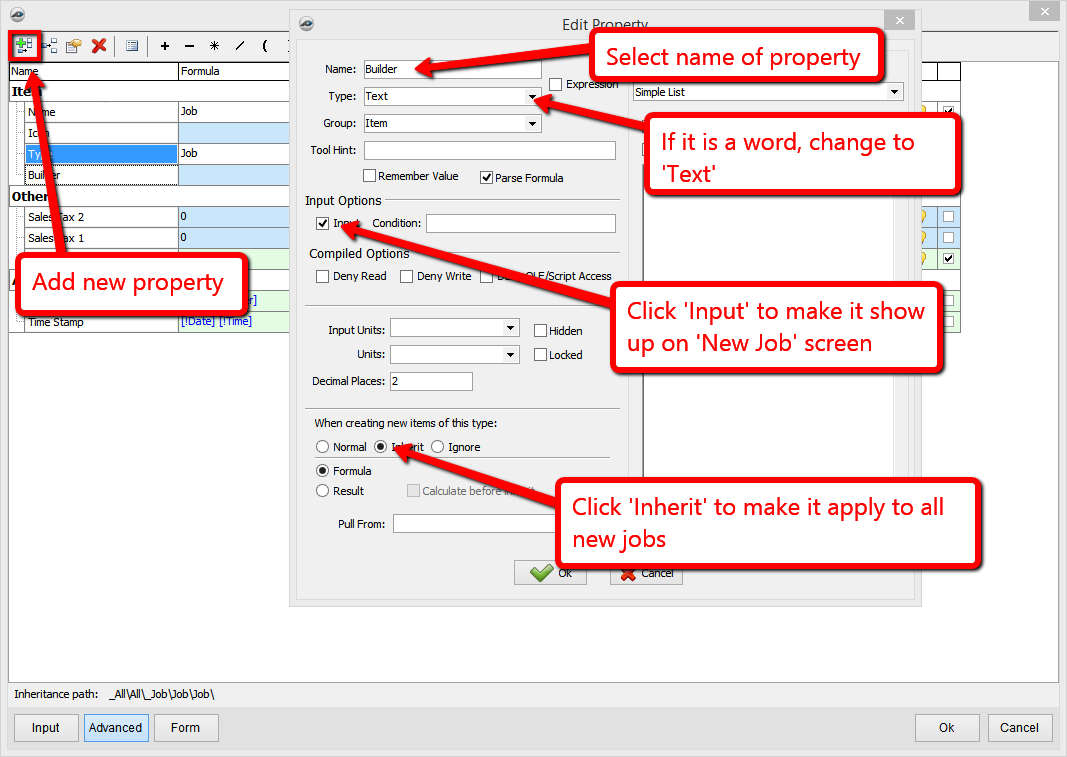
7. To edit the properties in the Job item that we created so that they will show up on our new jobs, click on Advanced on the Properties - New Item window.
...
8. Click the green plus (+) button to add a new property.
...
- Make sure Inherit is selected so new jobs will have this property.

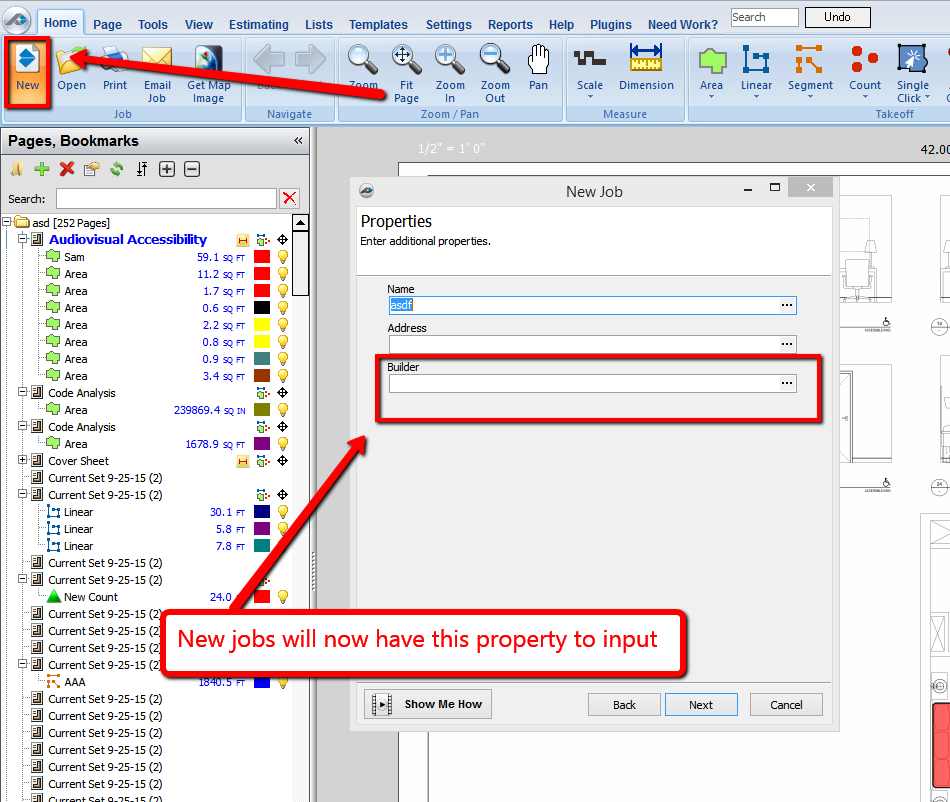
10. With the property now added, restart PlanSwift and pull in a job to see if the new option appears. It should come up on the second screen when adding a new job.

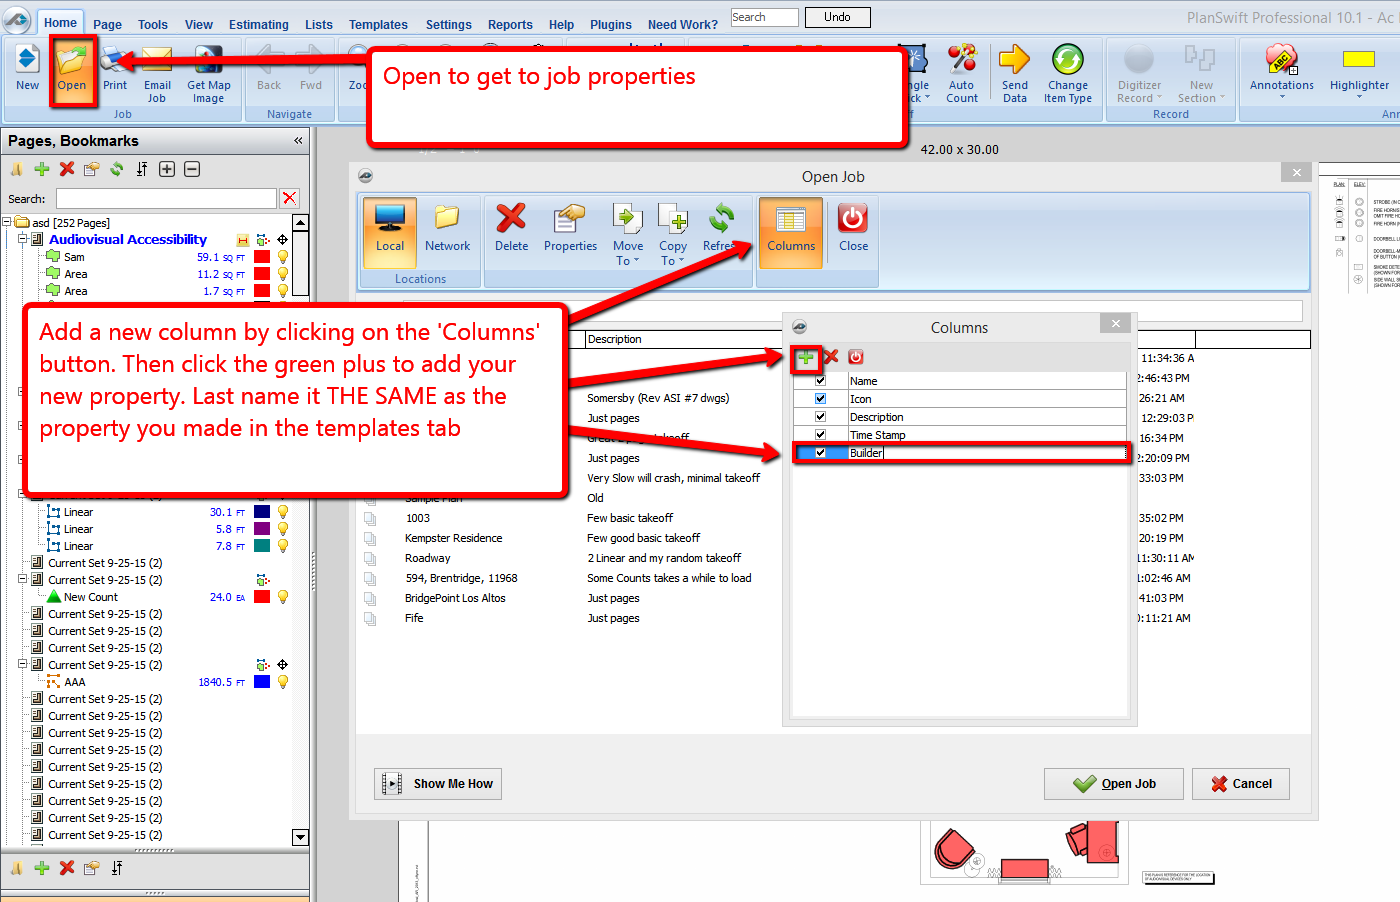
11. To verify that you can see this property on the open screen, click on Open.
...
13. Click on the green plus (+) button to add an extra column, and make sure it is named the same as your property you added.

14. To edit old jobs and input this property, select an old job and click the Properties button; it should let you input your new property.