Job Items are items which can be created or altered specifically for the current job. To view these items, click on the Job Items tab.
Because we used the Tutorial Template, our job is pre-loaded with a list of a few of the commonly used Job Items for Plumbing, Heating, and Cooling.
NOTE: How detailed and complete you want to be with Job Items is up to you. As you will soon see, having Job Items available during takeoff will speed up the takeoff process. (You can add Job Items during Takeoff.)
For this tutorial, you will rename and delete excess items.
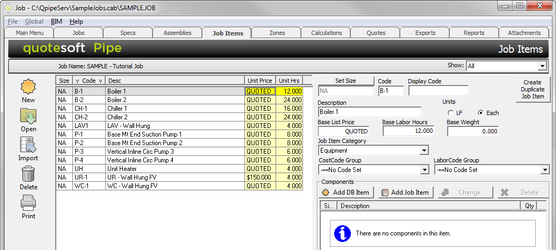
- On the left side of the screen, click on UR-1. Notice on the right side of the screen, the information changes to give you details for UR-Wall Hung FV. You are going to change the Job Item information.
- Look for the Code field. Click on the text in the box below Code. Type UR-2.
- Click on the text below Base Labor Hours. Type 3.
- Change Job Item Category to Fixture.
Notice that the Base List Price says QUOTED. “Quoted” means you can add the price later at the Quotes tab or in Excel since you have not yet received the price quote on fixtures and carriers from your supplier.
You are done updating the item.
Now you will add a new Job Item. You’ll add P-2, Pump 2.
- Click
 . The New Job Item window appears.
 - Type P-2 for the Code, Pump 2 for the Description, and 4 for the Labor Hours.
- Notice that the Job Item Category defaults to Equipment. You would select the appropriate Job Item Category depending on what type of items it is: fixture, specialty, or other type of item.
- When the Job Item is complete, at the bottom of the screen, click
 .
.

Now you are ready to start adding Zones for your Takeoff.