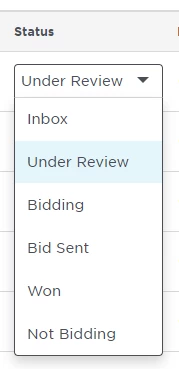
Changing project status
The Status drop-down menu lets you change the status and bid intent of your projects and, by extension, the tab where the project is located:
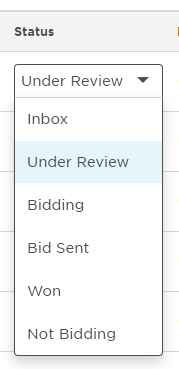
When you change the status of a project,
the project moves to the tab for the selected phase and
the project phase shown on the project details page changes to match the selected phase
if your change effects Bid Intent, the inviting General Contractor will be notified
Note:
Changing the project status to Inbox moves the project to your Inbox and removes all bidding status from the project.
For a description of each project status, see Understanding the project tabs.
Using Quick Search
You can use the Quick Search feature to locate projects by the Project Name field. Note that this feature only searches the tab you are currently viewing.
To use Quick Search,
from the top right of any tab, enter the full or partial name of the project in the Quick Search box:

Result: The list is automatically filtered and the results of your search are displayed.
When will an inviting General Contractor be notified of a status change?
The following table describes when general contractors are notified of bid intent changes.
When you change a project status to...
Then the general contractor is notified that the bid intent is now...
Inbox
none. All bidding status for the project is removed.
Under Review
under review.
Bidding
bidding.
Bid Sent
Bid Won
Not Bidding
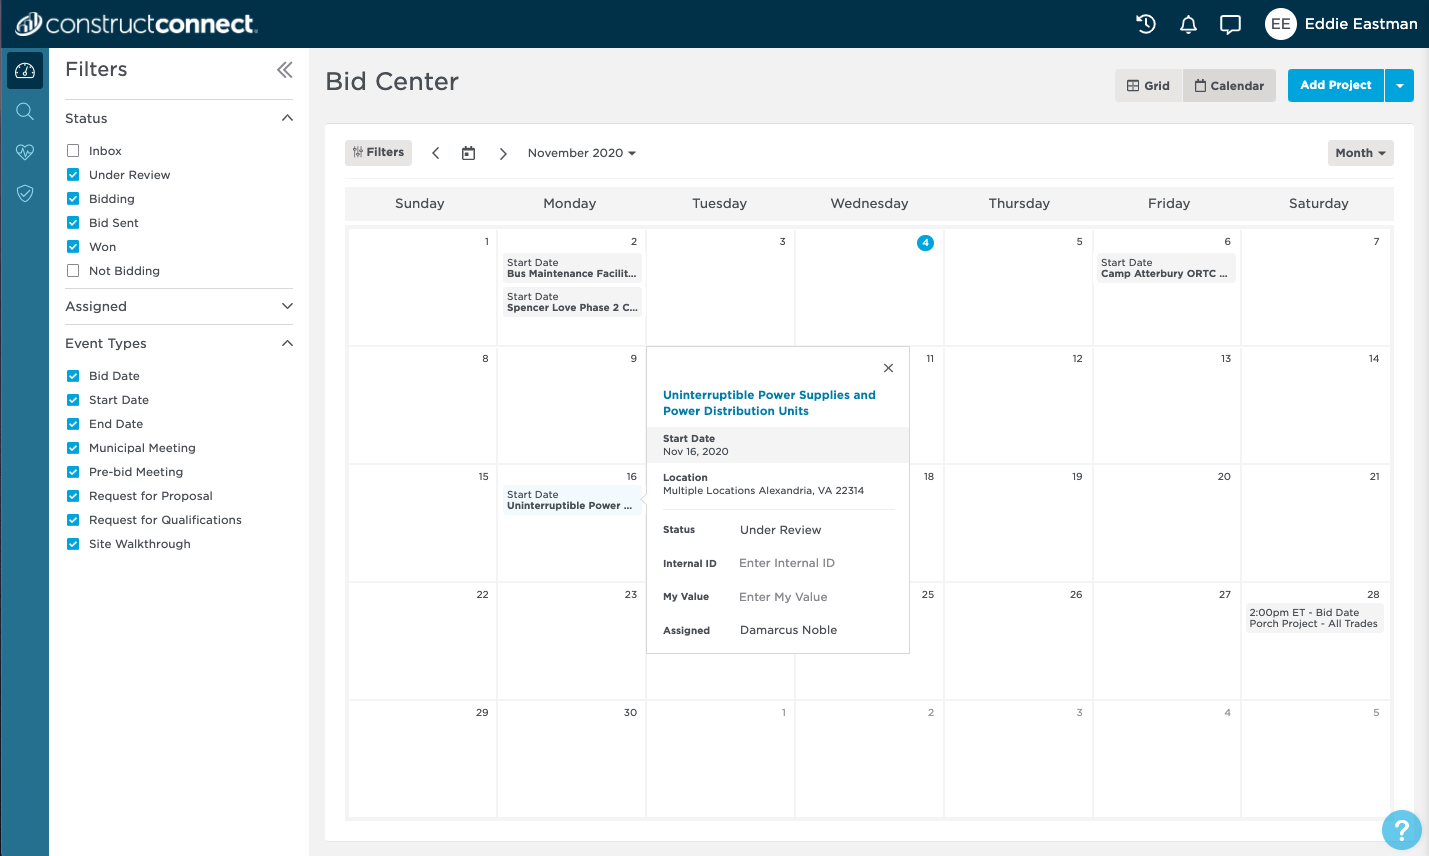
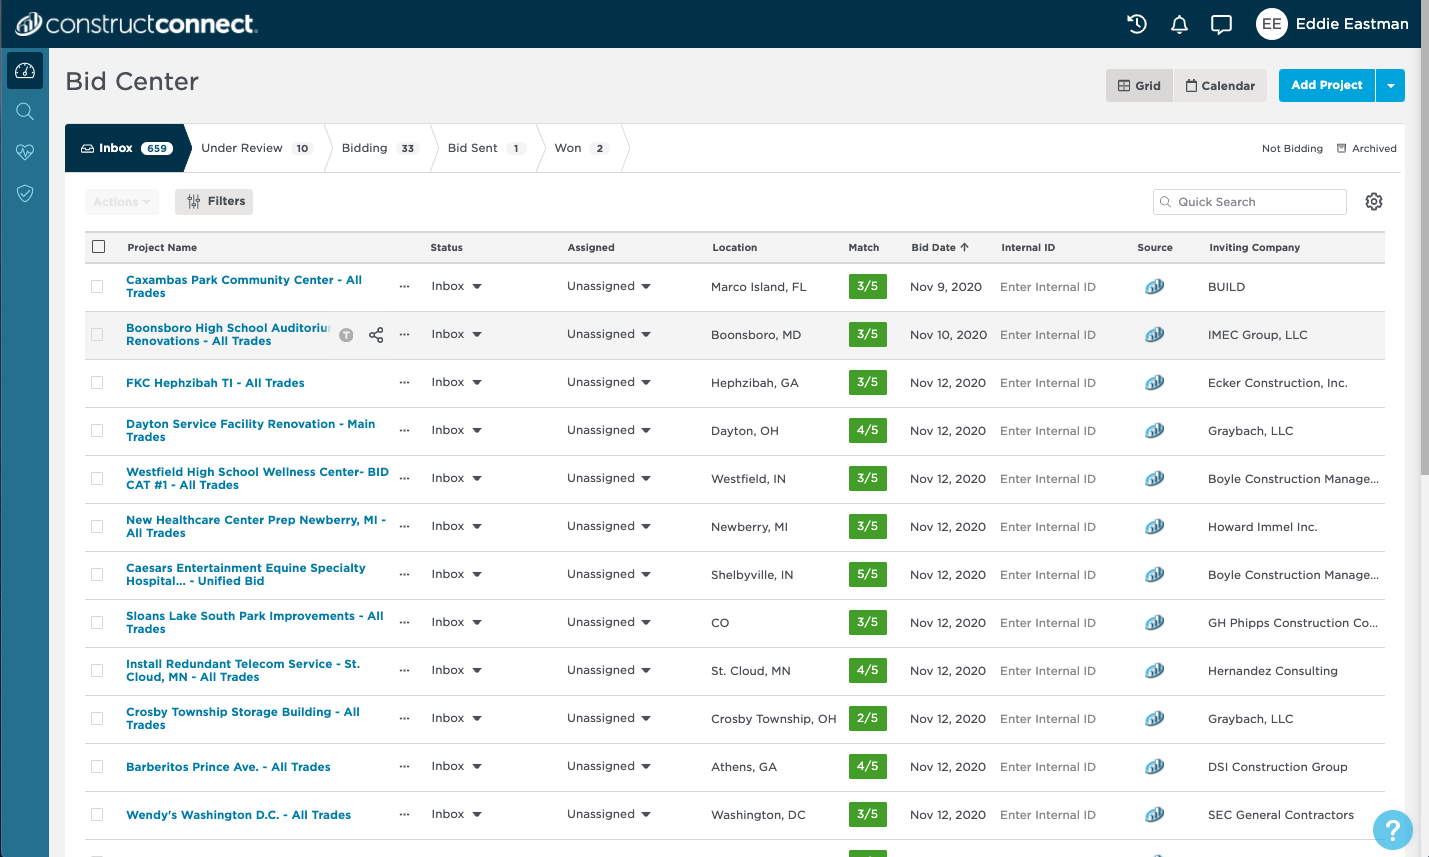
The Bid Center window is where you perform all the tasks relating to moving projects through your workflow:
This section contains the following topics:
| Table of Contents | ||
|---|---|---|
|
Understanding the Bid Center tabs

The tabs across the top of the window are where you access the projects you are moving through the bidding process, including projects you have not yet viewed and those you have deleted or archived.
For each tab,
The number on the tab indicates the number of projects included in the section.
Clicking on a tab displays the projects for the section.
| Info |
|---|
You move projects through each phase by changing the project's status and bid intent, when applicable. |
The following table describes the phases for each of the tabs in the window.
Tab
Description
Inbox
Projects that you have received but have not reviewed.
Under Review
Projects you have reviewed and are interested in, but have not yet decided if you will bid.
Bidding
Projects on which you intend to submit a bid.
Bid Sent
Projects on which you have submitted a bid.
Won
Projects on which you have won your submitted bid.
Not Bidding
Projects on which you have chosen not to bid.
Archived
Projects of any status, that you would no longer want to see on your Bid Center.
The project list for each tab contains information on the projects included in the section:
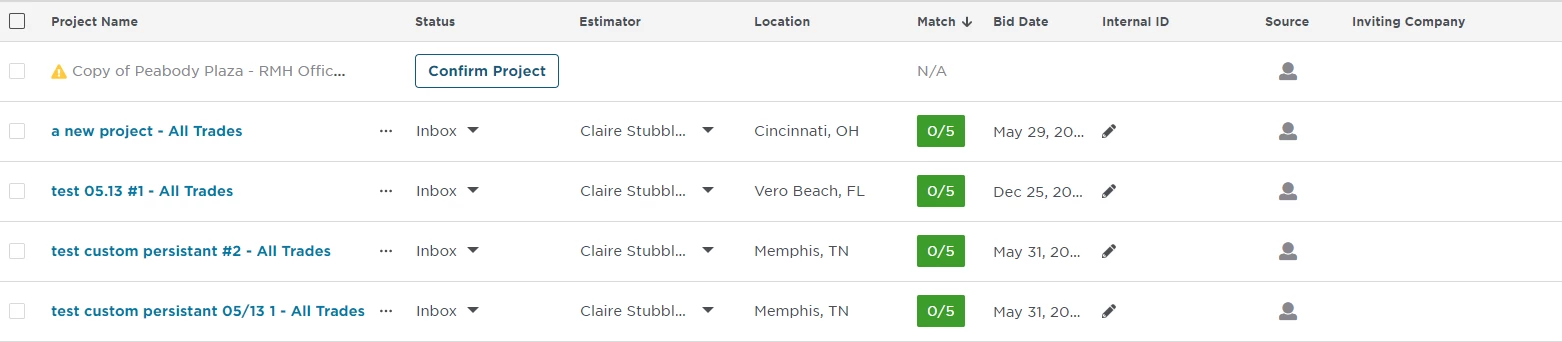
The following list describes the information for projects in the each tab.
Field
Description
Project Name
The name of the project.
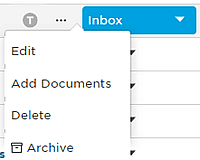
Project Name menu
Clicking the three dots next to the project name gives you access to additional options for the project, as described in the following sections:
Takeoff indicator
Hovering over the project line displays a T in a circle that lets you indicate that you are adding or have added takeoff to the project. You manually set this indicator on the project line.
To set the takeoff indicator,
On the line for the project, hover over the area immediately to the right of the project name to show the T takeoff indicator:
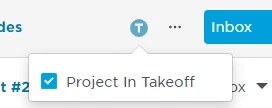
Check the box to set the T takeoff indicator to show on the project line. Check the box again to remove the indicator.
Editing project details
You can edit most of the details of the project listing in your Bid Center. However, if the project was an ITB from a General Contractor or was added from Project Intelligence, some details cannot be edited because they are still linked to the original source so that any updates made by the General Contractor or the ConstructConnect content team will automatically update your Bid Center.
To edit the project details page,
Click the three dots to the right of the project name and then click Edit.
Result: The project page is opened for editing.
Each section of the page has clearly marked tabs that you click to open the section for editing, as follows:
Edit Primary Contact
Add Note / Edit Note
Add or Edit Details
Add Design Team Contact
Note: Make sure to click the Save option once you complete editing a section.
Once you are done,
click Dashboard at the top left of the project page to return to the previous menu:
Adding documents
You can add documents to any project you’ve created in the project listing.
To add documents,
Click Add Documents to open the Upload menu:
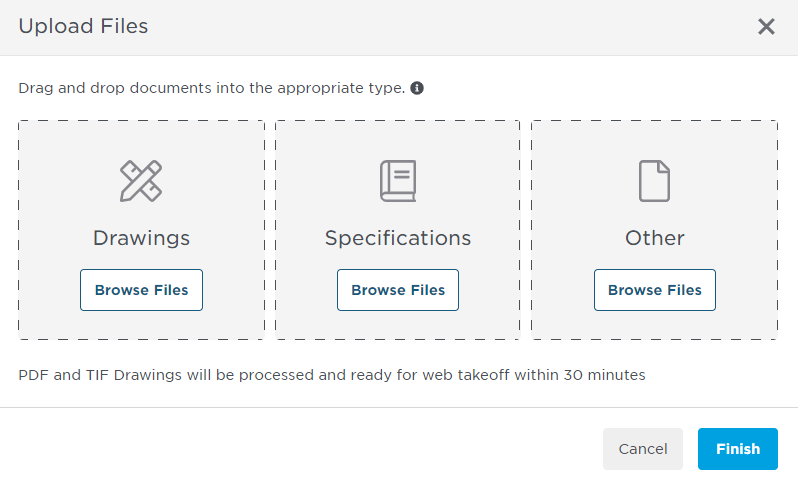
Browse or use drag-and-drop to upload documents to the project. As your documents upload, an indicator bar displays the progress for each file.
The upload menu must remain open until all uploads are complete. Clicking Cancel will stop the current document upload and cancel the remaining unfinished uploads. Any document that has already finished uploading will not be removed by the Cancel action.

Once the upload process is complete the Finish button becomes available and the section at the bottom of the menu displays the status for each document upload.
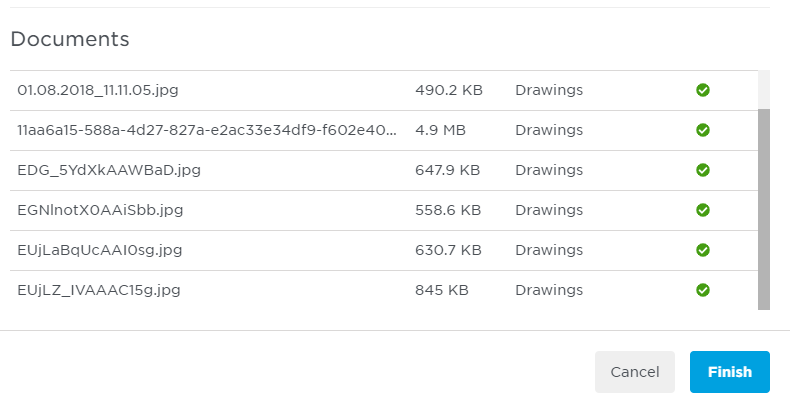
When you are ready, click Finish to close the menu.
Deleting a project listing
You can delete the listing of any of your projects that are assigned only to you.
Note: You cannot delete a project that is assigned jointly to you and another user.
To delete a project listing,
on the line for the project next to the project title, click the three dots and then click Delete.
Result: You are asked to confirm your selection.
To continue, click Delete Project.
Result: The project is moved to your Archived folder.
Archiving a project
You can archive projects of any status when you no longer want to see them in your Bid Center.
To archive a project listing,
click the three dots on the line and then click Archive.
Result: The project is moved to the Archive folder and you will see a green confirmation banner in the upper right of the screen.
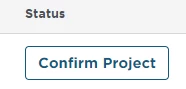
Status
When you have used the Email Forward Technology; included in the column for Status are confirmation buttons that allow you to review and approve the projects that you have sent to your BId Center via email.
When the status changes, the project is automatically moved to the applicable tab and the general contractor is notified of the change if it effects Bid Intent. For more information, see Changing project status.
Assigned
Assigned to the project, which is always either you or someone in your company assigned to the ConstructConnect account. You can change the assigned by using the drop-down menu.
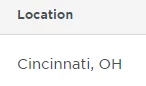
Location
The city and state where the project is located.
Match
Indicates the percentage that the project matches the requirements you have set for projects in your profile. Hovering over the score displays a breakdown of how each criteria point scored for the project:
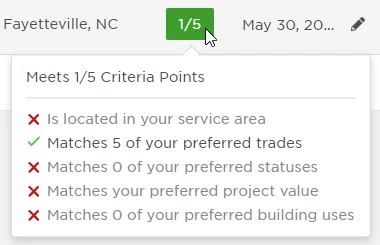
Note: Your criteria points are controlled by the selections you have made in the Predict Preferences menu. For more information, see < x ref to setting to predict preferences>>
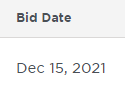
Bid Date
The date that the project is set to go to bid.
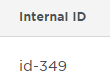
Internal ID
Set by you or your company, a unique number assigned to the project.
Source
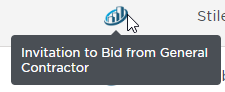
The source indicates how the project was added to your Bid Center. ITBs (Invitations to Bid) coming from a GC using ConstructConnect owned software to your registered email will automatically appear in your Bid Center and will have an icon that represents ConstructConnect. Projects that were added by you, either manually or using the Email Forwarding technology will have a person icon:
A person icon indicates a project that was created by you or someone in your company.
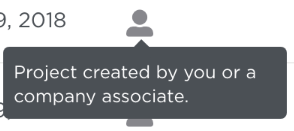
The ConstructConnect icon indicates an Invitation to Bid received by a General Contractor.
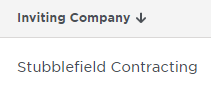
Inviting Company
The company issuing the invitation to bid.
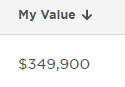
My Value
Set by you or your company, an estimated value for the project.
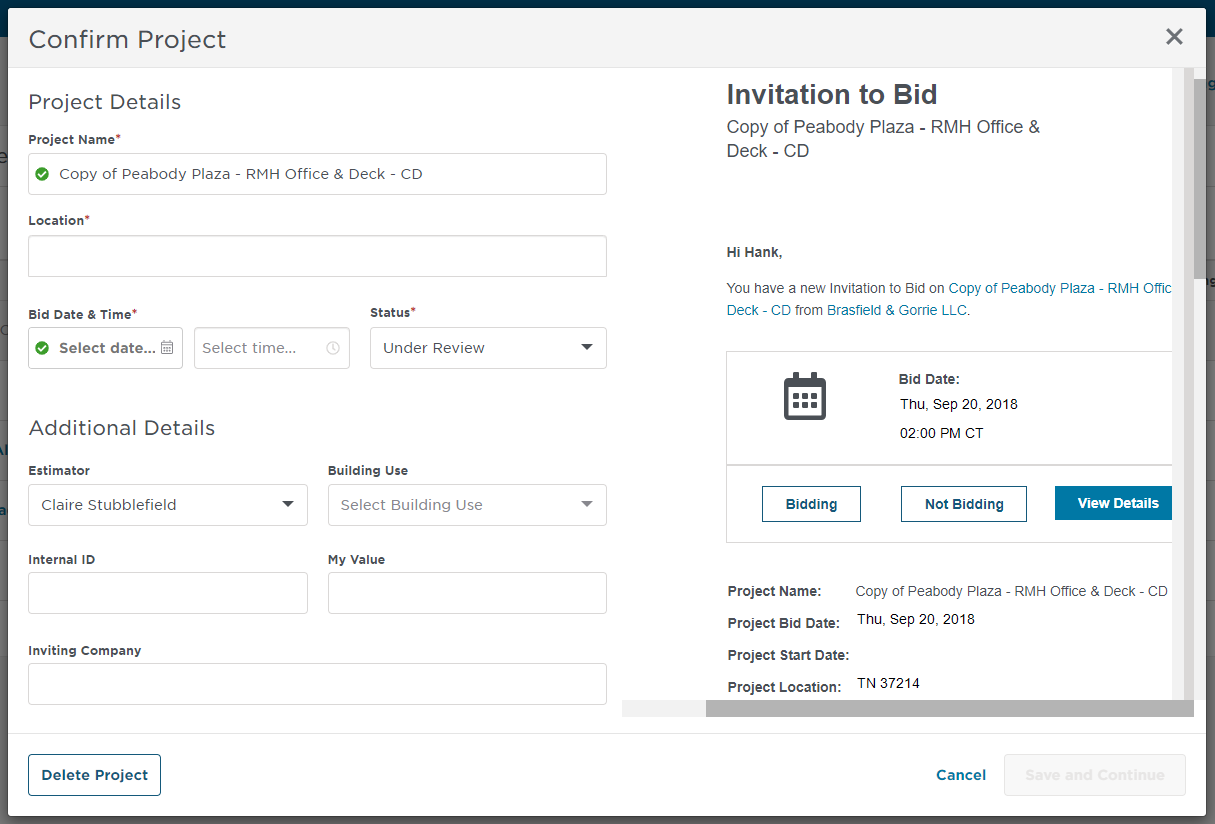
Confirming projects
When you have used the Email Forward technology, you need to confirm projects before they will be added to your Bid Center. Unconfirmed projects only have basic information and are not editable. As you confirm your project, you can add additional details to the project.
To confirm projects,
On the project row in Bid Center, click Confirm Project.
In the Confirm Project menu, verify the information (you will see a preview of the email you forwarded on the right).
When you are ready to add the project to your Bid Center, click Save and Continue.
Using the Actions menu
The Actions menu is at the top of page and is available when you have one or many projects selected.

To use the Actions menu,
select one or more projects and then select the action option from the menu.
The following table describes how you can use the Actions menu.
Option
Description
Change Status
Use to change the status of the project.
Archive
Click to send the project to your Archive folder when you no longer want to see it on your Bid Center.
Filtering the project list
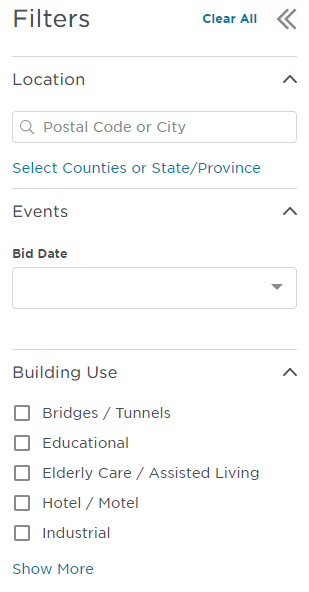
You can use the Filters menu to locate projects by location, key project events, and and building use:
Note:
Filters are applied to each tab except the Inbox tab.
All tabs are automatically updated with the results with each filter selection.
Click Clear All at the top of the menu to clear all selections.
The following table describes the filtering options you can apply to the list.
Option
Description
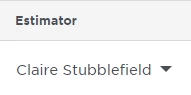
Estimator
Filtering by estimator lets you see the projects by individual estimator. All the estimators in your company are shown in the Estimator list, including yourself.
To filter by estimator,
Click on the box next to one or more estimator names to display the projects for the selected estimators. You can select as many estimators as you need.
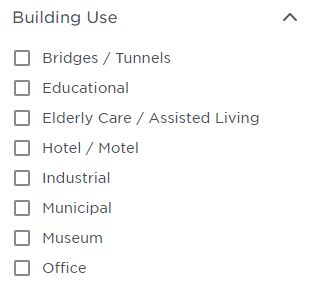
Building Use
Filter the list according to the end use of the project.
Click Show More to see the full list of filtering options.
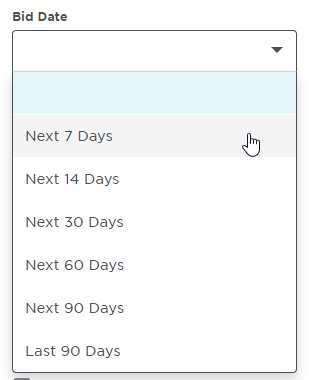
Events / Bid Date
Use the drop-down list to filter by the selected bid date:
the digital bid board where you can manage and prioritize all of your projects and Invitations to Bid as well as collaborate with your internal team and external partners. By changing a project’s status, you will advance your project through the bidding funnel. With two different custom views and a variety of filters of actions, Bid Center is the one place you need to organize and manage your project pipeline.
Grid View: learn more
Calendar View: learn more