In
...
this section, we will cover how to import
...
Autodesk Fabrication
...

pipe files. This step by step guide will walk you through importing from a file as a job or zone depending on the type of export created by Autodesk Fabrication.
Importing a BIM file as a job would be ideal when you have a file that contains multiple zones that need to be split. For instance, if the detailer exports phases or floors of a building, the export could have multiple of what we commonly refer to as Zones. In a case like this, our import module will list all zones found in the export file so each one can be assigned its own spec.
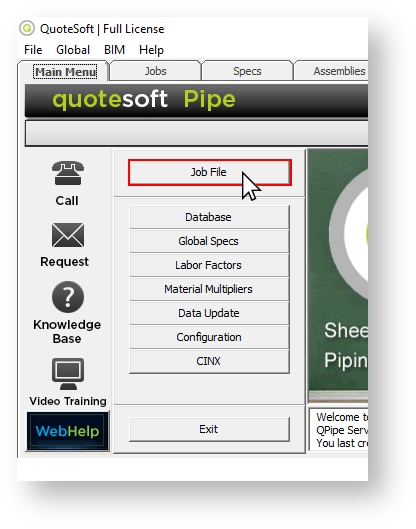
To import as a Job File:
- On the Main Menu, click on the Job File button, or the Jobs tab.
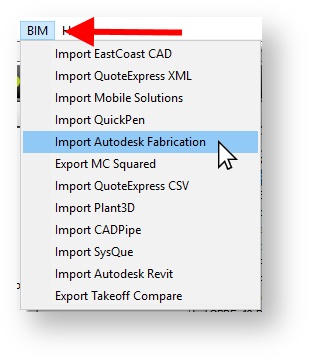
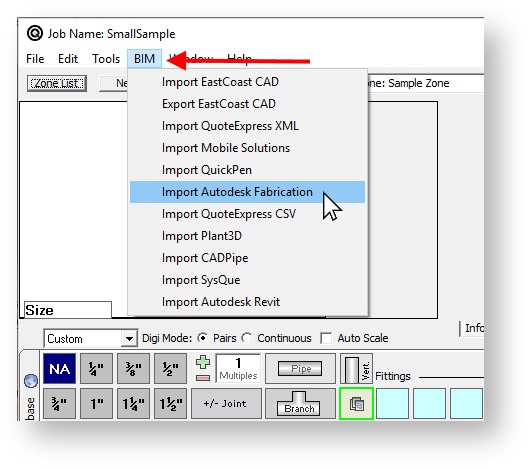
2. Click the BIM dropdown menu and and select Import Autodesk Fabrication.
3. Then, navigate to the file you would like to import
...

...
and click to highlight.
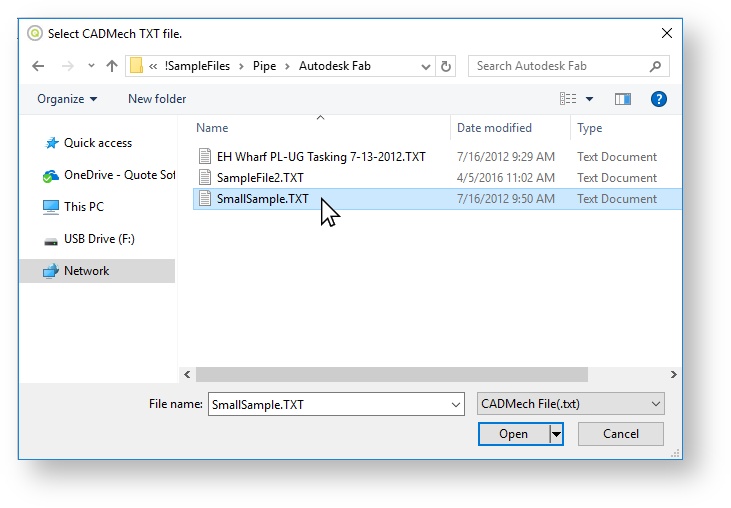
- Click Open
4. The Create a new Job window will appear.
- Choose the appropriate Template that has all of the specs you expect to use for this imported job
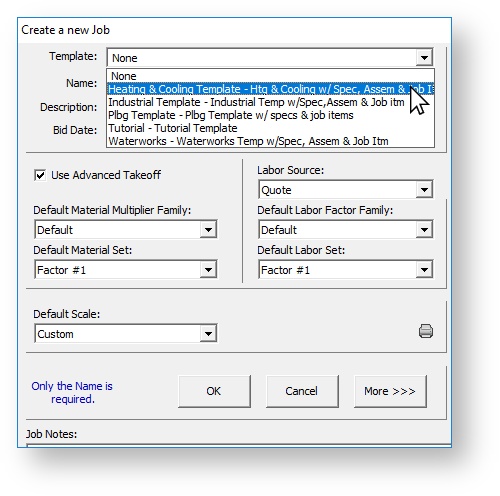
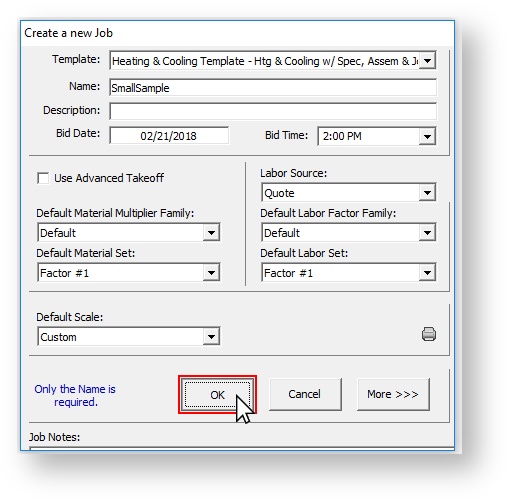
5. Give the job a new name if necessary and verify Use Advanced Takeoff is unchecked
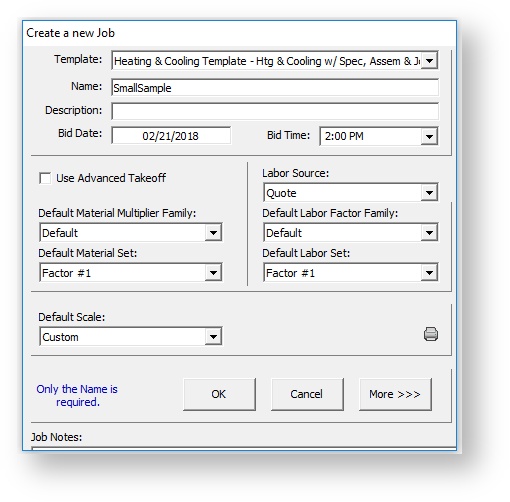
- Note: Advanced Takeoff cannot be used after importing from a BIM file. All zones will appear in Classic Takeoff when edited.
6. Click OK to continue.
7. All spec\groups will appear in the Choose Spec Mapping pop up window.
- Specs that have not been mapped will appear in white.
- Specs that have already been mapped in previous imports will appear in green.
.png?version=1&modificationDate=1519281216536&cacheVersion=1&api=v2&effects=drop-shadow&height=400)
- Import Specs - This section lists the specs found in the Autodesk Fabrication file to be imported
- QXP Specs - This section is where you will map QPipe specs to the specs listed in the file. The drop down box will contain the specs associated with the template you original chose for this job.
8. Choose the appropriate QXP Spec.
.png?version=1&modificationDate=1519281217748&cacheVersion=1&api=v2&effects=drop-shadow&height=400)
9. That line will turn yellow after a spec is chosen. Click OK to continue.
.png?version=1&modificationDate=1519281217037&cacheVersion=1&api=v2&effects=drop-shadow&height=400)
10. A window stating Loading BIM Manager will appear. Loading the file will take a short period of time depending on the size of the job you are importing

11. The initial import window will appear. This window:
- Displays the name of the File.
- Shows number of items in the job.
- Lists 3 Item options
- Import Items by Custom Setup
- Import Items by Supplier Code
- Import Items by Spec and Supplier Code
- Gives option for Include Spec as Key
- Allows you to edit your item mapping. (See Edit Mapping)
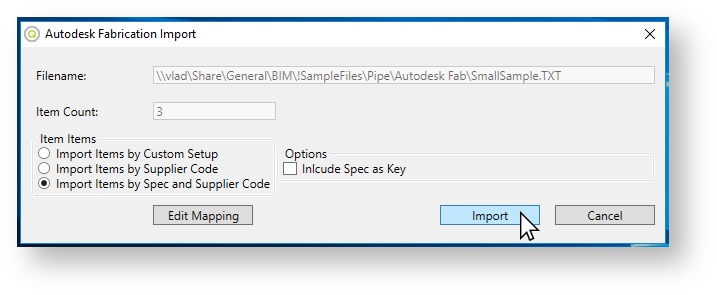
12. Click Import to import the file.
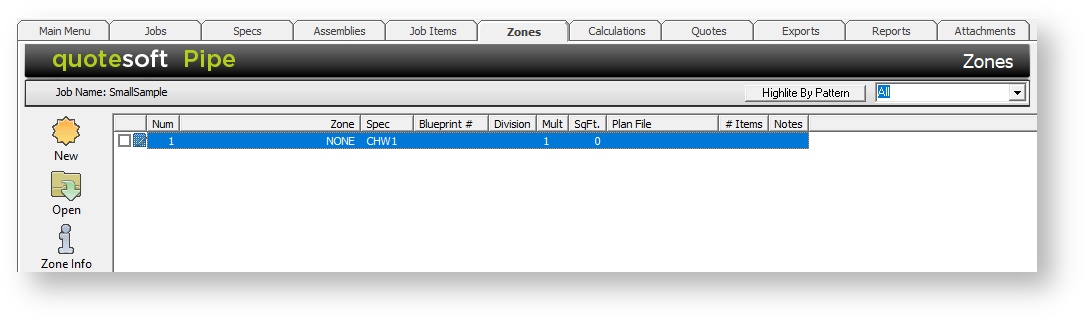
13. Once imported, it will show the zones imported. You may now edit the zones by clicking Open or run calculations and reports.
Change orders or drawing changes that do not require a full export could be imported as a zone instead of a job. This allows you to import to an existing job if necessary to update the estimate.
To import as a Zone:
- On the Main Menu, click on the Job File button, or the Jobs tab.
2. Click on New to start a job. The Create a new Job window will appear.
- Choose the appropriate Template that has all of the specs you expect to use for this imported job.
3. Give the job a new name and verify Use Advanced Takeoff is unchecked

- Note: Advanced Takeoff cannot be used after importing from a BIM file. All zones will appear in Classic Takeoff when edited.
4. Click OK to continue.
5. In the Zones tab, click new to start a new zone. (See 07. Zones in the Legacy Pipe Training Workbook for creating zones). This should launch Classic Takeoff
6. Click the BIM dropdown menu and and select Import Autodesk Fabrication.
7. Then, navigate to the file you would like to import and click to highlight.

8. Click Open
.png?version=1&modificationDate=1519281213622&cacheVersion=1&api=v2&effects=drop-shadow&height=400)
- Since the zone was created with your desired Spec, the import will not show the option to map the spec from the import the a QXP Spec.
9. A window stating Loading BIM Manager will appear. Loading the file will take a short period of time depending on the size of the job you are importing
10. The initial import window will appear. This window:
- Displays the name of the File.
- Shows number of items in the job.
- Lists 3 Item options
- Import Items by Custom Setup
- Import Items by Supplier Code
- Import Items by Spec and Supplier Code
- Gives option for Include Spec as Key
- Allows you to edit your item mapping. (See Edit Mapping)
11. Click Import to import the file.
12. Once imported, it will show the zone imported. You may now edit the zone in Classic Takeoff or run calculations and reports.
Anchor EditMapping EditMapping
To Edit Mapping:
- Click the Edit Mapping button on the initial import window.

2. The BIM Manager window will appear.
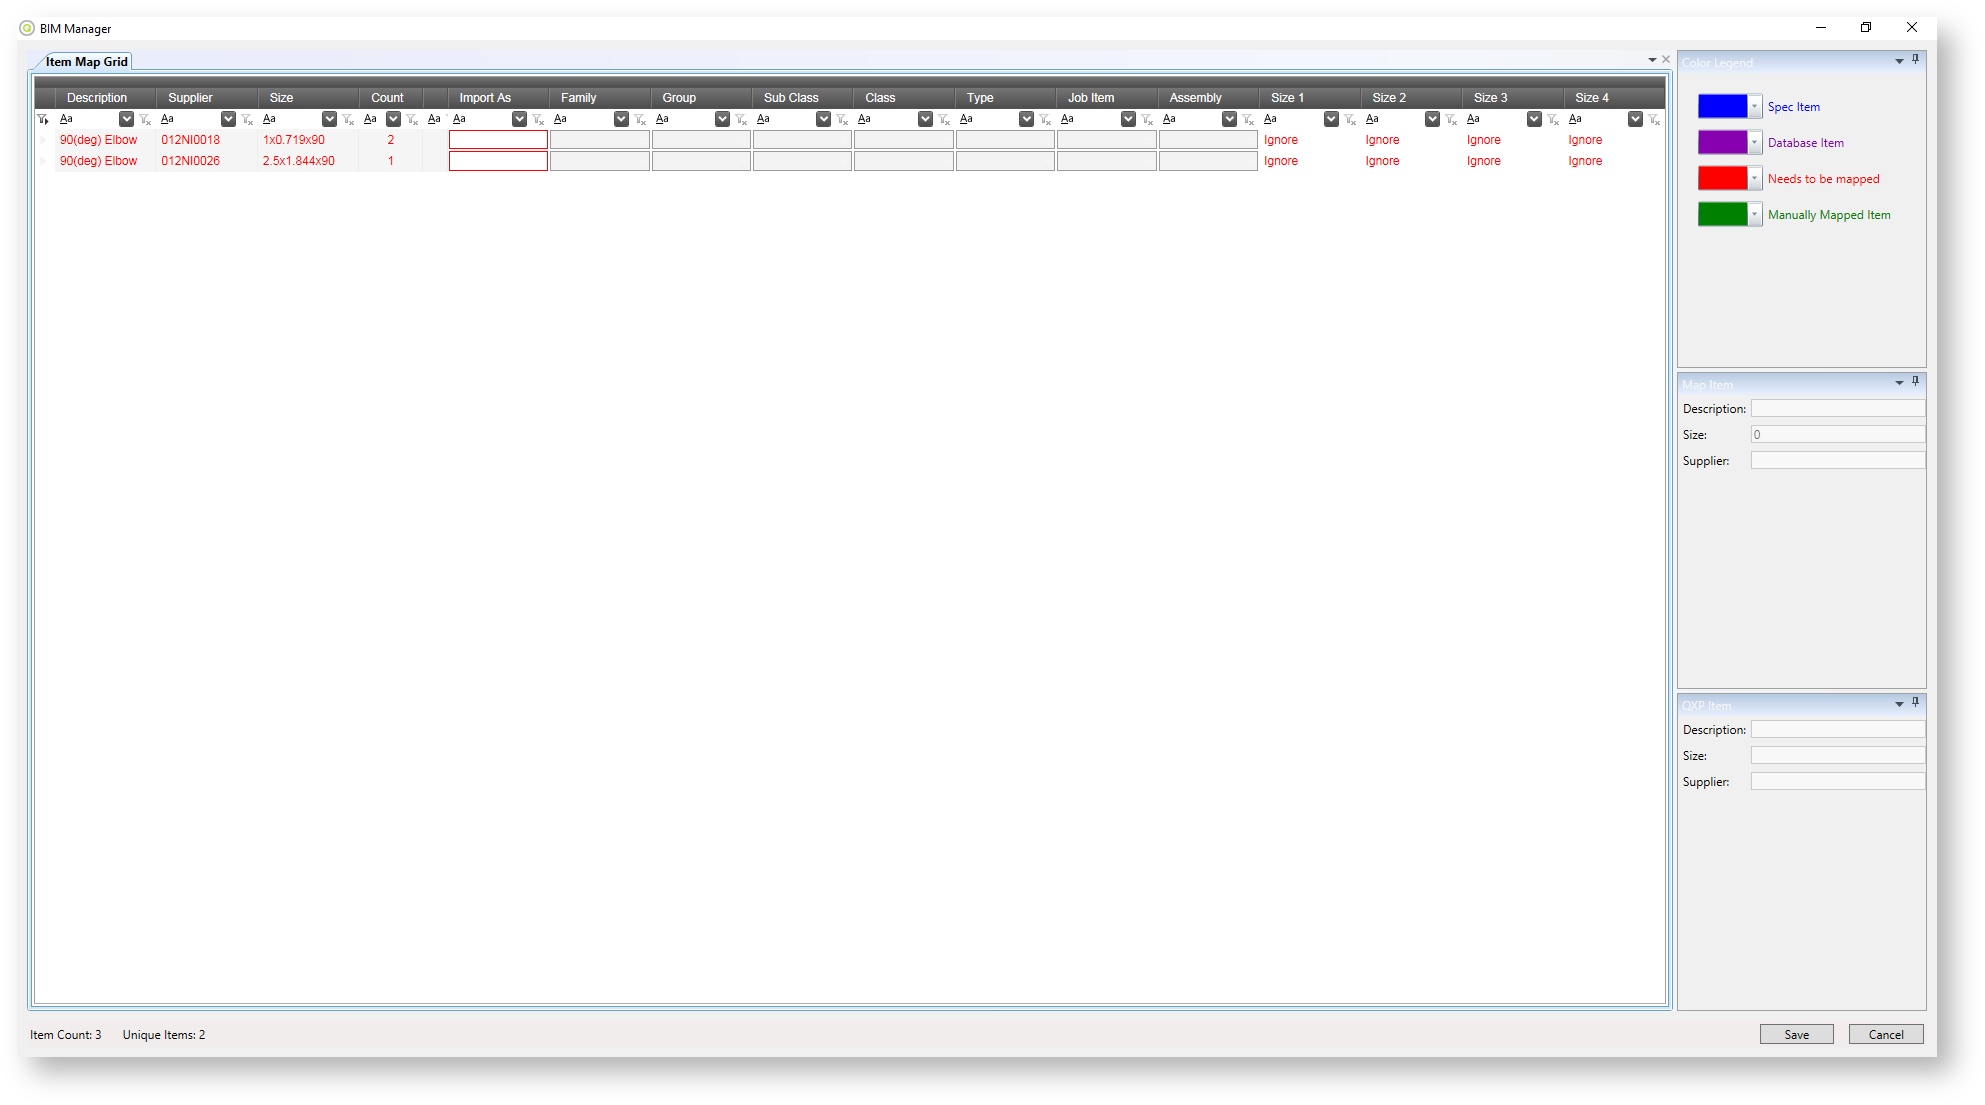
3. The Item Map Grid lists all the items in the selected import file.
- Notice the Color Legend located at the top right of the screen. This legend will help you determine which items were mapped and which items still need mapping.
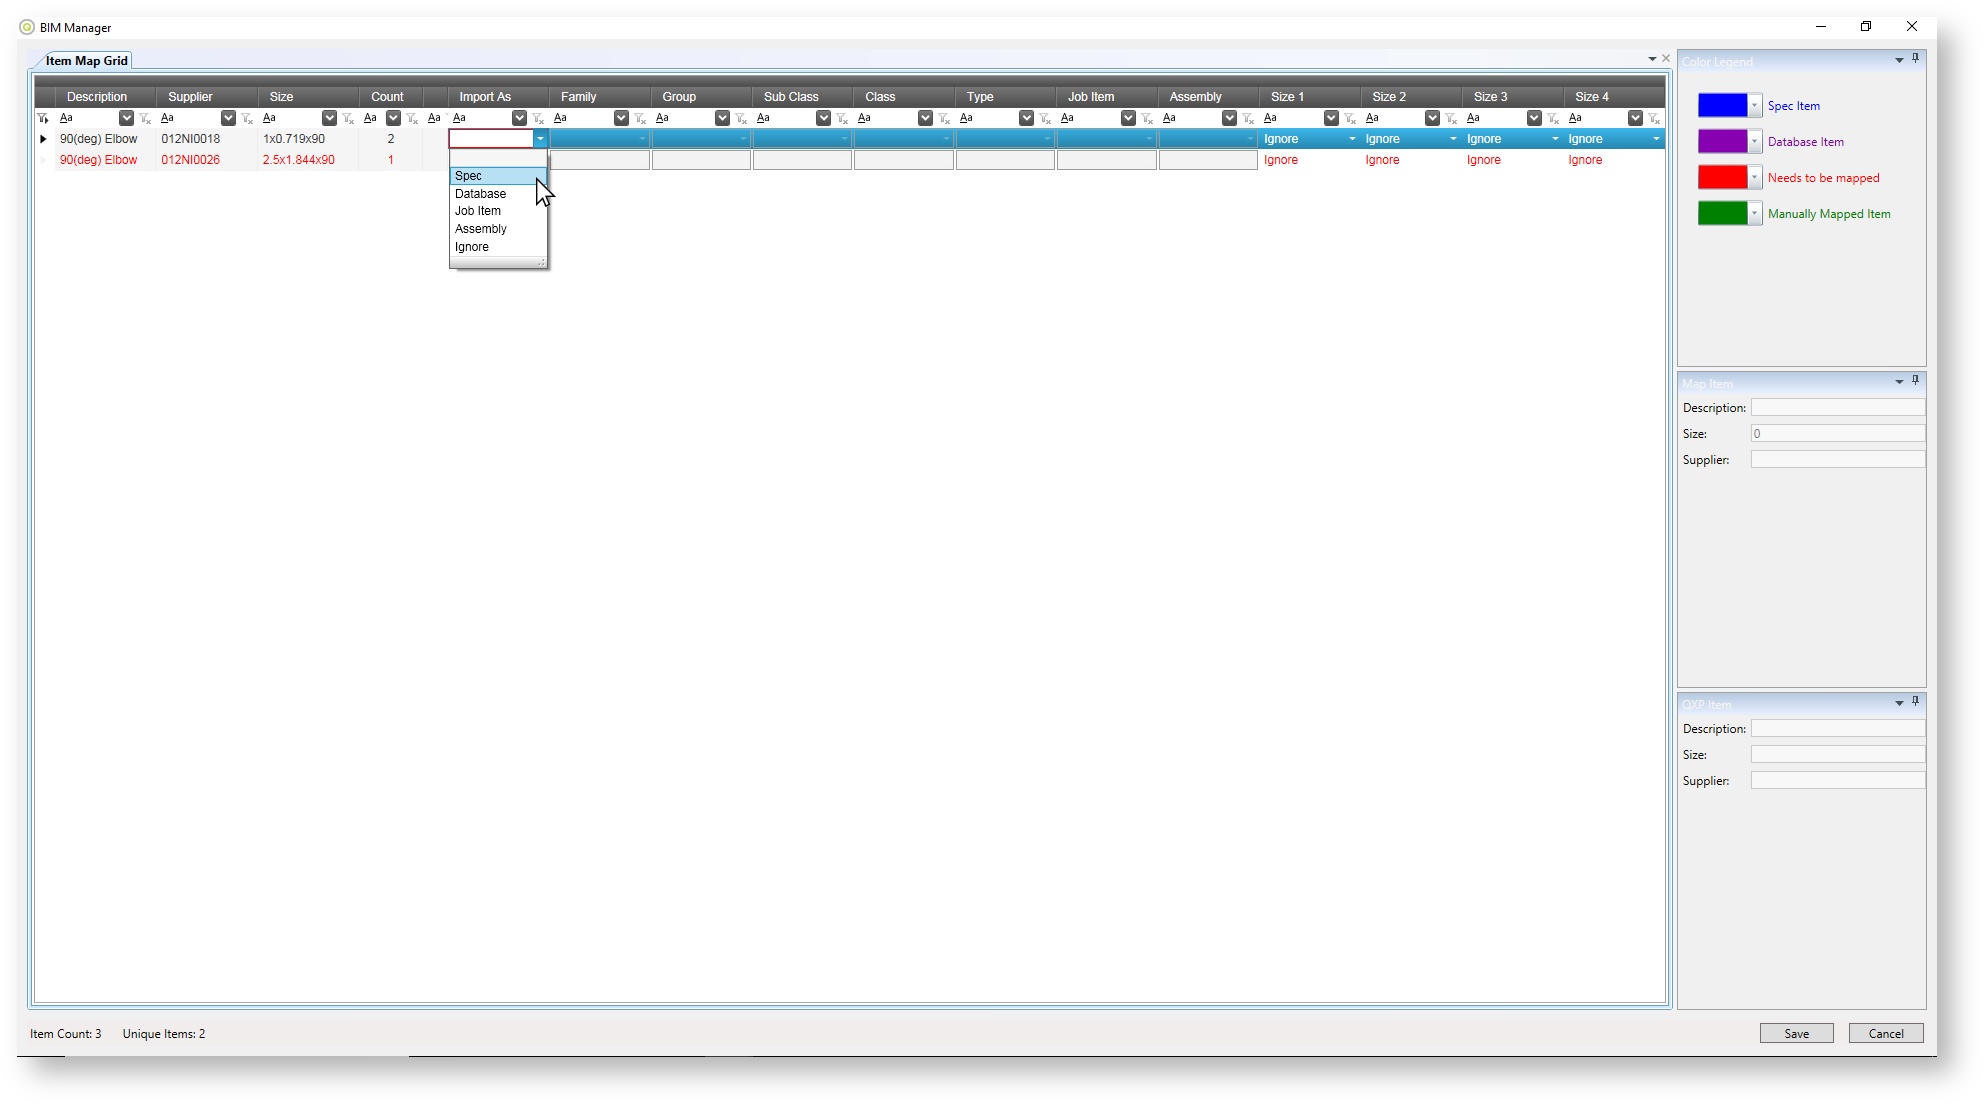
4. Next to the items listed in red, choose how you would like to map the import item to a QXP item. Import As: determines what groups, classes, sub classes, etc. will be filled out.The five options are:
- Spec - Allows you to map the item according to the spec being used. (IE: Spec, Pipe - This maps the item to pipe type included in your spec.)
- Database - *Allows you to map the item to a SPECIFIC Item in the QXP Database while ignoring what is in the specified spec.
- Job Item - Allows you to map the listed item as a Job Item in the QXP Database.
- Assembly - Allows you to map the item to an Assembly in the QXP Database.
- Ignore - Ignores the item completely. The program will skip importing this item.
5. Click Save
* Please note that if you import as a Database item, the item does not calculate the same as it would if it was imported as a Spec item. For instance, importing a 20' piece of pipe as:
- a Spec Item will calculate any peripheral accessories such as hangers or couplings along with the pipe.
- a Database Item will only calculate the pipe and accessories must be added to the job as separate items after the import.