...
1. Go to the Settings tab in PlanSwift.


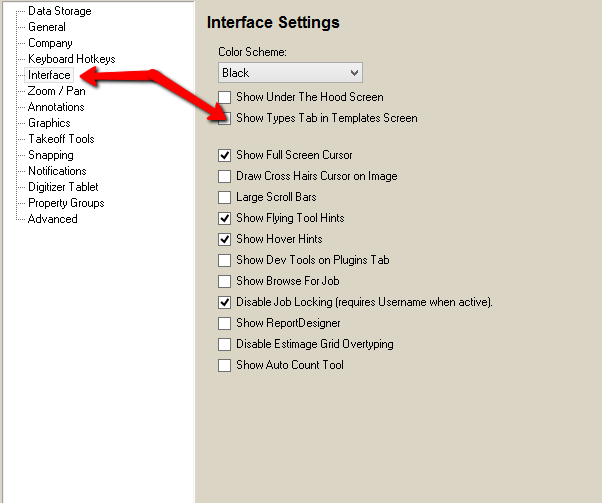
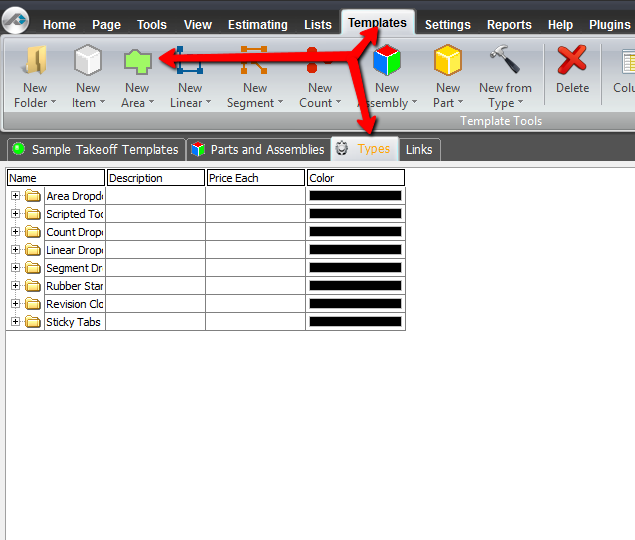
2. Go to the sub-setting of the interface and check the box that reads Show Types Tab in Templates Screen.

3. Go to the Templates tab in PlanSwift and note the now visible Types tab.

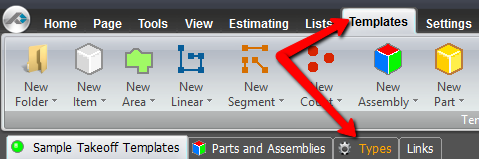
4. After clicking on the Types tab, create a new area takeoff template by clicking the New Area button on the top of the Templates tab.

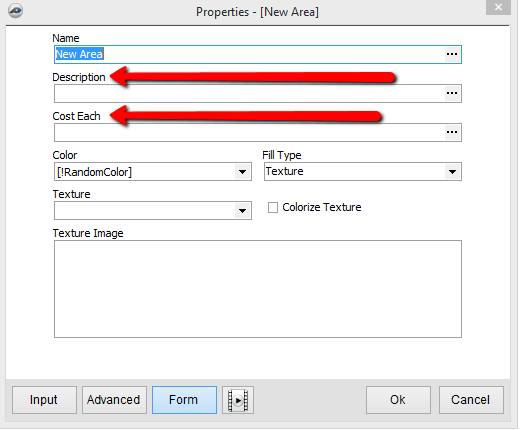
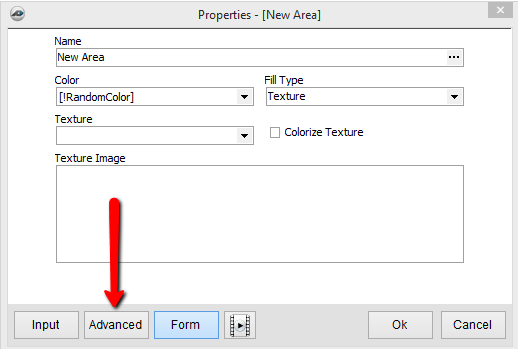
5. The main window of the Area Item - the Form Layout window - will appear displaying by default only the Name, Color and Fill Type (texture) properties.


6. Hit the Advanced button to open the Advanced Properties window.

7. Once in this window, we can establish this area item as the default area item by assigning as its name an exact copy of its type. In other words, the word Area will be entered into the Name property because that is what is entered into the Type property. Because this is being entered on the Types tab, any changes made will also apply to the Area takeoff tool.


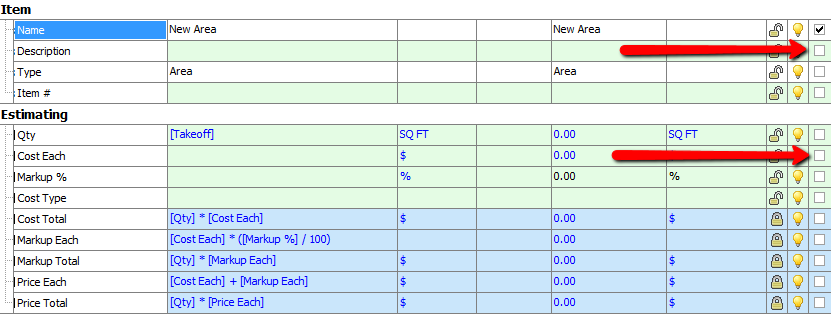
8. As an example, let's say we want the Description and the Cost Each displayed on the main properties window. We would simply check the box next to each of those properties: one can be found under the Item group, the other under the Estimating group. Once checked, those two properties will be displayed on the Form layout of the Properties window.