How the Integration Works
...
In UDA, open a past project (select a project that contains an inventory item list).
At the top, select Export to eTakeoff; then export the inventory list into Excel.
 Image Removed
 Image Added
...
In PlanSwift, go to Templates tab (located at the top) and verify that an Excel Import ToolTool button is displayed. If no such button is displayed, go to our plugin store to download and install the PlanSwift Import from Excel plugin.
 Image Removed
 Image Added
Next have the spreadsheet open in PlanSwift and go to Templates tab to utilize the tools. Follow this link for video instruction on how to use the PlanSwift Import from Excel.
...
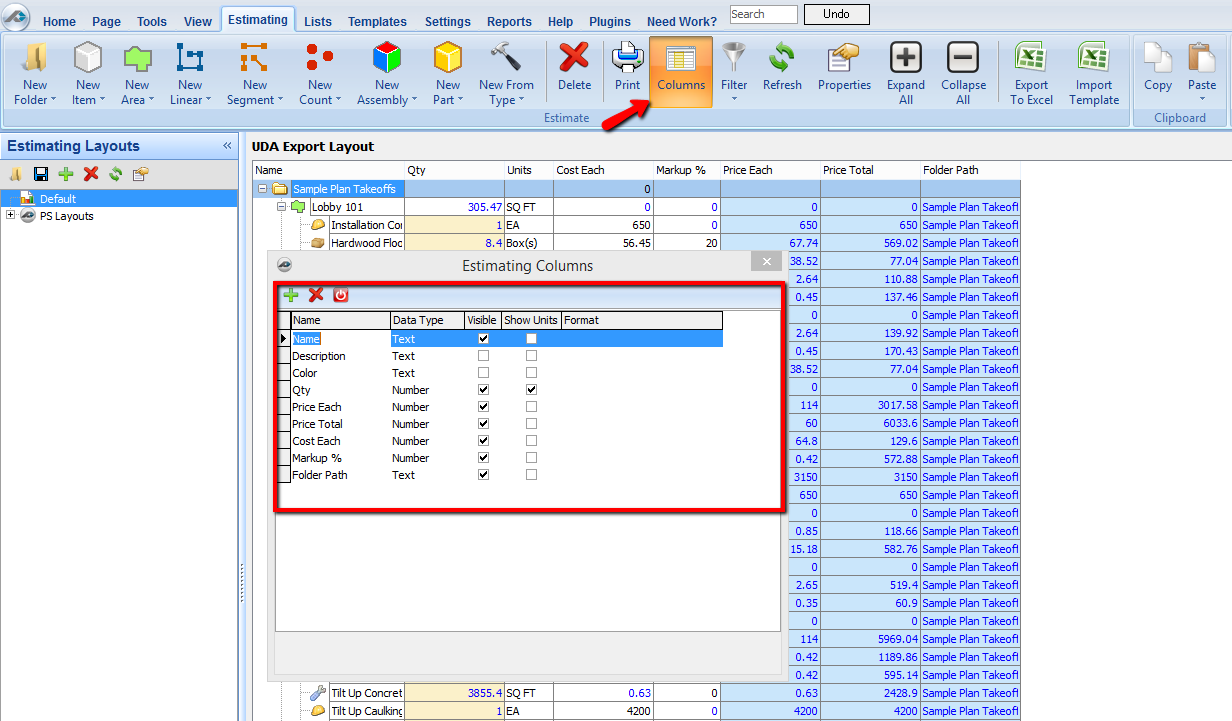
In PlanSwift, click on the Estimating tab. Select the Columns button on the top toolbar. AA Select Column form will open.
The column Folder Path should be checked as visible. If the column is not on your column list, Click the "+" button to add a column, and title it Folder(space)Path. Click Close.
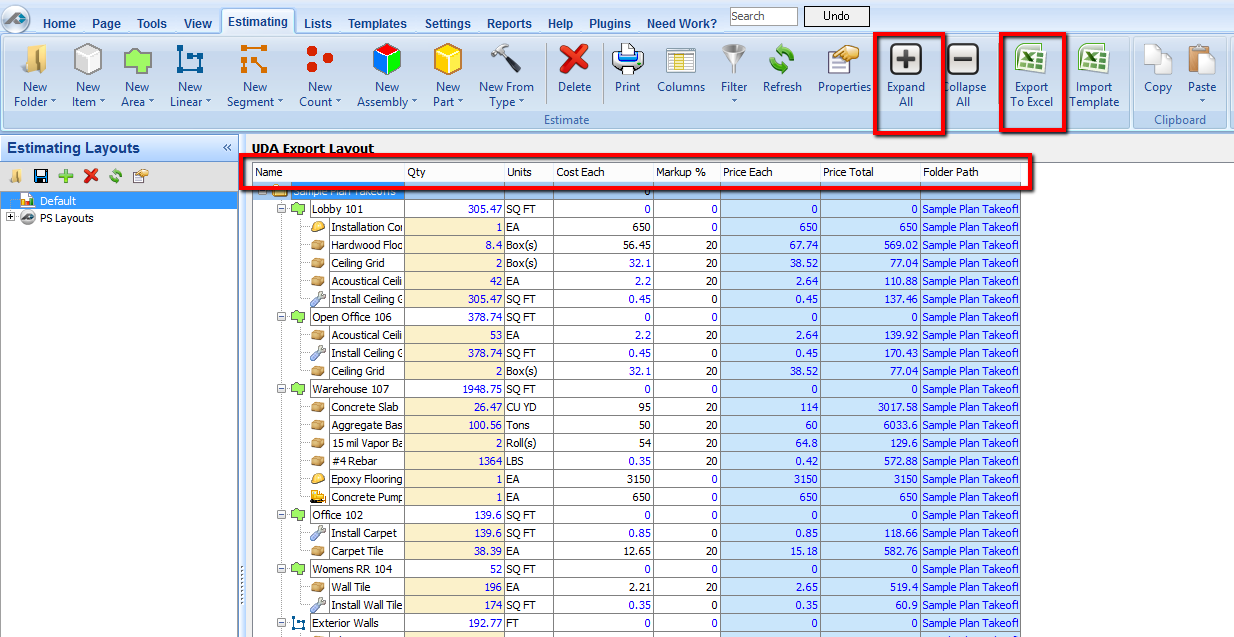
Click Expand All on the top toolbar. Select the Export to Excel button on the EstimatingEstimating toolbar.
Click Save to save the exported file to the location of your choice.
...
Now the List is exported, formatted, and ready to import into UDA as a blank estimate. See attached file below Planswift PlanSwift 9.0.xls for an example.
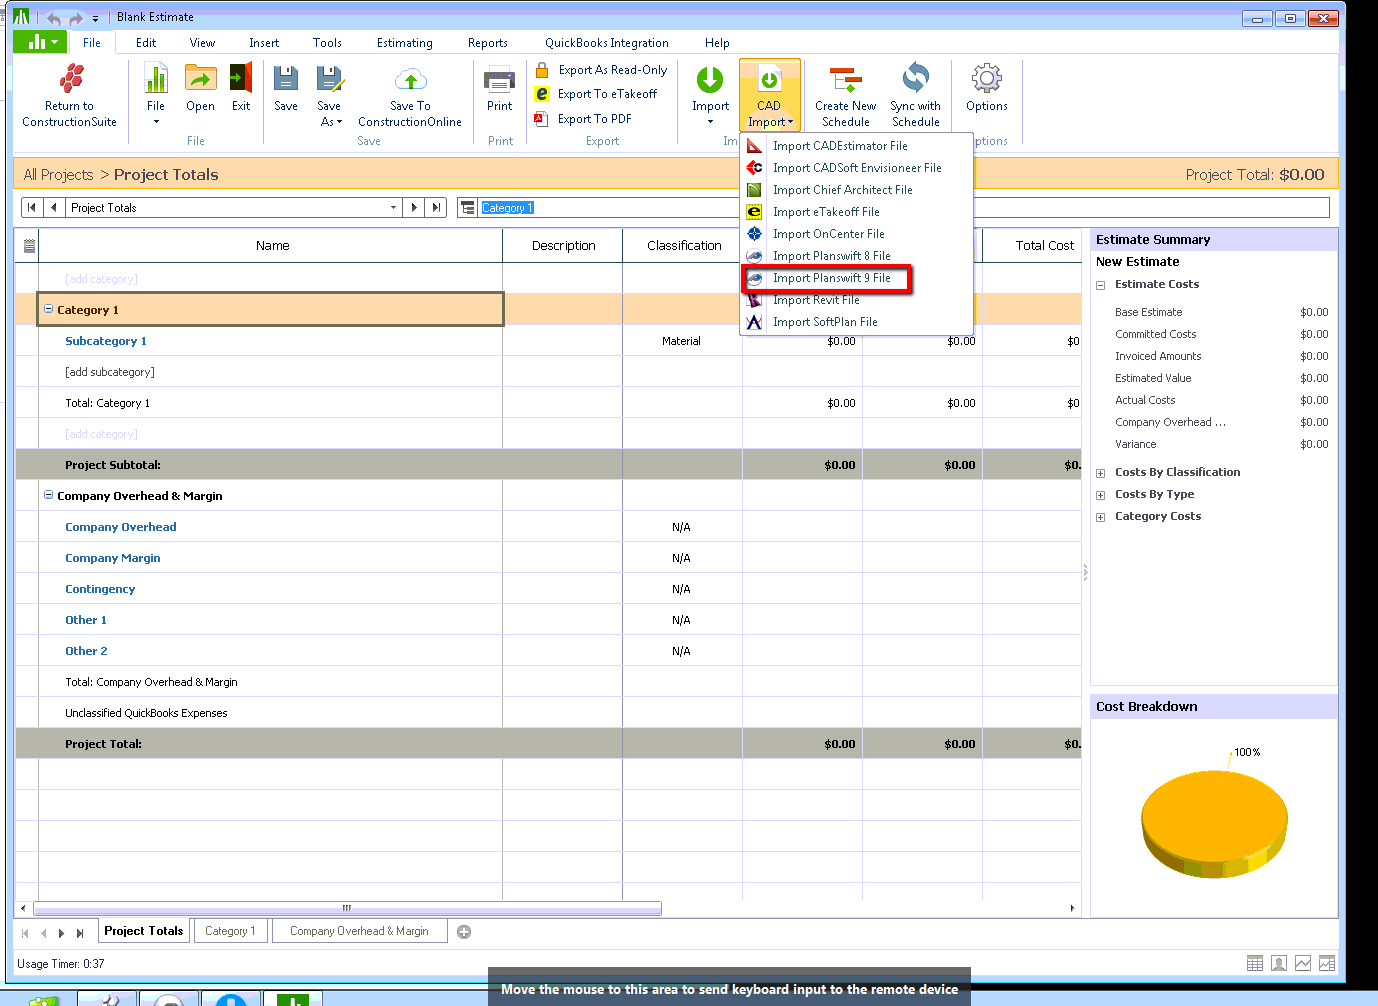
2. Import from Excel to UDA
...
The Imported PlanSwift material list form will open. Click the file you wish to import. Click OK to finish.
Downloadable UDA Import XLS Examples:
...