...
| Table of Contents | ||||
|---|---|---|---|---|
|
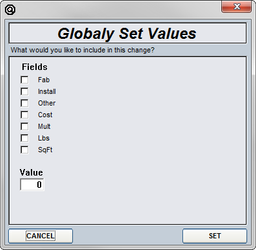
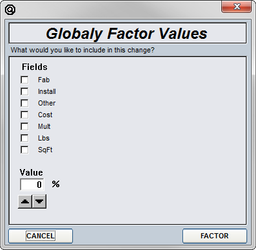
Global Factors & Changes
To globally factor or change the entire accessory file either up or down by an amount or percentage, simply click on the “Global Factor” or “Global Change” button from the pressure files main menu. Then select whether it is the fab, Install or Cost values that you are wishing to change. It is not recommended to change fab, Install and Cost values at the same time because you will notice that each of the options will need to be lowered or raised a different percentage than the other.
After a choice has been made as to which values are going to be factored or changed, you must then select an amount. Simply use either the up or down arrows to change the percentages / amounts to the desired value.
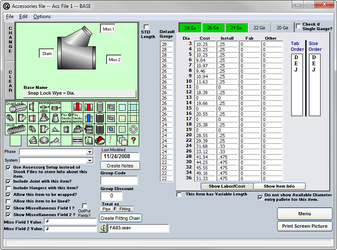
Data Setup
In the Accessories File you will find the setup page for the Snaplock Pipe, generally used for low pressure run-outs to grills, registers or diffusers.

This setup page has several columns of information that you should update;This setup page has several columns of information that you should update;
- STD Length
The standard length of the pipe that you purchase. - Per Ft. Cost
The cost per foot of the pipe. - Install Labor
The amount of time for installation of one standard length of each diameter. Labor is to be input in decimal hours (.5 = ½ hour). - fab Labor
Fabrication labor needed for this item. - Other Labor
Depending if you use the Other labor factor in the program, you may wish to enter in some hour for material handling, estimating, project management, etc. - Tab Order
This is the order in which you are going to input sizes and lengths on the item. For example; J = diameter and C = length. - Size Order
The input (Tab) order may be different than the reporting (Size) order. You can adjust how you wish the data about each item to appear on reports.
Below the Cost/Labor table you will see a series of options available to you. These settings will assist in setting up the cost and labor columns. Show Labor/Cost: Click to view the labor and cost tables for this item.
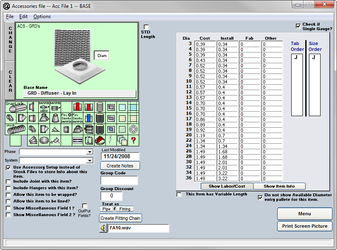
- Show Item Info
Click to show the per diameter Multiplier, Pounds, Square Feet and individual item number. - Labor is to be Calculated
This option will allow you to state whether the labor is per standard length or per foot. - Cost is to be Calculated
This option will allow you to set the cost column to either be a per foot or per standard length.
To the left, you will have several option available to you for each of the items.

- Use Accessory Setup Instead of Stock Files
If the item you are wishing to setup cannot be classified as Rectangular or Round, then you will use the stock file. This option will give you an option to state which stock file and which group to open when this item is selected in takeoff. - Include Joint with This Item
Check to apply a joint connection to this item. - Include Hangers with This Item
Check to apply a hanger to this item. - Allow This Item to be Wrapped
If you wish to be able to apply wrap to this item in the Takeoff process you will need to have this field checked. You will also have to input an Item sq ft so the program will know the amount of wrap to include. - Allow This Item to be Lined
If you wish to be able to apply liner to this item in the Takeoff process you will need to have this field checked. You will also have to input an Item sq ft so the program will know the amount of liner to include. - Miscellaneous Fields 1 & 2
Checking either of these boxes will give you another size input field for your item. Once you have checked the box, it will appear in the above picture and you’ll be able to click and drag the box on the picture to put it in the appropriate location. - Out-Put Fields
If you wish to have one of the miscellaneous fields act as the size that is to be used for the next new item in the Takeoff process, check this option. - Last Modified
The date you last edited the data for this item. - Create Notes
If you wish to input a note about this item. This button will appear green if there is a note stored for this item. - Group Code
The item code associated with this item in your suppliers catalog. - Group Multiplier
A discount or markup you wish to have associated with this item. - Treat as Pipe/Fitting
Select the appropriate setting according to your item. - Create Fitting Chain
A fitting chain is a group of items attached to one item. For example; start collar, volume damper, flex duct and grill. You can attach items to another and when this feature is enabled in Takeoff, they will all be taken off with one click. - Sound File
Set the appropriate sound file you wish to have played when this item is selected in Takeoff.
The Lay In diffuser is setup using the same setup procedures as the Snaplock pipe with a few differences.
- Cost
Cost is no longer a per foot cost but a per item cost. Most contractors input the cost of all air distribution devices as a quote on their final report. However, the cost of the panduit straps, duct tape, seismic hangers, etc. should be entered here. - Include Joint/Hanger/Wrap
These options should be unchecked as they are not used with this item. - Miscellaneous Fields 1 & 2
These fields are generally used to state the rectangular dimension of the diffuser.
Snaplock adjustable elbows are set up similar to the Diffuser.
- Cost
The per diameter cost of the item. - Include Joint/Hanger/Wrap
These options will be checked as they may be needed with this item. - Miscellaneous Fields 1 & 2
These fields will be unchecked as we do not need more than one entry field.
Hanger and Joint Setup
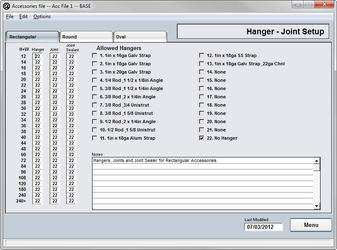
- Hanger Setup
Rectangular and Round are set up the same way. Simply input the code you wish to have used as a default in the Takeoff process. Check the boxes of the alternates you wish to have available to you. - Joint Setup
Rectangular and Round are setup the same way. Simply input the code you wish to have used as a default in the Takeoff process. Check the boxes of the alternates you wish to have available to you. - Joint Sealant Setup
Rectangular and Round are setup the same way. Simply input the code you wish to have used as a default in the Takeoff process. Check the boxes of the alternates you wish to have available to you.
Labor Rates Setup
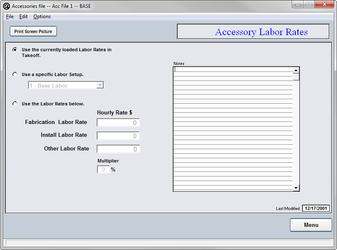
- Use the currently loaded rates
When you enter the Takeoff program, your default labor rates will be used, unless otherwise stated. This option will tell the program to use whichever rates are the default. - Use specific labor setup
Choose this option if you wish to have a specific rate used whenever an item is selected out of this file. - Use labor rates below
Select this option and input the rates you wish to have used. If you choose this option, you willnot be able to change to a different rate in the takeoff process. You may also input a multiplier using this option.
Advanced Setup
- Multiple Gauge Pricing Setup
Located in the upper right of the screen there is an option that when unchecked will show you multiple setup tables for gauges 28 through 20. The table pricing, labor and other info is set up the same as before, just with a setup table for each gauge. - Default Gauge
With multiple gauges and diameters available you will have to set the default gauge per diameter. Inputting a 26 on the line for 10 inch diameter will tell the program to use the pricing and labor from the 26 gauge table. You can choose another gauge in Takeoff but 26 will be the default. - Show available size/gauge
You’ll find this option in the lower left of the screen. This option will change the entry palette to show the gauge table with the available diameters per gauge.
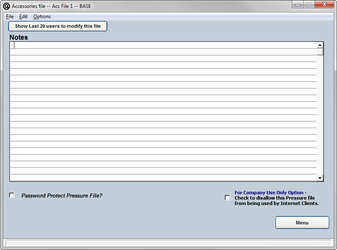
Notes
The notes page of the Accessories File is for specific notes pertaining to the items stored in this file.
If you wish to protect this file from being changed check the box to password protect this file. This will open a dialog box showing you your passwords. You can change the passwords to whatever you wish to use.
The View password will allow you to only view the file and not make any changes.
The Edit password will allow you full access to the file.
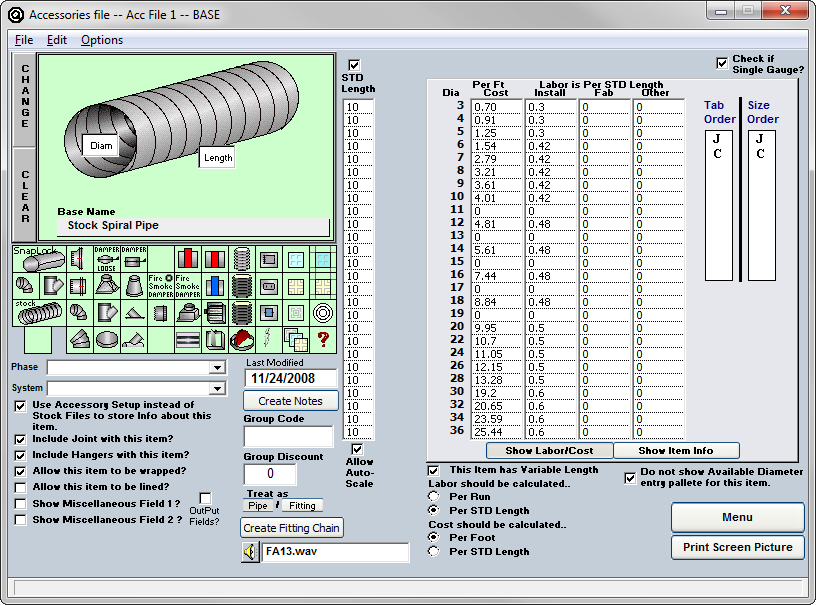
Stock Spiral Pipe Setup
This option is available for the spiral pipe that you purchase of light gauges and no larger then 36 inches in diameter. The setup process for this item will be very similar to the setup of the Snaplock pipe with the difference being in the standard length column.
The stock spiral pipe can also be disabled from use by simply Right Clicking on the item to hide/show the icon from view. This feature is useful if you choose not to use spiral pipe in this location.
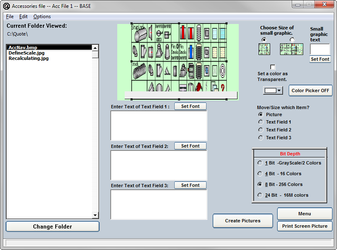
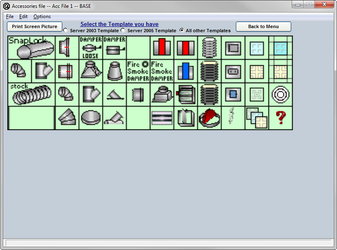
Create Template Picture
When customizing layout of Accessory File, choose the correct template size and then click the “Print Screen Picture” button to send the image to your printer. Cut out and laminate to use on your digitizer.
Create New Pictures
Use this screen for basic image editing. Import new images and add them to a standard accessory file background.