...
...
...
...
...
...
...
...
...
...
...
...
...
...
...
...
...
...
...
...
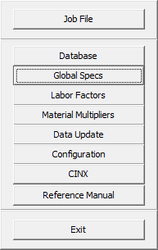
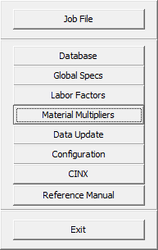
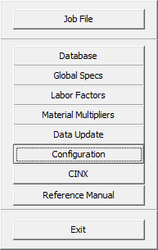
The first screen you will see after logging in will be the Main Menu. This truly is the center point for navigation throughout QuoteSoft Pipe. This screen allows you to access sections of QuoteSoft Pipe.
Check out the Main Menu viewer! Watch for new information. Quote Software will send you messages about program updates and other issues.
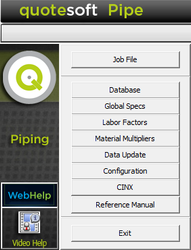
The following sections explain the buttons on the left side of the Main Menu.
| Table of Contents | ||||
|---|---|---|---|---|
|
Job File
The Job File button gives you access to the list of jobs in the program. This is where you add and modify jobs.
You can access the list of Jobs two ways: you can select  from the Main Menu or you can click on the Jobs tab at the top of the screen.
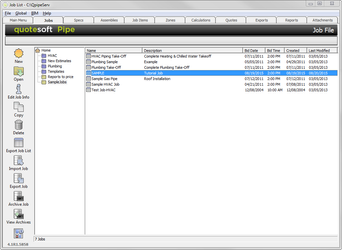
The Job File screen is explained in detail later in this Reference Manual.
Database
The Database screen manages over 70,000 unique items used in the mechanical trade! For rapid lookup, each item is classified by having a unique Family, Group, Class, and optional Type hierarchy. You can access the Database screen two ways: click  on the Main Menu or click
  on the Job List screen.
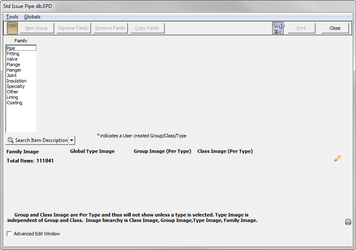
When you first open the Database screen, only the Family is shown. After you select a Family (e.g. Pipe), a list of Groups appears. After you select a Group (e.g. PVC), items in the Class appear, etc. The following screen is an example of the Family, Group, Class, and Type. All Database items are accessed this way, although some may require more or less selections.
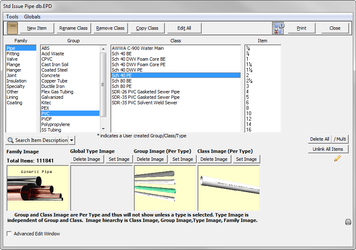
Viewing Items
To select an item such as a 1/2″ 150# Black Malleable Tee, select the Family (Fittings), Group (Black Malleable), Class (150# Black Mall Threaded), Type (Tee), and Item(Size) (1/2″).

Once you select the Item (Size), the Item screen appears.
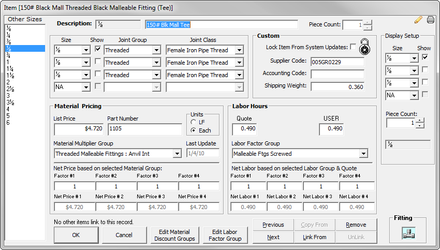
The Item screen contains the following fields:
| Other Sizes | These are all the sizes that are available for this item. |
| Description | Size and description of item as it will appear in printouts. |
| Piece Count | Quantity per item. (Usually this is one.) |
| Size | Up to four sizes for an item. |
| Show | Checked box means size will be displayed. |
| Joint Group | From the Joint Family in the Database1 |
| Joint Class | A subset of the Joint Group1 |
List Price | Per the manufacturers’ list shown2 (Enter ‘Q’ for Quoted). |
| Part Number | Per the manufacturers’ list show. |
Units | LF = lineal feet or Each. |
| Material Multiplier Group | Name of group where list prices are discounted. |
| Manufacturer | Company that publishes list price. |
| Last Update | Date of manufacturer’s published list. |
| Lock Item from Updates | Check to protect user-modified items. |
| Supplier Code | Supplier code (used by Quote Software Inc. for pricing updates). |
| Accounting Code | Optional user code (will not be affected by updates). |
| Shipping Weight (lb.) | Available for most items. |
| Labor Hours | Per unit labor rates (Enter ‘N’ for N/A) |
| Labor Factor Group | Name of group where labor rates are discounted. |
| Picture | Available for most items |
1 – When SPEC is displayed as the Joint Group or Joint Class, the joints remain undefined until set up into a Global or Job Spec.
2 – When QUOTED is displayed, price will require a quoted value at the time of job calculation.
Database Item Sizes
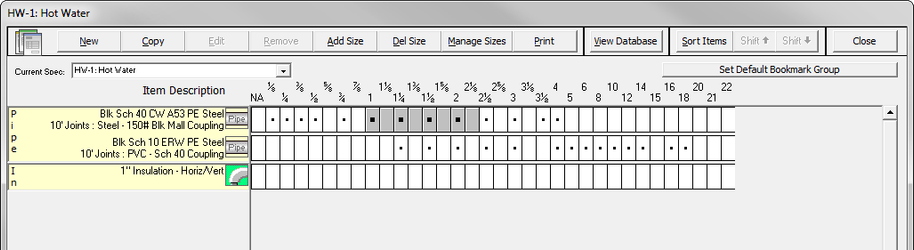
On the left side of the Item screen, notice there are “Other Sizes.”

These “other sizes” are all the sizes that are available for this item. These are the sizes that appear in Specs as small dots when you add a job and then create specifications for that job. Notice on the screen below the large dots as well as the small dots. The small dots are the sizes from the database. The large dots are the sizes that you select for the job that you are working on. (You select the specific sizes when you modify Specs.)
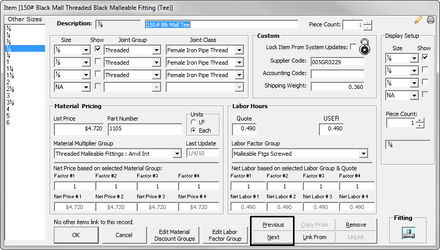
Viewing Next and Previous Items
Once inside the Item screen, the next and previous Items (within the same Family, Group, Class, and Type) can be accessed by selecting  and
and  respectively.
Adding Items
New items can be added:
- Select the Family to which the item belongs. (Note that new Families cannot be created.)
- Select the Group to which the item belongs. Select
 to create a new one. When creating a new Group, you are prompted to enter the Description.
 - Select the Class to which the item belongs. Select
 to create a new one. When creating a new Class, you are prompted to enter the Name. (Some Families may also require a Joints to be entered.)
 - Select the Type to which the item belongs. Select
 to create a new one. When creating a new Type, you are prompted to enter the Description and Takeoff Position.
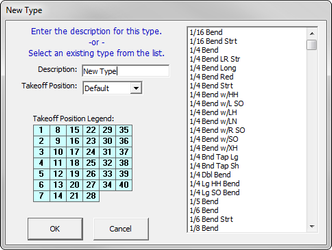
- Select
 to add the new item. Enter the item data and click
  . (Note that the Description is a required field that MUST be filled in.)
Copying Items
You can copy the Group, Class, or Item. If you'd like to copy the Group, select the Family and then select  . Type in the new description.
You can also copy the Class. Select the Family and Group; then select  .
.
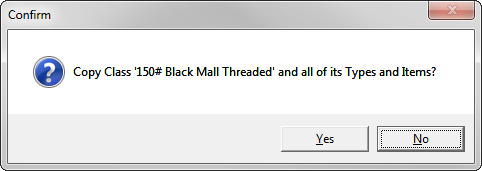
The program asks if you'd like to copy the Class and all its Types and Items.
Linking Items
QuoteSoft Pipe contains a special link feature which allows you to place an existing item in multiple locations within the Database. The primary purpose of linking items is to allow multiple size references to the same item (such as hangers, bolts, joints, etc.) Under normal circumstances, you will not use this feature in routine maintenance of the data.
- Select the Family, Group, Class, and Type location from the Database screen.
- Select
 on the Item screen.
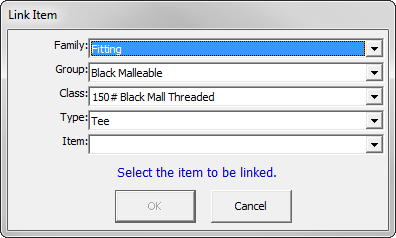
- Choose the Family, Group, Class, and Item of an existing item to link with. Select and a new item is created which is a link to the existing item.
Removing Items
Items you add to the Database can be removed as follows:
- Select the Family, Group, Class, Type, and Item from the Database screen.
- Select
 from within the Item screen. (You will be asked to confirm the removal.)
Exercise caution when removing items. Once an item has been removed, it cannot be restored.
NOTE: Items installed by Quote Software Inc. are permanent and cannot be removed.
Editing All Items
QuoteSoft Pipe contains a special feature that allows you to rapidly change the price and/or labor hours of all items within a single Family, Group, Class, and Type. To use this feature, select  from the top of the Database screen. A grid will be displayed that allows you to change information for all items from a single screen.
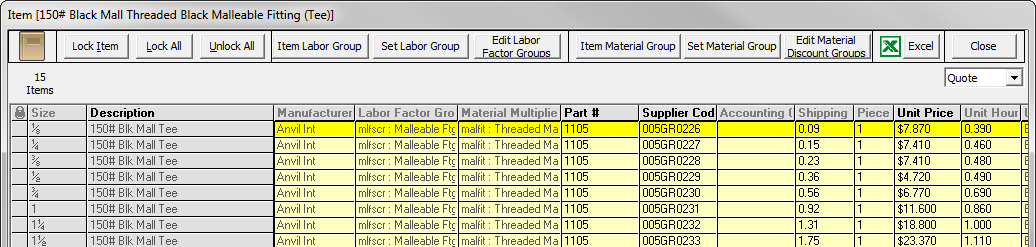
You can change the columns in yellow by entering new values from the keyboard. As in the case of single items, a dollar amount of QUOTED can be entered using the letter ‘Q’. Your default labor rate is displayed initially but can be changed using the buttons at the top of the screen.
Global Specs
Global Specs are specifications that are available to all jobs and all users. This is a place where you can put all your specifications that you ever want to use.
To help speed up your implementation, Quote Software has provided you with 45 pre-built specifications. You can select one of these specifications and modify it to closer match your company's specifications. You will learn more about Specs later in the Reference Manual.
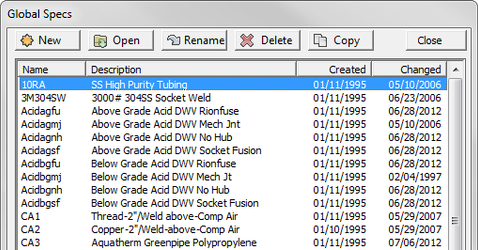
From the Global Specs, you can quickly review all your specs. You can add a new spec, open a spec, rename, delete, or copy a spec.
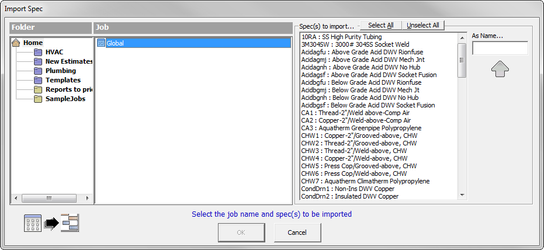
Global Specs are available to all jobs. For example, when you create a new job and want to add a spec, go to the Spec screen and select Copy. Click on  and all your Global Specs appear.
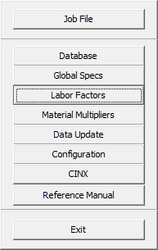
Labor Factors
To access the Labor Factor table, click  from the Main Menu or at the top of the Job List screen, click Global > Labor Factors.
The Labor Factors table displays a list of all labor groups in the system.
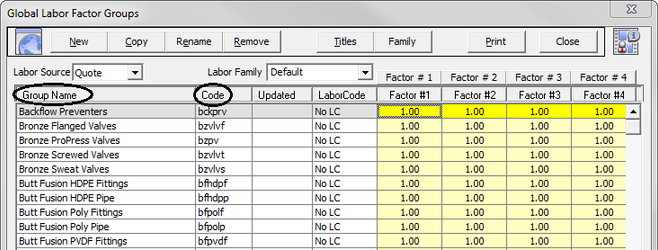
To assign multipliers to Labor Factor Groups, click the multiplier in the appropriate group and under the desired title. Type in the new value and press Enter.
You can sort the order of the groups either by the Group Name or by the Code. Select Group Name at the top of the group name column to sort alphabetically by the group name. Select Code at the top of the code column to sort alphabetically by the code.
The following information is contained about each group:
| Labor Source | Choose between Quote or User. |
| Group Name | The name of the Labor Factor Group as it appears in the Global Spec. |
| Code | A six-digit reference code used in some printouts. |
| Labor Factors | One of up to four factors for each of four sets of labor rates, which are applied to all items within the Labor Factor Group. |
Adding/Renaming/Removing Labor Groups
New Labor Factor Groups can be added to the Database to accommodate data added to the system.
To add a new Labor Factor Group, click  . Fill in the desired Discount Group and Code and then click . The new group will be sorted alphabetically.
Labor Factor Groups can be renamed as desired.
NOTE: You cannot rename or remove the Global Labor Factor Groups that were shipped to you from Quote Software.
To rename an existing group, select the Group Name and click  . Edit the Discount Group or Code and click to save your changes.
Labor Factor Groups can also be removed if required. To remove an existing group, select the Group Name and click  . The program will require confirmation prior to removal.
Naming/Changing Factor Groups
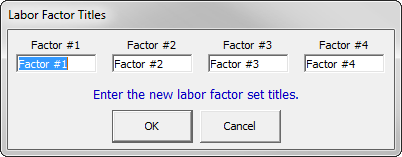
QuoteSoft Pipe contains room for up to four (4) factors for each of four (4) sets of labor rates for each Labor Factor Group.

This allows you to have different multipliers for different size jobs, different crews, different types of jobs, etc. Upon receipt of your system, all multipliers are 1.0. It is your responsibility to find and enter the appropriate factors to reflect the labor rates for your firm and for your area.
To assign names to the lists of factors, click  and change the names of the titles. Click when you are done.
Filling in Your Columns
You can quickly fill in your columns with data you need. Click the top of the column you would like to edit (e.g. Factor #1). A screen appears asking what you would like to do with the column.

Select the appropriate button to complete the task you would like to do. The system asks you specific questions depending on what button you chose.
Material Multipliers
To access the Material Multiplier Groups screen, click  from the Main Menu or click Global > Material Multipliers from the Job List screen.
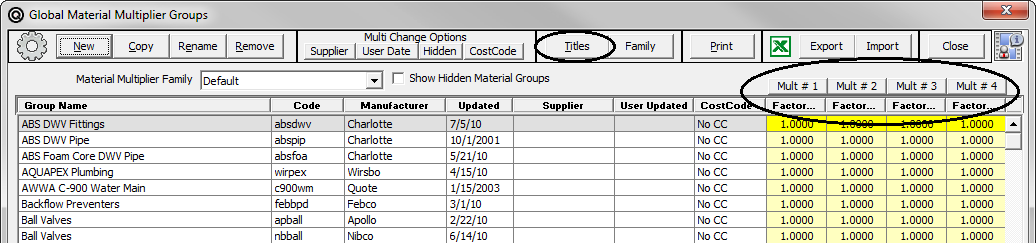
The Material Multiplier Groups screen displays a list of all material groups defined in the system.
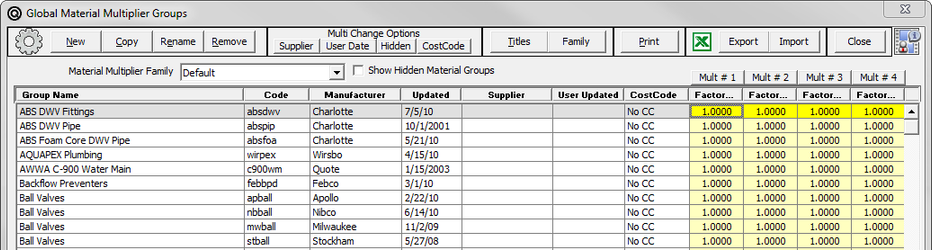
To assign multipliers to Material Multiplier Groups, click the multiplier in the appropriate group and under the desired title. Type in the new value and press Enter.
You can sort the order of the groups either by the Group Name, Code, Manufacturer, Updated, or Supplier. Select Group Name at the top of the group name column to sort alphabetically by the group name. Select Code at the top of the code column to sort alphabetically by the code. The same applies for the Manufacturer, Updated, etc.
The following fields are provided for each group:
| Material Multiplier Family | Set to default. |
| Group Name | The name of the Material Discount Group as it appears in the Database. |
| Code | A six-digit reference code that appears in some printouts. |
| Manufacturer | The manufacturer, whose list prices are used for all items in the group. |
| Updated | The date of the last change to prices in the group (usually the date of the manufacturer’s list prices). |
| Supplier | The name of the supplier for the group name. |
| User Updated | Name of person updating prices. |
| Multipliers | One of up to four discount factors, which are applied to all items within the Material Discount Group. |
Adding and Renaming Multiplier Groups
New Material Multiplier Groups can be added to accommodate data added to the system.
NOTE: You can add up to 600 Material Multiplier Groups.
To add a new Material Multiplier Group, click .
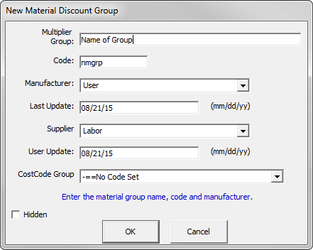
Enter the Multiplier Group, Code, Manufacturer, Last Update, Supplier, and Date. The new group will be added alphabetically.
Material Multiplier Groups you add can be renamed (or updated) as required.
NOTE: You cannot remove the Global Multiplier Groups that were shipped to you from Quote Software.
To rename or update an existing group, select the Group Name and click . Change the Group Name, Code, Manufacturer, and/or Date as required.
Renaming/Changing Multiplier Group Factors
QuoteSoft Pipe contains room for up to four (4) multipliers for each Material Multiplier Group. This allows you to have different multipliers for large jobs, small jobs, out-of-town jobs, etc.
Upon receipt of your system, all multipliers are 1.0. It is your responsibility to find and enter the appropriate multipliers to reflect the market conditions for your firm. You may also assign names to the lists of multipliers by clicking on and entering the desired names. Click when you are done.

Filling in Your Columns
You can quickly fill in your columns with data you need. Click the top of the column (Mult #1) you would like to edit. A screen appears asking what you would like to do with the column.
Select the appropriate button to complete the task you would like to do. The system asks you specific questions depending on what button you chose.
Data Update
Use the Data Update command if you have:
- new items of data and/or revised list pricing from Quote Software;
- or pricing updates from Harrison Publishing House. This is the pricing service you are using in your tables.
To start an update, click  from the Main Menu.

NOTE: Software updates (not data updates) are available electronically from the Quote Software website: www.quotesoft.com. You will get an email telling you that updates are available. Contact Quote Software technical support for details.
Installing Data Updates (Quote Software)
Quote Software data updates are normally distributed electronically. You will get an email telling you that updates are available. You will go to the website www.quotesoft.com and download the update file. You will download it to the QpipeServ folder. After downloading the file, go to the Main Menu and select .
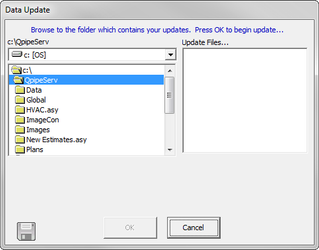
When the Data Update screen is displayed, select the file you downloaded from the Quote Software website. Click to start the update.
When data updates are installed, a list of new and revised data will be provided. You will need to carefully review this information carefully and adjust your Global Discount tables as required (see the Global Discounts screen.)
Installing Data Updates (Harrison Publishing House)
QuoteSoft Pipe supports pricing updates from the Harrison pricing system. Note that these updates are obtained directly from Harrison Publishing House via the Internet and require a separate contractual agreement between you and Harrison Publishing House.
To install Harrison pricing updates, refer to the Pricing Service document included with this Reference Manual. Details for installing updates are included in that document.
Important Update Notes
Data updates are delivered under the assumption that ALL prior updates have been installed. NEVER INSTALL UPDATES OUT OF ORDER! This can corrupt the Database and cause significant downtime when restoring from backup. If you have any questions regarding an update, please contact Quote Software Inc. or your local sales representative!
Configuration
The Configuration screen allows you to establish parameters and personal preferences within the QuoteSoft Pipe program. To access the Configuration screen, click  from the Main Menu or click File > Configuration from the Job List screen.
Workstation Tab
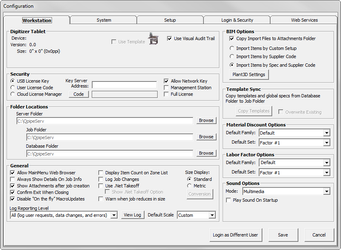
The fields on this screen are initially assigned by Quote Software.
Workstation Tab (Digitizer Tablet Section):
| Device, Version, Size | Indicates the device, driver version, and working area size of an installed digitizer tablet. Note that you must have the Virtual Tablet Interfaceâ„¢ installed in order to use a tablet. |
| Scale | Indicates the initial (default) scale that will be used when creating a Zone. Note that “default” is equivalent to the scale of 1/8″ = 1′. You should select a value that is most common for your business. |
| Use Template | Indicates that you will be using the Quote Software In.c digitizer template installed along the lower edge of the tablet. |
| Use Visual Audit Trail | Indicates that you will use a visual audit trail. |
Workstation Tab (Security Section):
| Key Server Address | |
| Code | |
| Allow Network Key | Select this option if you system is set up for a Network. |
| Management Station | This option is selected if your system is set up for a Management Station. |
| Digitizer Station | This option will be selected if you are using your system with a digitizer. |
Workstation Tab (Server Location Section):
| Browse |
Workstation Tab (General Section):
| Sound Mode | Specifies sound options and may be Disabled (no sound), PC Speaker (uses beeps from the internal speaker), or Multimedia (uses sounds generated from external PC speakers.) It is recommended the Multimedia option be selected if your system has the appropriate speakers installed. |
| Size Display | Choose from Standard or Metric. |
| Default Material Multiplier Family | Choose from Default, 1, 2, 3, or 4 |
| Default Material Set | |
| Default Labor Set | Choose from Factor #1, #2, #3, or #4 |
| DisAllow On the fly MacroUpdates to old excel reports | |
| Allow MainMenu Web Browser |
System Tab
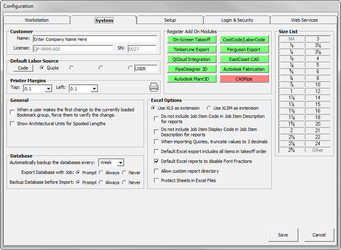
System Tab (Customer Section):
| Customer Name | Customer name used on reports. |
| License Number | Customer license number (No modification allowed). |
System Tab (Default Labor Rate Section):
| Default Labor Rate | Names of labor rate sources: Quote Software Inc., MCAA, PHCC, and User. The last entry (User) is for customer-supplied labor rates and is the only field that may be changed. The radio box indicates the default labor rate source used when recalculating jobs. |
System Tab (Printer Margins Section):
| Printer Margins | The left and top printer margins. These are normally set to 0.2″ but may need to be set to 0.0″ for certain printers with hardware margins. |
System Tab (General Section):
| Enable Database Checkout Functionality | Recommend to check this if you have more than one person adding to or maintaining database to prevent overwriting others’ work. |
| Do not include Job Item Code in Job Item Description for reports. | Customer to decide if this is a useful code to include in reports. |
System Tab (Size List Section):
| Default Sizes | Provides the sizes that will be displayed whenever a list of sizes is displayed. It is strongly recommended that this list not be altered! |
Setup Tab
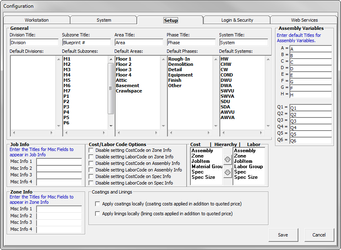
Setup Tab (General Section):
| Division Title/Default Divisions | |
| Subzone Title/Default Subzones | |
| Area Title/Default Areas | |
| Phase Title/Default Phases | |
| System Title/Default Systems |
Setup Tab (Job Info Section):
| Titles for Fields | Additional Job File information are set here and accessed through Jobs tab, Edit Job Info, and More screen. |
Setup Tab (Assembly Variables Section):
| Default Titles | Default unless protocol for assembly creation has been established and practiced by all program users. |
Login & Security Tab
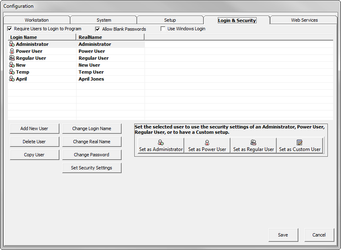
Login & Security Tab:
| Set Security Settings | Use the information on this tab to set up your users and their passwords. |