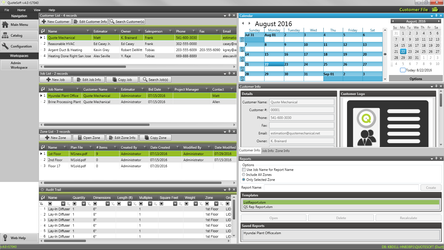
Upon logging in, the first screen of QuoteSoft Rep that you see is the Main Menu. The central point of navigation in QuoteSoft Rep, all other features can be accessed from here.

| Table of Contents | ||||
|---|---|---|---|---|
|
Customer File
If you click on the 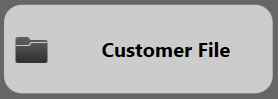 button on the Main Menu, you can access the Customer File screen.
The Customer File screen will give you access to the list of customers in the program, as well as their associated Jobs and Zones. In addition, you can add new Customers, Jobs, and Zones, as well as make modifications to existing ones. To find out more about the different sections, as well as how to customize the layout of the Customer File screen, look at the Customer File section further on in this manual.
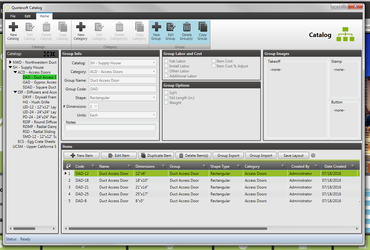
Catalog
If you click on the  button, you can access the Catalog screen.
[Placeholder – Catalog not yet filled]
Configuration
If you click on the  button, you can access the Configuration screen.
Workstation
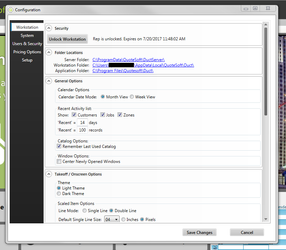
Security

Click the Unlock Workstation button to access the Unlock Code screen.
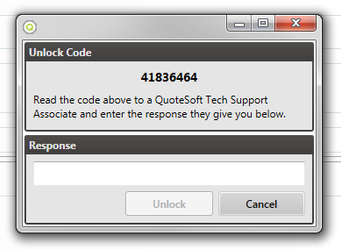
Follow the instructions given to unlock QuoteSoft Rep.
Folder Locations

Use the Open button to select a new Server Folder if necessary.
General Options
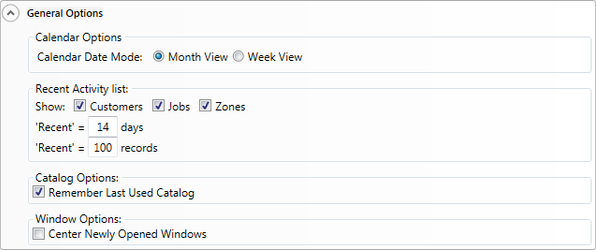
- Calendar Options
- Calendar Date Mode
- You can select whether the calendar on the Main Menu and in the Customer File should display with Month View or Week View.
- Calendar Date Mode
- Recent Activity list
- You can decide whether you want to show Customers, Jobs, and/or Zones on the list
- ‘Recent’ allows you to decide how many days you want to show on the Recent Activity list
- Catalog Options
- Remember Last Used Catalog
- Remember last used catalog
- Remember Last Used Catalog
Takeoff / Onscreen Options
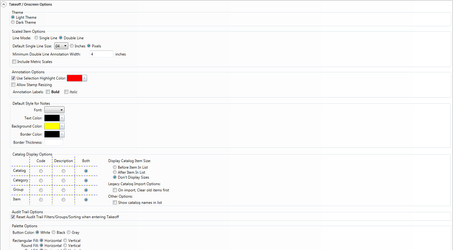
- Theme
- Light Theme
- Dark Theme
- Scaled Item Options
- Line Mode
- Single Line
- Double Line
- Default Single Line Size
- Minimum Double Line Annotation Width
- Line Mode
- Annotation Options
- Use Selection Highlight Color
- Allow Stamp Resizing
- Annotation Labels
- Default Style for Notes
- Catalog Display Options
- Catalog, Category, Group, Item
- Display Item Size
- Before Item In List
- After Item In List
- Import Options
- On import, Clear old items first
- Other Options
- Show catalog names in list
- Audit Trail Options
- Reset Audit Trail Filters/Groups/Sorting when entering Takeoff
- Palette Options
- Button Color
- Rectangular Fill
- Round Fill
- Oval Fill
System
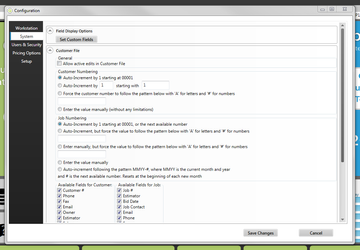
The System tab allows you to modify various system settings.
Field Display Options

Upon clicking the  button, the Custom Field Labels screen will appear.
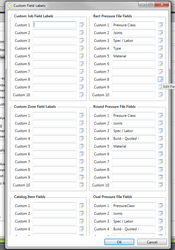
This screen can be used to set custom field labels.
Customer File
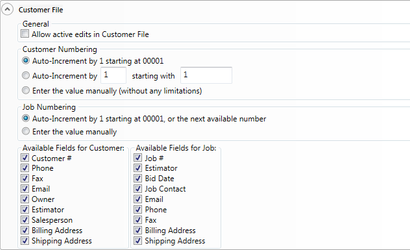
- General
- Allow active edits in Customer File
- If checked, will allow active edits in Customer File
- Allow active edits in Customer File
- Customer Numbering
- This section will allow you to change the way customers are numbered in the Customer File.
- By default, QuoteSoft Rep will Auto-Increment by 1 starting at 00001.
- However, other options include:
- Auto-Increment by a number, starting with another number
- Force the customer number to follow a given pattern with ‘A’ for letters and ‘#’ for numbers
- For example, A####A would force all customer numbers to have a letter followed by three letters and then another letter.
- Enter the value manually (without any limitations)
- Job Numbering
- This section will allow you to change the way jobs are numbered in the Job File and features the same options as the Customer Numbering section, with one more:
- Auto-increment following the pattern MMYY-#, where MMYY is the current month and year and # is the next available number. Resets at the beginning of each new month
- For example, in October 2017, the jobs would be numbered 1017-1, 1017-2, 1017-3, and so on.
- Available Fields for Customer
- This section allows you to show or hide different fields for the customer based on which ones you use.
- The options are Customer #, Phone, Fax, Email, Owner, Estimator, Salesperson, Billing Address, and Shipping Address
- Available Fields for Job
- This section allows you to show or hide different fields for the job based on which ones you use.
- The options are the same as for customers
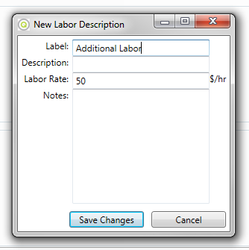
Labor Descriptions

The Labor Descriptions section allows you to view labor descriptions, as well as to create new ones and edit or delete existing ones.
Users & Security
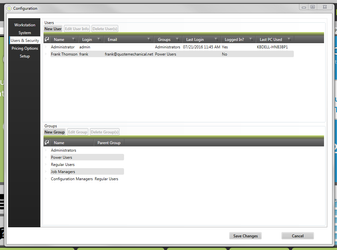
The Users & Security tab allows you to modify existing users, as well as create new ones and delete unwanted ones. In addition, you can add, modify, and delete groups, to easily set permissions for users.
Creating a New User
To create a new user, click the  button above the user list.
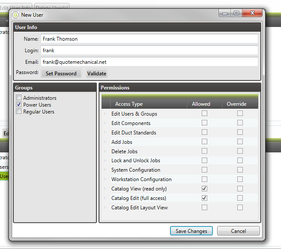
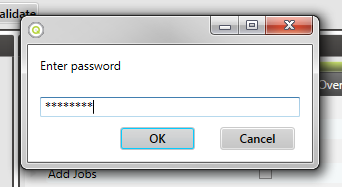
On the New User screen, you may enter the user’s Name, Login, and Email (optional). In addition, you have the option of setting a password for the user; this, however, is not required.
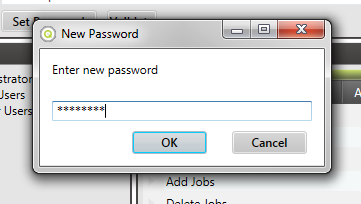
Once you have entered a password and clicked OK, you can click  and enter in your password again to make sure that you have the password correct.
Once you have entered the information at the top, you can decide which permissions you would like to assign the user.
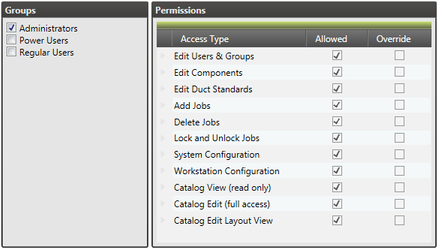
You can either select which permissions are allowed manually with the check boxes on the right, or select a group to assign its permissions to the user.
When you have finished editing the user, click the  button to save your changes. If you do not want to save your changes, instead click
  .
.
Editing a User
To edit a user, select the user you would like to edit and then click the  button above the user list.
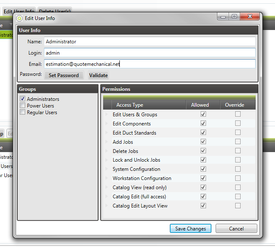
You may now edit the user’s Name, Login, and Email, as well as their Password. You can also assign groups and/or specific permissions as you see fit.
When you have finished editing the user, click the button to save your changes. If you do not want to save your changes, instead click .
Deleting a User
To delete a user, select the user you would like to delete and then click the  button above the user list. You will be presented with the following screen to confirm that you would like to delete the user.
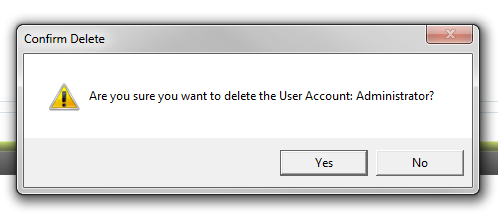
If you would like to delete the user, click Yes. Otherwise, click No.
Creating a New Group
To create a new group, click the  button above the groups list.
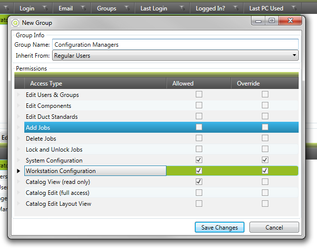
On the New Group screen, you must enter a group name and then select which permissions you want members assigned that group to have. In addition, you can choose a group for your new group to inherit from; this “parent” group’s permissions will be loaded by default.
When you have finished editing the group, click the button to save your changes. If you do not want to save your changes, instead click .
Editing a Group
To edit a group, select the group that you would like to edit and click the  button above the groups list.
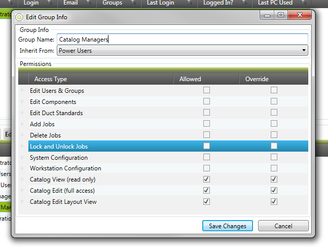
On the Edit Group screen, you may modify the group name as well as the permissions assigned to members of that group. In addition, you can change the group whose permissions are inherited by the group you are editing.
When you have finished editing the group, click the button to save your changes. If you do not want to save your changes, instead click .
Deleting a Group
To delete a group, select the group that you would like to delete and click the  button above the groups list. You will be presented with the following screen to confirm that you would like to delete the group.

If you would like to delete the user, click Yes. Otherwise, click No.
Pricing Options
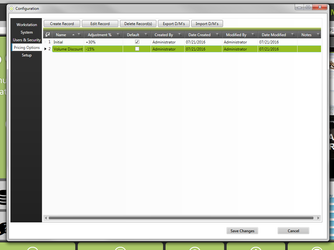
The Pricing Options tab allows you to add and modify records of price adjustments that you can apply uniformly to a customer, job, or zone.
Creating a Record
To create a new record, click the  button above the records list. You will be presented with the New Price Adjustment screen.
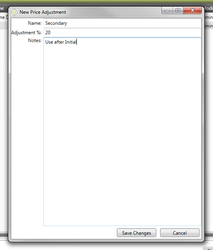
Once you have finished entering the data how you see fit, click Save Changes to save your changes or Cancel if you want to close the window without creating a new record.
Editing a Record
To edit a record, select the record you would like to edit and click the  button above the records list. You will be presented with the Edit Price Adjustment screen.
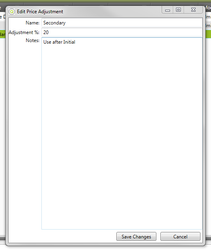
Once you have finished editing the data how you see fit, click Save Changes to save your changes or Cancel if you want to close the window without saving your modifications to the record.
Setting a Default Record
To set a default record for all new customers, right-click the record you want to set as a default on the records list.

Click “Set as default for new customers”. A check mark will appear by the item, signifying it is the default.

Deleting a Record
To delete a record, select the record(s) you would like to delete and click the  button above the records list. You will be presented with a prompt asking whether you are sure you would like to delete the selected items.

If you are sure you would like to delete the records, click Yes. Otherwise, click No and the record(s) will not be deleted.
Exporting Records
To export records, select the record(s) you would like to export and click the 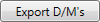 button. You will be shown a screen where you can select where on your computer you would like to save the QMT (Quote Markup Transfer) file.
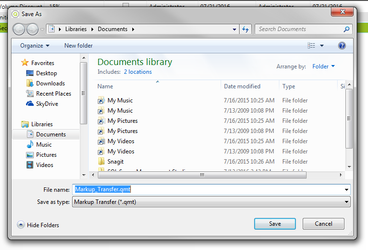
Once you have navigated to where you would like to save the file, click Save. Alternately, click Cancel if you would like to close the window without exporting the file.
Importing Records
To import records, click the  button. You will be presented with a screen where you can navigate your computer to find the QMT (Quote Markup Transfer file) you would like to import, like if you were transferring data from another computer.
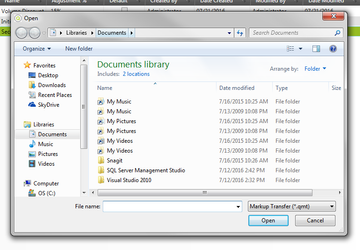
Once you have navigated to where the file is located, click Open to import the records into QuoteSoft Rep. Alternately, click Cancel if you would like to close the window without importing the file.
Setup
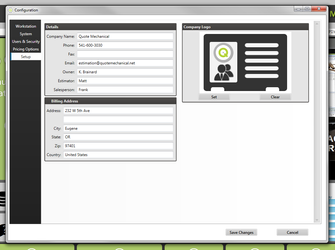
The Setup tab allows you to modify your company information, if you entered it in First Time Setup, or to enter it if you did not. In addition to your company details, you may also select your company logo using the Set button on the left.
Takeoff
If you click on the  button, you can access the Takeoff screen.
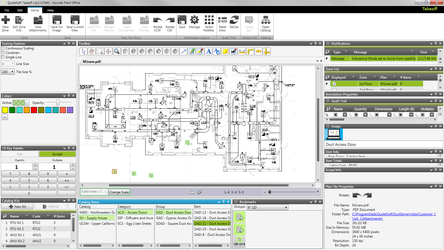
More information about Takeoff can be found later in this manual (link).
Knowledge Base
If you click on the  button, you will be directed to the QuoteSoft Knowledge Base in your web browser, where you can view the Beginners Guide and Reference Manual materials.
Web Help
If you click on the  button, you will be directed to the QuoteSoft Technical Support page in your web browser, where you can get in contact with a QuoteSoft support representative for any questions you might have.
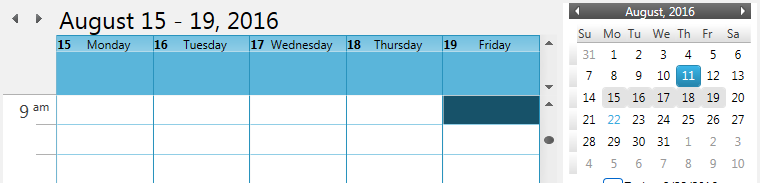
Calendar
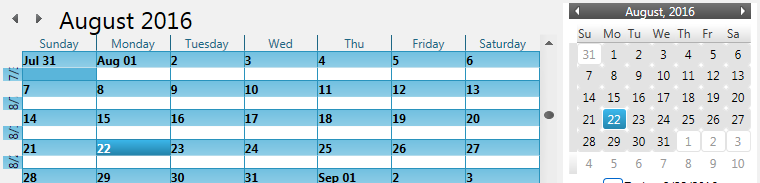
The right side of the Main Menu is home to a calendar widget that displays the Jobs under their bid dates as listed in the Job File. You can also select different days on the calendar, for different views.
Request Support
If you click on the  button, you will be taken to the QuoteSoft Request Support form where you can request technical support.
Video Training
If you click on the  button, you will be taken to the QuoteSoft Video Training site where you can view videos that instruct about how to use various features of the program.
Request Training
If you click on the  button, you will be taken to your email client where you can send a request for software training to QuoteSoft.
Recent Jobs
If you click on the  button, you will be taken to the Recent Jobs screen.
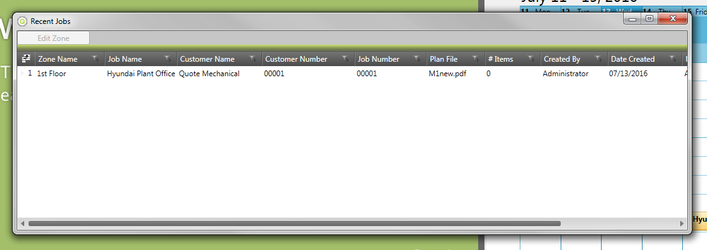
This screen will show you jobs that have been modified in the last two weeks, or however long you set in the Configuration.
Active Users
If you click on the 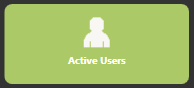 button, you will be taken to the Active Users screen.
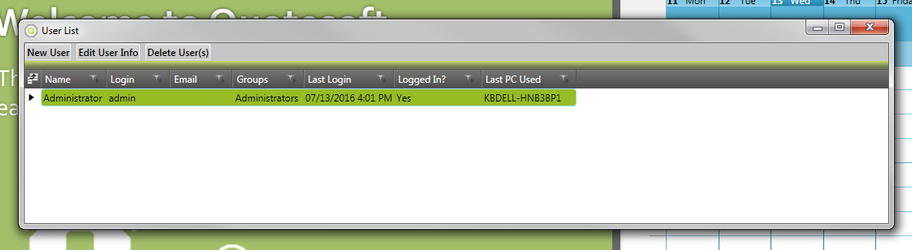
This screen will allow you to see which users are logged into QuoteSoft Rep, as well as to add, edit, or delete users.
DB Updates
If you click on the  button, you will be taken to the Database Update History screen.
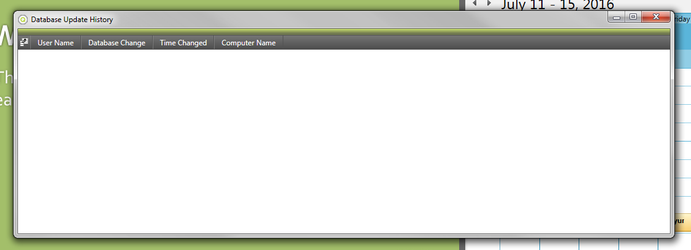
This screen will show you the history of updates to the database in QuoteSoft Rep.
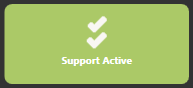
Status of Support Subscription
The bottom right corner of the screen will show your status of support subscription; that is, whether your support is still active or if it has expired.