| Table of Contents | ||||
|---|---|---|---|---|
|
Enabling the Advanced Takeoff
To enable the Advanced Takeoff:
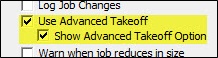
- Go to configuration
- Check the box to allow Advanced Takeoff
- Check the box to show the check mark on the zones tab
You are not able to open taken off jobs/zones in Advanced Takeoff, because the data is stored in different formats which are incompatible. You also cannot open a new job in legacy onscreen either.
To test this, you can go to a Job, then to Zones, check the box at the top, and double click a zone. The following message will appear.
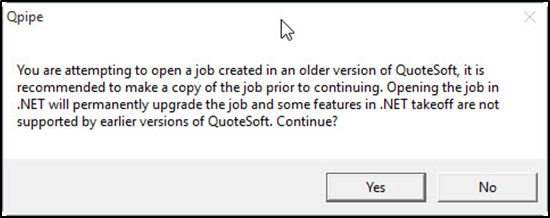
However, this will not interrupt
...
your workflow in any way. Show them that you still start at Jobs tab, then go to Specs tab, then go to Assemblies, then to Job Items, and finally to Zones to create a zone. Of course Attachments are there as well.
Training
- Click New Zone and review the New Zone prompt.
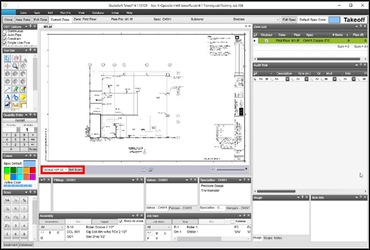
- Once in Takeoff, if
...
- your workspace does not look like this one go to the View menu at the top, click the Load button, select the Default All Palettes workspace and load it.
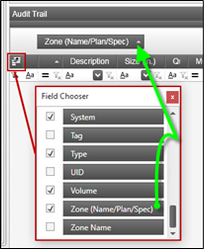
- Immediately go to the Audit Trail and click on the Grouping bar at the top (blue in this image).
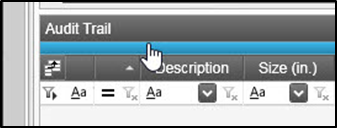
- If Zone is not in there, add it.
- Click on the Field Chooser
- Find Zone (Name/Plan/Spec)
- Drag it into the Grouping area
- Close the Field Chooser
- Click the Grouping bar again to close it
- At this point, you may recreate your workspace they used in Legacy takeoff.
- Stretch to two monitors
- Move the palettes and join them together
- Explain the Palette control that comes up when you hold one on top of another
- Right click in the Spec Palettes to choose Icon or Text, fill vertically or horizontally
- Database and Bookmarks are unpinned (slide out) palettes and you can pin them to stay open if you like
- Lastly, go through the Audit Trail columns and order them to your liking
- Review the On-Screen Takeoff options
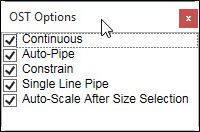
- Continuous
- Auto-Pipe
- Constrain
- Single Line Pipe
- Auto-Scale After Size Change
- At this point, do some simple takeoff on the plan file. This process is exactly the same as before, so your workflow should remain the same
- Pipe, Fittings, Valves are all taken off the same
- Use copy and paste to duplicate items, same as before
- Takeoff Assemblies and Job Items from the palettes, open the detailed list to import Job Items and Assemblies as well
- Next, create another zone from Takeoff
- Click the New Zone button in the Zone Menu above
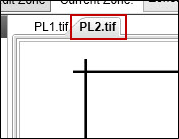
- Select a different plan file
- You can see how it Tabs it at the top of the plan file area
- You can pull the second plan file out, then using the docking control on the center of the plan file you can dock them side by side, top to bottom etc. or have it floating on its own free window
- You can still use the floating window and do takeoff as normal while it is in that state
- Review the Zone List
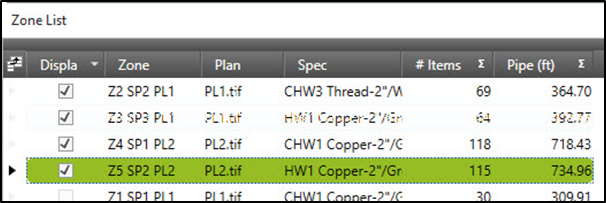
- Replaces Layers palette from Legacy
- Allows switching from zone to zone quickly
- Audit Trail
- The Audit Trail should have two Groupings in it (you have two plans = two zones)
- Scroll through the Audit Trail so the see all items are there
- Collapse the Groupings
- Drop an item on one of the plan files, show them the Grouping expands where they are working to keep up with them
- Right click an item, or a group of items, Global, review the global tool is the same as it was in the Legacy Takeoff Tool. Select items on the plan file, right click, Global, same tool as well
- Wrap Up and Reopen
- Close the Takeoff window with X upper right or Close button
- Double click one of the zones on the list. Once back in takeoff, you can see only one checked on the Zone List. Check the other, and voilà, it appears
- Remember to save your workspace if you’ve made changes
This is about the level of the basic training. The rest can be considered Advanced Training. Before you have another training scheduled with QuoteSoft training staff, it is recommended that you have at least a week’s worth of use with the Advanced On-Screen Takeoff.
Advanced Tips and Tricks
Some of these are redundant, but we all know a quick review of the basics couldn’t hurt.
- Workspaces – how to customize them to your liking
- Saving and loading Workspaces
- Exporting and importing Workspaces to share with others
- Palette Configuration
- Combining Palettes
- Palette load orientation (vertical and horizontal)
- Text or Icon display options
- Palette titles (add spec to title bar in Pipe Takeoff Options)
- Pinned vs. Unpinned palettes (slide out from side or bottom)
- Multiple plan files
- Recommendations for use (Tabbed is best)
- Copy and Paste Into
- Copy from 1/8in to 1/4in plan (pipe length adjusts)
- Using the Zone List to change Zones
- Legacy Layers tool
- Highlighted is active
- Right click options on the Zone List
- Audit Trail
- Continuous all zones
- Grouping (by Zone recommended)
- Reorder columns, combine columns
- Hanger column, live updating sort by
- Simple filters (description, size, spec)
- Custom filters (pipe AND fittings)
- Save Plan File
- All takeoff items
- Filter Audit, only saves what is visible
- On-Screen Options
- Auto-scale after size change
- OS option to clear filters on new Zone
- Selection highlight color
- Customize Job Item/Assembly labels
- Double-click to end Auto-Pipe
- Fixed width for Double Line Pipe