The Catalog is where you can find an organized list of all the items in QuoteSoft Rep that you can place in Takeoff. QuoteSoft Rep comes with [amount] items already built-in, but also includes functionality for you to import or enter items of your own into the database.
To access the Catalog in QuoteSoft Rep, click on the  button.

| Table of Contents | ||||
|---|---|---|---|---|
|
Ribbon Menu
File

- Close the Catalog window to return to the Main Menu.
Edit

- When clicked, this button brings up the Search Catalog screen where you can enter in an attribute to see all items with that attribute or search term.
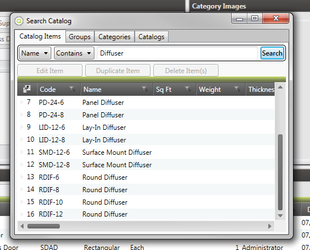
- When clicked, this button brings up the Search Catalog screen where you can enter in an attribute to see all items with that attribute or search term.

- This button will allow you to export catalog files from QuoteSoft Rep in the .CT (Catalog Transfer) file format so that you can re-import it again at a later time, or import the catalog on another computer. You will be shown a screen that allows you to navigate your computer and choose where the file should be exported to.

- This button will allow you to import catalog files in the .CT (Catalog Transfer) file format. You will be shown a screen that allows you to navigate your computer and choose where the file to be imported is located.

- This button will open the Configuration screen to the Workstation tab. For more information about this section of QuoteSoft Rep, see here.
Home
For catalogs, categories, and groups:


- Create a new catalog, category, or group.


- Edit the selected catalog, category, or group.


- Delete the selected catalog, category, or group.


- Duplicated the selected catalog, category, or group, and open the duplicated catalog, category, or group for editing.
Catalogs
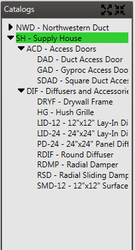
In QuoteSoft Rep, you can have multiple catalogs in the Catalog screen, separated out to denote different suppliers that may have different items or different prices for the same items.
As you can see, different catalogs can be expanded or collapsed by clicking the triangle button to the left of the catalog ID and name. If you would like to expand all, click the  button. If you would like to collapse all, click the
  button.
Creating a New Catalog
To create a new catalog, click the  button in the Catalogs section of the Edit tab of the ribbon menu. You will be brought to the New Catalog screen, where you can enter the information for the new catalog.
Only the name field is required; however, you may fill out the rest however you see fit. Once you are done, click Save Changes to save your changes.
Editing a Catalog
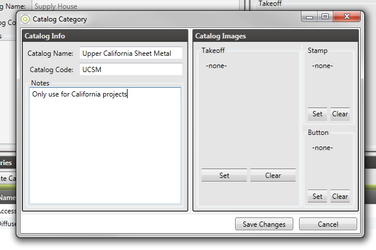
To edit a catalog, click the  button in the Ribbon Menu in the Catalogs section, or right-click the catalog’s entry in the Catalogs section on the left side of the screen and select Edit Catalog. You will be brought to the Edit Catalog screen, where you can edit the fields of the catalog.
Once you are done, click Save Changes to save your changes. If, however, you do not want to save your changes, click Cancel.
Deleting a Catalog
To delete a catalog, click the  button in the Ribbon Menu in the Catalogs section, or right-click the catalog’s entry in the Catalogs section on the left side of the screen and select Delete Catalog.
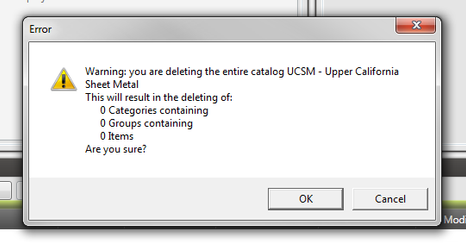
You will be asked if you are sure you would like to delete the catalog. If you are sure, click OK; otherwise, click Cancel.
Duplicating a Catalog
To duplicate a catalog, click the  button in the button in the Ribbon Menu in the Catalogs section, or right-click the catalog’s entry in the Catalogs section on the left side of the screen and select Duplicate Catalog.
You will be presented with the Duplicate Catalog screen, which requires you to change either the Catalog Name or Catalog Code in order to have a unique catalog. Click Save Changes to save the changes and finish the duplication process. If you do not want to finish the duplication process, you may click Cancel.
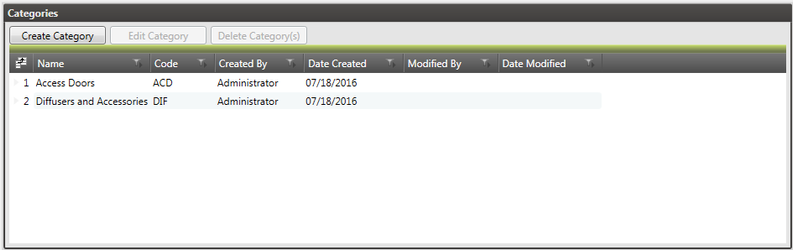
Categories
The Categories section allows you to separate out different groups based on their general categories. For example, [insert example here].
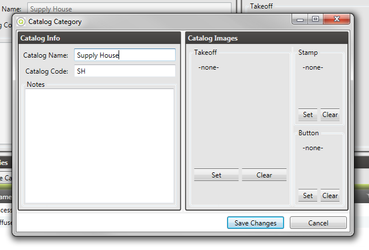
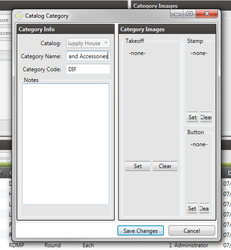
Creating a New Category
To create a new category, click the  button in the Categories section of the Edit tab of the ribbon menu or click
  above the categories list. You will be brought to the New Category screen, where you can enter the information for the new category.
Only the name field is required; however, you may fill out the rest however you see fit. Once you are done, click Save Changes to save your changes.
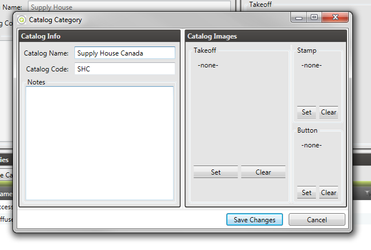
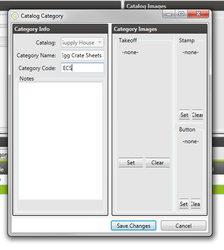
Editing a Category
To edit a category, click the button in the Ribbon Menu in the Categories section, or right-click the category’s entry in the Categories section on the left side of the screen and select Edit Category. You will be brought to the Edit Category screen, where you can edit the fields of the category.
Once you are done, click Save Changes to save your changes. If, however, you do not want to save your changes, click Cancel.
Deleting a Category
To delete a category, click the button in the Ribbon Menu in the Categories section, or right-click the category’s entry in the Categories section on the bottom of the screen and select Delete Category.
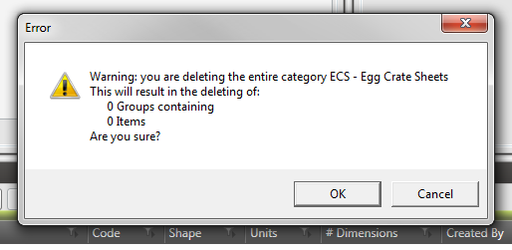
You will be asked if you are sure you would like to delete the category. If you are sure, click OK; otherwise, click Cancel.
Duplicating a Category
To duplicate a category, click the button in the button in the Ribbon Menu in the Categories section, or right-click the category’s entry in the Categories section on the bottom of the screen and select Duplicate Category.
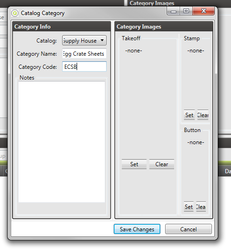
You will be presented with the Duplicate Category screen, which requires you to change either the Category Name or Category Code in order to have a unique category. Click Save Changes to save the changes and finish the duplication process. If you do not want to finish the duplication process, you may click Cancel.
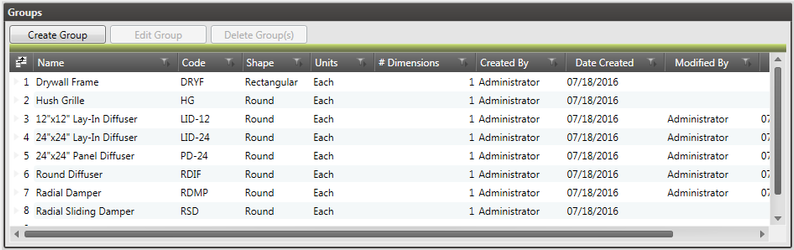
Groups
The Groups section allows you to further distinguish between different types of items; for example, [insert example here].
Creating a New Group
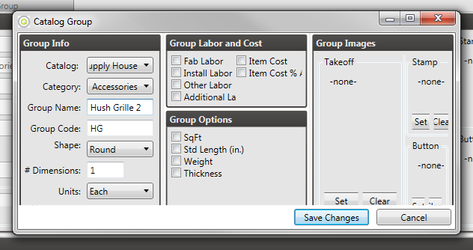
To create a new group, click the button in the Groups section of the Edit tab of the ribbon menu or click  above the groups list. You will be brought to the New Groups screen, where you can enter the information for the new group.
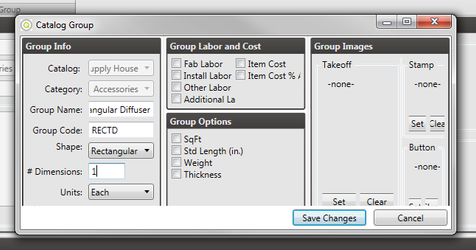
Editing a Group
To edit a group, click the button in the Ribbon Menu in the Groups section, or right-click the group’s entry in the Groups section on the left side of the screen and select Edit Group. You will be brought to the Edit Group screen, where you can edit the fields of the group.
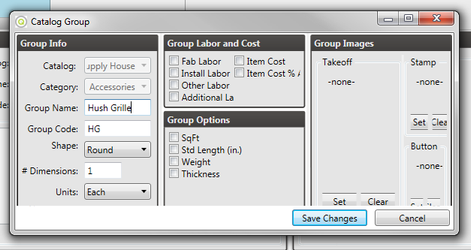
Once you are done, click Save Changes to save your changes. If, however, you do not want to save your changes, click Cancel.
Deleting a Group
To delete a group, click the button in the Ribbon Menu in the Groups section, or right-click the group’s entry in the Groups section on the bottom of the screen and select Delete Group.
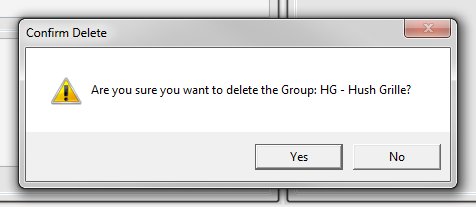
You will be asked if you are sure you would like to delete the group. If you are sure, click OK; otherwise, click Cancel.
Duplicating a Group
To duplicate a group, click the button in the button in the Ribbon Menu in the Groups section, or right-click the group’s entry in the Groups section on the bottom of the screen and select Duplicate Group.
You will be presented with the Duplicate Group screen, which requires you to change either the Group Name or Group Code in order to have a unique group. Click Save Changes to save the changes and finish the duplication process. If you do not want to finish the duplication process, you may click Cancel.
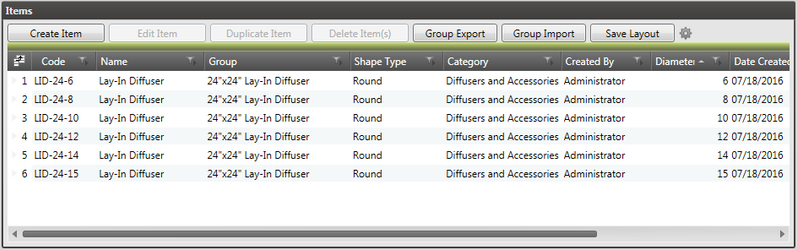
Items
Creating a New Item
To create a new item, click  above the items list. You will be brought to the New Items screen, where you can enter the information for the new item.
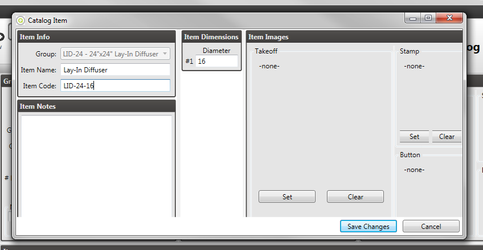
Here you can enter an Item Name, an Item Code, and, if specified in the Group settings, any number of dimensions. Once you have finished entering the necessary information, click Save Changes to save your changes.
Editing an Item
To edit an item, click the  button above the items list. You will be brought to the Edit Item screen, where you can edit the fields of the item.
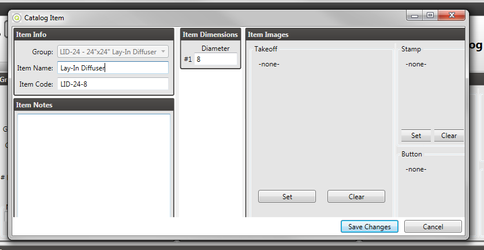
Once you are done, click Save Changes to save your changes. If, however, you do not want to save your changes, click Cancel.
Deleting an Item
To delete an item, click the  button above the items list.
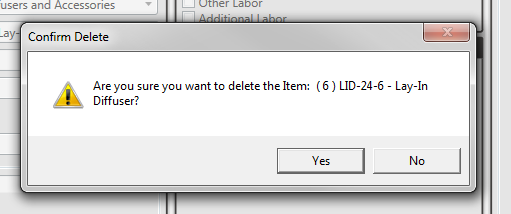
You will be asked if you are sure you would like to delete the item. If you are sure, click OK; otherwise, click Cancel.
Duplicating an Item
To duplicate an item, click the  button above the items list.

You will be presented with the Duplicate Item screen, which requires you to change either the Item Name or Item Code in order to have a unique item. Click Save Changes to save the changes and finish the duplication process. If you do not want to finish the duplication process, you may click Cancel.
Adding an Image to an Item
To add an image to an item, first open up the Edit Item screen. There are two different images you can set, Takeoff and Stamp, but the way that you add an image is the same for each.
To add the image, click the  button. You will be presented with a dialog box where you can navigate your computer for the image you want to assign to the item.
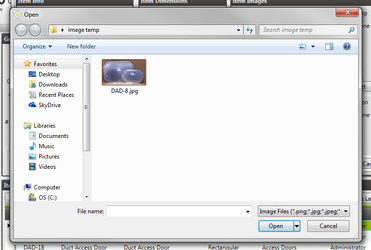
Once you select the image, click Open and you will return to the Edit Item screen to see that the image has been added to the item.
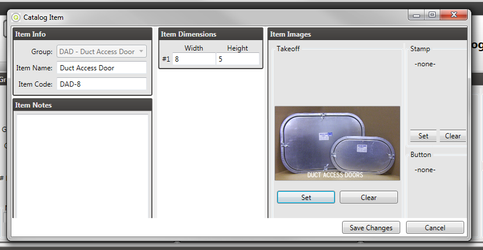
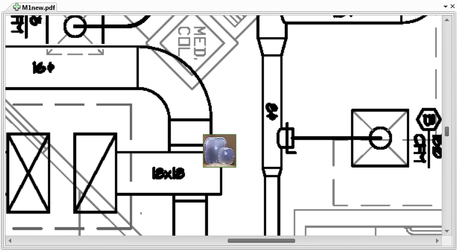
Now that the image has been added, when you place this item in Takeoff, the image will display.