| Table of Contents | ||||
|---|---|---|---|---|
|
...
- Check the IntelliSearch box.

- Click on the Manufacturers drop down and select Watts Regulator Company.

- Click on the Category drop down and select Valves.

- Click on the Sub-Category drop down and select Ball-Brz.

- Click on the Go button.

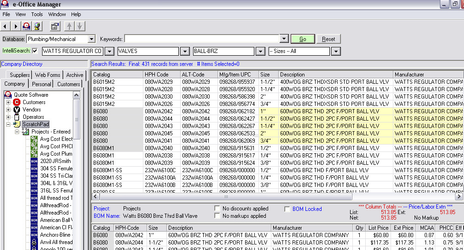
The following screen appears, showing Watts’ Brz Ball Valves.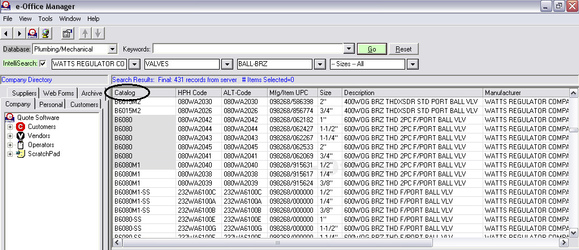
- Click the Catalog button to search by the manufacturer's Catalog part #.
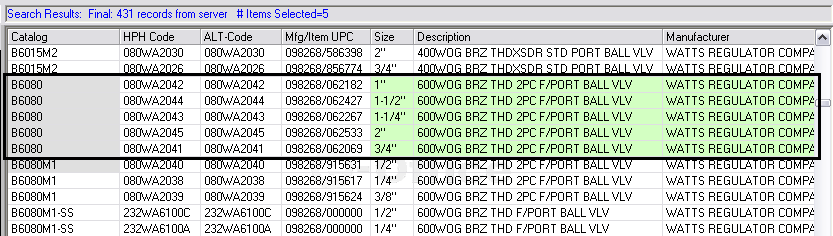
- Click on the items you would like to import into QuoteSoft Pipe. (They will highlight green.)
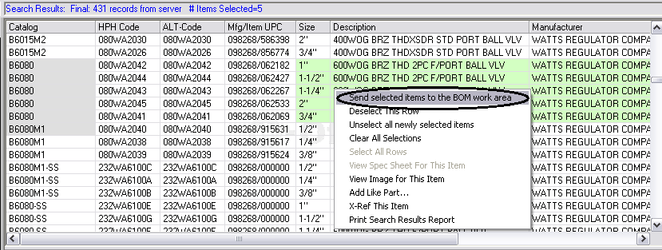
- Right click on the selected items, and then select Send Selected Items to the BOM (Bill of Materials) Work Area.
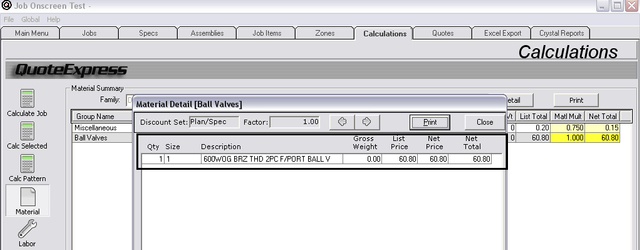
E-Office sends the selected items to the BOM Work Area. Here you will see the Catalog #, HPH-Code, Size, Description, Manufacturer, Qty, List Price, Ext Price, and Effective Date.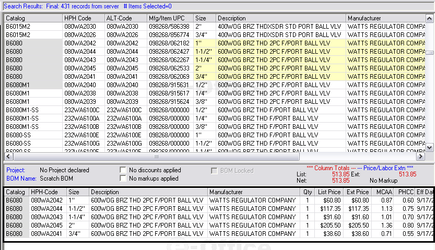
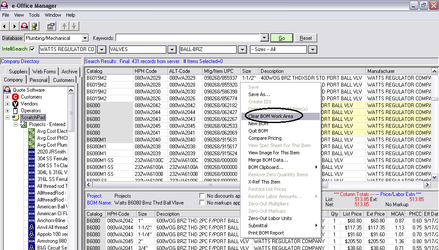
- Right click inside the BOM Work Area. The following screen appears.
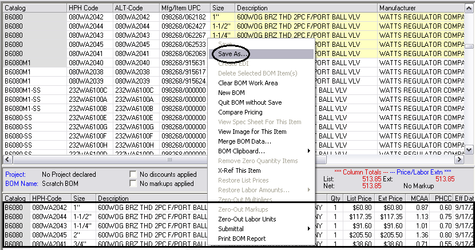
- Click on Save As. The following screen appears.
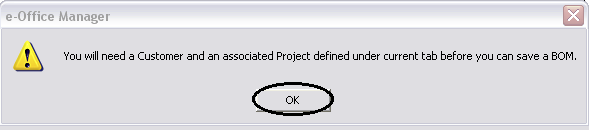
- Click OK.
The following screen appears. It allows Customers to save the BOM (Bill of Materials) inside of Harrison's E-Office.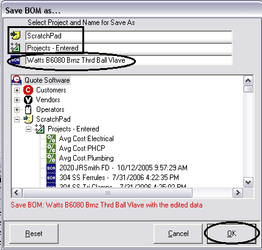
- The BOM will be saved under the Scratch Pad/Project-Entered. Next to BOM, type the Name of the BOM you would like to save. (Watts B6080 Brnz Thrd Ball Valve)
- Click OK. E-Office will show you the Default E-Office Screen.
- Right click in the BOM (Bill of Materials) work area and select Clear BOM Work Area.
- Scroll down the list of BOMs and find the one named Watts B6080 Brnz Thrd Ball Valve.
- Right click on the BOM and select Export to File.
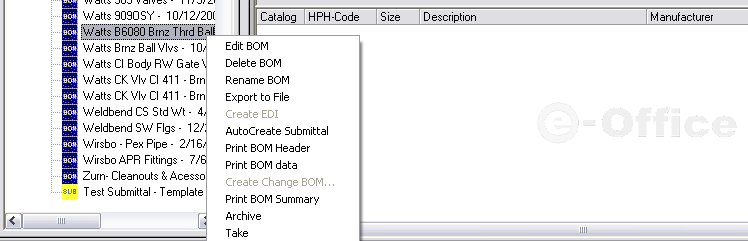
The following screen appears.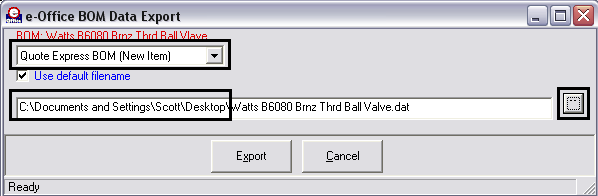
- In the top-left corner of the screen, select QuoteSoft Pipe BOM (New Item).
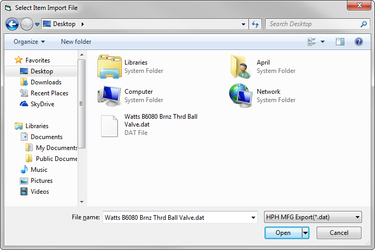
- In the field in the middle of the screen, select the Location to save the file.
- Type the Name of the file that you want to save. The file must end in “.dat” in order for QuoteSoft Pipe to recognize it.

- Click on Export. The following screen appears.
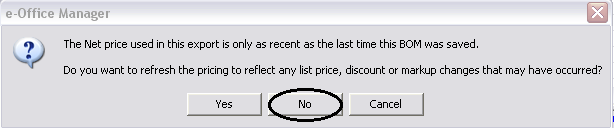
- Click on No (unless you created the BOM previously). Before exporting the file you want to make sure that you have the latest list price. The file Watts B6080 Brnz Thrd Ball Valve.dat will now be saved to the Desktop.
The following screen appears.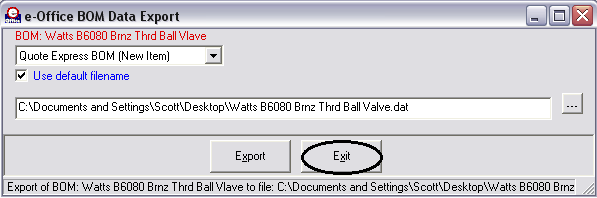
- Click on Exit.
- Close all the way out of Harrison's E-Office.
...
- Open QuoteSoft Pipe by double clicking the icon on your Desktop.

- From the Main Menu, click on the Database tab.
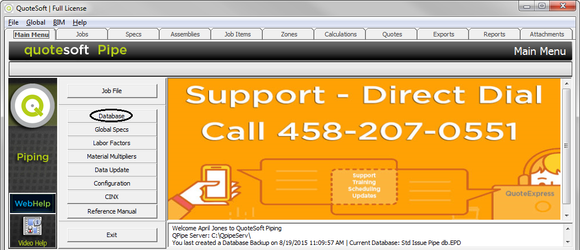
- On the top left corner, click on the Tools menu and select Import Wizard.
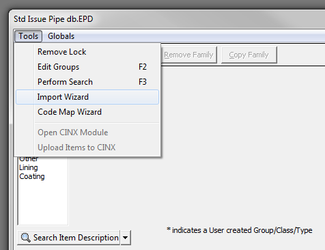
The following screen appears.
- On the top left corner, click on the Import Items button. A screen appears where you can select the “.dat” file you created in E-Office.
When done, the following screen appears.
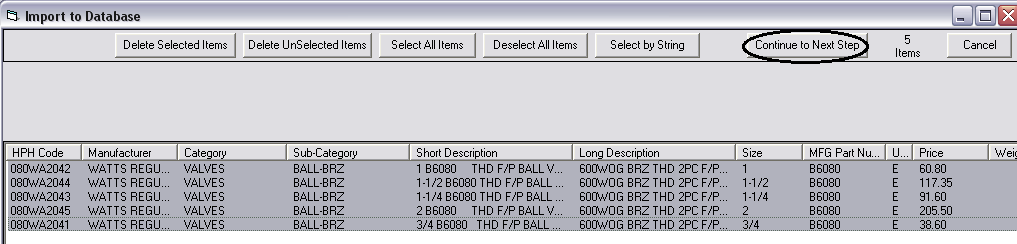
- Click on OK. The following is the import of the Watts B6080 Brnz Thrd Ball Valve.
- Click on Continue to Next Step.
The following screen appears.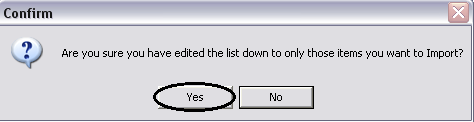
- Click Yes. (The list was already edited when creating the BOM.) The following screen appears.
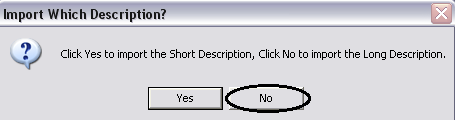
- Click No. The Short Description contains sizes which you do not want. You want to use the Long Description. Here is a sample of the Long Description.

The following screen appears. First choose the Select All Items button.
- On this screen, you will need to change the Size 2 to match Size 1 on all items listed. (Ball Valves need to have two Joint Sizes so QuoteSoft Pipe can add the correct number of joints.) Example: (2x2x2) Tees have 3 joints so you need to match all 3 sizes. (2x2x1) Reducing tees would also use 3 joints but the 3rd Size would be different from Size 1 or 2.
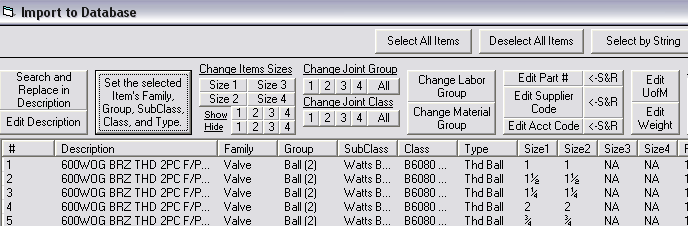
The following screen appears after changing all the sizes.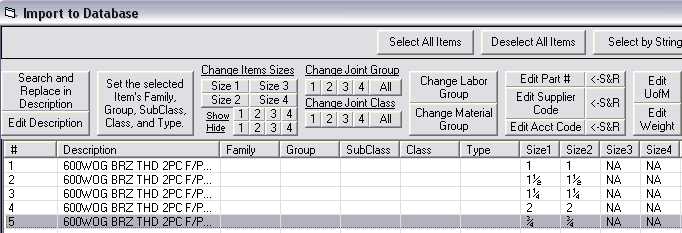
- Click on the Set the selected Item’s Family, Group, SubClass, Class, and Type button. This will help you set where the items are to be located in the Database.
The following screen appears.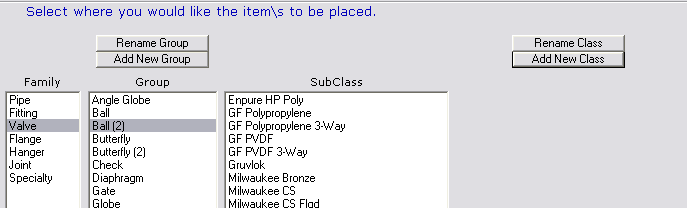
- Select the Family and Group you want the item to be added in the Database. If you need to add a new Class, click on the Add New Class button.
- Enter a new Subclass: Watts Brnz
- Enter a new Class: B6080 600WOG FP Thrd Brnz
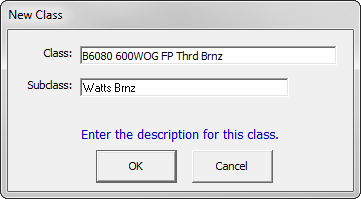
- Click OK. This will set the new Subclass and new Class. The following screen appears.
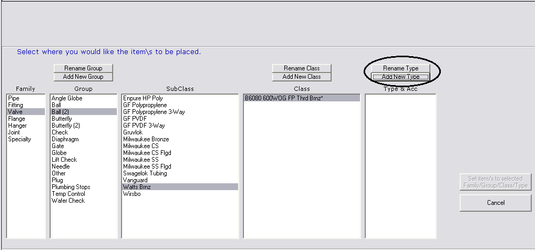
- Click on the Add New Type button.
- Scroll down on the right hand side tool bar and select the Threaded Ball Valve.
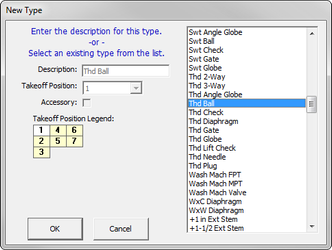
- Click OK. The following screen appears.
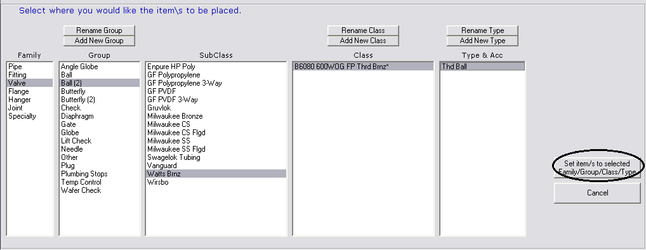
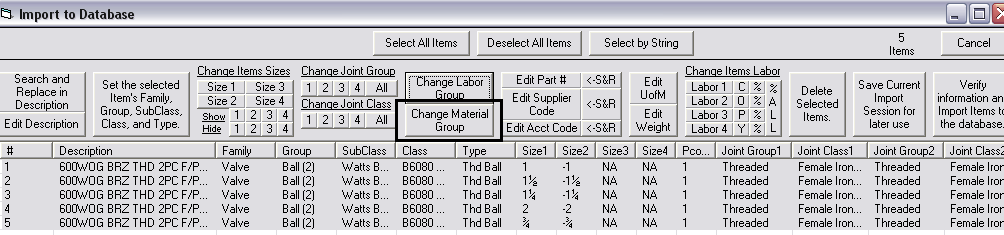
- Click on the Set item/s to selected Family/Group/Class/Type button. The Import screen re-appears.
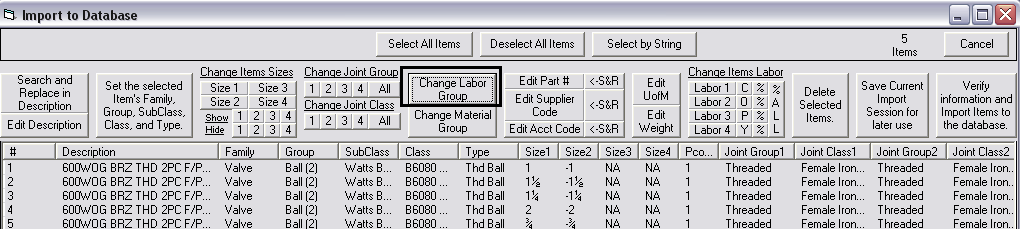
- Select the sizes you need to show (1) and set the others to hide (2, 3, and 4). (Because a valve has the same input and output size, you need to only show one size in Takeoff.)
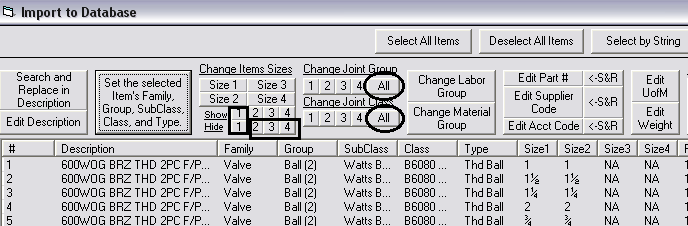
- Change ALL Joint Groups to Threaded.

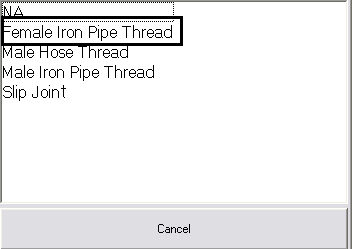
- Change ALL Joint Classes to Female Iron Pipe Thread.
If the item you are importing can use more that one type of Joint or Joint Class, set the Joint Group and Joint Class to SPEC and SPEC. This will allow you to set the Joint Group and Joint Class in the SPEC instead of the Database.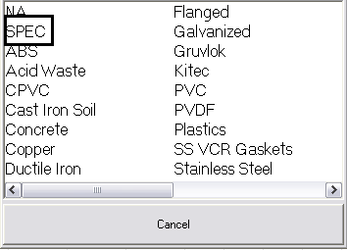
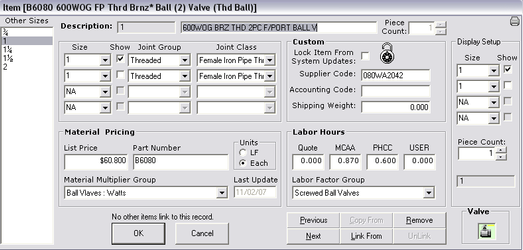
- Change the Labor Group if it already exists in the Labor Groups Table.
The following screen appears.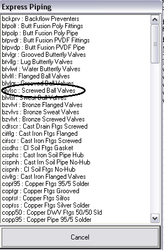
- Select Screwed Ball Valves from the Labor Group List.
- Change the Material Group if there is a group that already exists in the material multipliers group.
The following screen appears.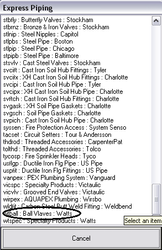
- Select the Ball Valves: Watts from the Material Multipliers list. If you need to create a new material multiplier, click the Edit Material Discount Groups button at the bottom of the screen. Add a material Multiplier as normal and then select it as shown under item 25 above. To add Labor Groups follow the same procedure as above for the material groups but use the Labor Factor Group instead.
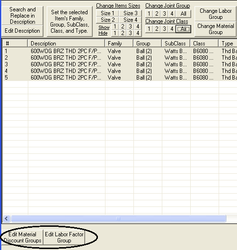
- If needed, you can also set the Labor for each item or you can import items and then use the Edit All and Excel Export functions in the database to add these items.
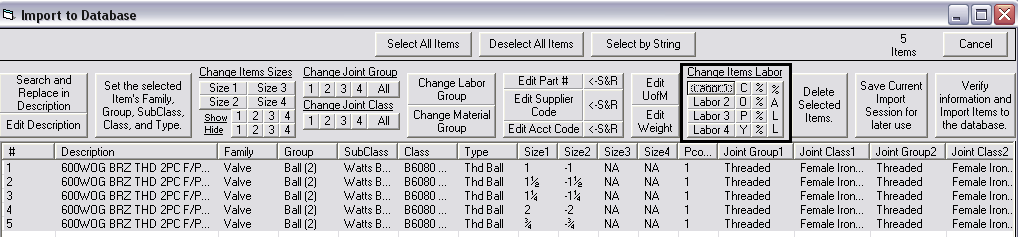
Labor 1 = Quote Labor, Labor 2 = MCAA, Labor 3 = PHCC, and Labor 4 = User - Click Save Current Import Session for later use and save the file to your desktop.
- Click Verify information and Import Items to the database.
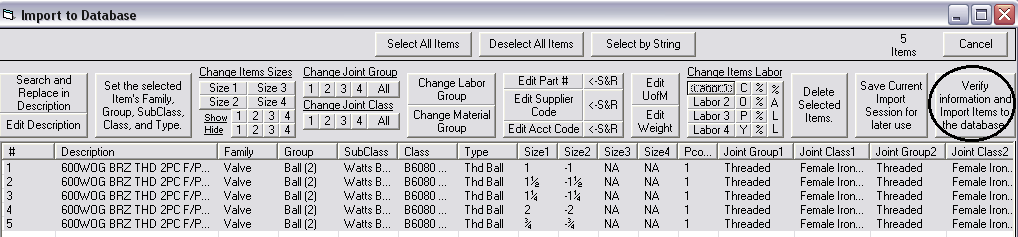
The system asks you the following questions.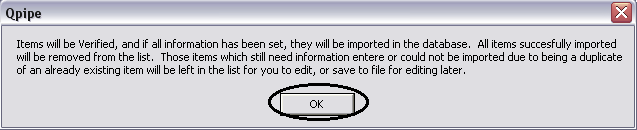
- Click OK. If you have missing information or the system found a duplicate, you will receive the following message.

If you receive this window, go back and make sure you followed all the steps given.
Still having problems? Call 1-800-813-7020 and Technical Support will help you with the import. - Testing the data: Once you have entered all the items, test the data to make sure it is accurate.
- Go into the Database and verify all information.
- Go into a spec and assign the new ball valve.

- Go into a Zone and takeoff the item you added.
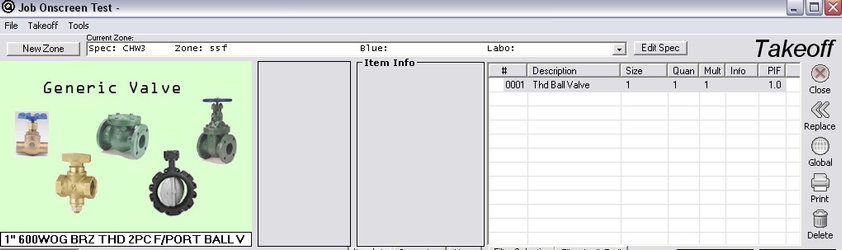
- Run a Calculation with that job and see if the data is accurate.