The Filters menu on the left side of the Project list page lets you apply filtering options to the projects in the list. You can set up a list of favorite filtering options and also incorporate new filters from a shared search. Each time you add or remove a filtering option, the list refreshes with the projects matching your selected options.
This section contains the following topics:
Accessing the Filters menu
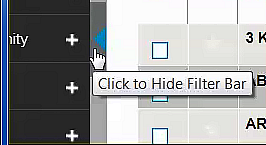
The Filters menu is displayed by default on the left side of the Project list page. You can close or open the menu using the blue arrow on the side of the menu:
Applying filters to the list
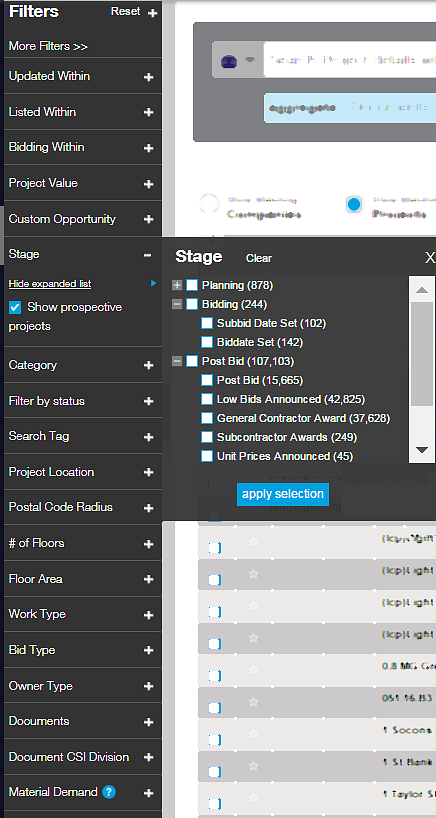
Each time you make a selection from the Filters menu, the results list automatically refreshes with your selections. You can filter the list by a range of criteria, including bidding status, value, stages and category (as shown in the following example with the Stage category expanded):
To apply filters to the list,
- click the plus + sign next to each option to expand the menu
- make your selections or enter values.
Results: With each selection, the project list refreshes with the results matching your filtering options and the total count of projects updates.
Notes:
- To set the menu so that the same filters are used each time, see Customizing your filtering options.
- For a description of each of the filtering categories, see Filters menu descriptions and options.
Customizing your filtering options
You can customize the Filters menu to include only those filtering options that you most frequently use. Your Filters menu settings remain in force until you change them, including logging in and out. You can add filters to a saved filter set to include additional filters. For more information, see Adding filters from a search outside of your filter set.
To customize your filtering options,
- Click More Filters at either the top or bottom of the menu.
- In the menu, select the filters you want, or click All to select all of the filters. Note that clicking All again removes all of the filters:
- In the menu, select the filters you want, or click All to select all of the filters. Note that clicking All removes all of the filters.
Note: All options are selected by default.
- Click Save and Close when you are done.
Result: The Filters menu changes to reflect your selections.
Adding filters from a search outside of your filter set
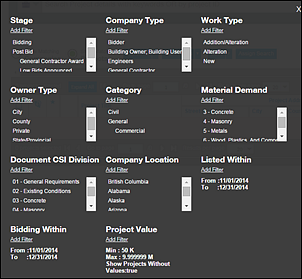
When you run a saved search that includes filters outside of your filter set, the results match the saved search and the message Search includes hidden filters is displayed at the top of the Filters menu. You have the option to both view the additional filters and then add them to your filter set.
- To see the hidden filters, click the message Search includes hidden filters. The filters are displayed by category:
- To add any of the filters to your filter set, click Add Filter below each category name. Repeat this step for each filter category you want to add to your filter list.
Filters menu descriptions and options
The following table describes the Filters menu options that you can use for filtering the projects in the list.
Option | Description | ||||||||
| Clear All + |
Note: This option is only available after you use the Filters menu. | ||||||||
| More Filters | Opens the Add Filters menu where you can set your filtering options. See Customizing your filtering options for more information about this feature. | ||||||||
| Updated Within | Use either the slider bar or the date menu to select the range for the most recent update to the project listing. All date ranges are selected by default. | ||||||||
| Listed Within | Use either the slider bar or the date menu to select the date range of the original project listing. All date ranges are selected by default. | ||||||||
| Bidding Within | Use either the slider bar or the date menu to select by upcoming bid date. All date ranges are selected by default. | ||||||||
| Project Value | Enter either a minimum or maximum dollar value, or both. Select Show projects without value to see projects both with the specified value and projects without a value. | ||||||||
| Stage | Use to filter by project stage and substage, and then click apply selection. All stages are included by default. Note: To include projects that are not fully verified by the ConstructConnect Research Department, select Show prospective projects. | ||||||||
| Category | Select to filter by category, or intended project end-use, and then click apply selection. All categories are selected by default. | ||||||||
Filter by Status | Use to show, hide and exclude certain project types in your results. Note that this option is not available for company results.
| ||||||||
| Search Tag | Use to apply the criteria of tagged searches to the current list of projects displayed on the page. You can apply all the tags shown or select from the list, up to five maximum.
Note: Click Clear to remove all search tag criteria and reset the menu. | ||||||||
| Project Location | Select the project location and then click apply selection. | ||||||||
| Postal Code Radius | Enter the postal code for the project:
| ||||||||
| # of Floors | Use to set the range of floors above and below grade. | ||||||||
| Floor Area | Use to specify the internal floor area of the project:
Note that the system converts to the requested measurement type during the search, but the results always display the unit of measurement in the format native to the project. | ||||||||
| Work Type | Select the work type and then click apply selection. | ||||||||
| Bid Type | Select the bid type and then click apply selection. | ||||||||
| Owner Type | Select the owner type and then click apply selection. | ||||||||
| Documents | Select to include any combination of plans, specs, plan addenda or spec addenda. | ||||||||
| Document CSI Division | Use to filter projects by the CSI Division code specified in the project documents. Click to expand the menu to filter by division and subdivision. Notes:
| ||||||||
| Material Demand | Click to expand the menu to select the CSI MasterFormat materials, and then click apply selection. For company users, the values that can be selected can be restricted by the company administrators. | ||||||||
| Company Type | Select to filter by the type of the company, and then click apply selection. | ||||||||
| Company Location | Select the location for the project either by country, state or province, or county. | ||||||||
| More Filters | Opens the Add Filters menu where you can set your filtering options. See Customizing your filtering options for more information about this feature. |


