After opening the program, the system takes you to the Main Menu.

This is the “center point” for navigating throughout QuoteSoft Pipe. This screen allows you to access the sections of QuoteSoft Pipe. Be sure to watch for new information! Quote Software will send you messages about program updates and other issues through the Main Menu viewer.
Database
The Database has over 70,000 unique items used in the mechanical trade! You can access the Database screen two ways: click  from the Main Menu or click
  on the Job List tab. Each item is classified by having a unique Family, Group, Subclass, Class, and optional Type & Accessory genealogy. When you first open the Database screen, only the Family is shown.
 The Database section will take approximately 45 minutes.
Exercise 1: Navigating the Database
- To select a 1/2″ 150# Black Malleable Tee, select Fitting (Family).
- Select Black Malleable (Group).
- Select 150# Black Mall Threaded (Class).
- Select Tee (Type).
- Select ½” (Size).
The following screen is an example of that Family, Group, Class, Type, and Item (Size).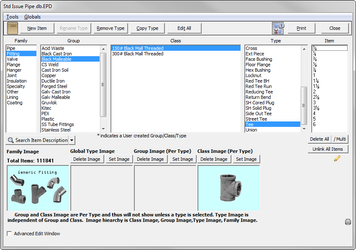
All database items are accessed in this manner, although some may require a different number of selections. After selecting the Size (Item), the Item detail screen appears. This contains all the information about the item. Notice the picture of the Tee in the above screen. It has three joints. You can set the material for the joint (Joint Group) and the type of joint (Joint Class) on the Item screen.
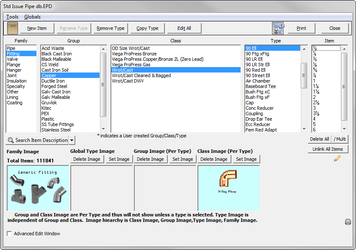
Now you will look at a Copper Fitting that is a little different. - Select
 on the Black Malleable Fitting screen.
 - On the Database screen, select the Family, Group, Class, Type, and Item to match the screen below.
This is an Item screen for an Elbow. There are two joints. Notice that the fields say “SPEC” instead of a designated Joint Group and Joint Class. This means the end treatment will come from the Spec during report time (instead of looking here for the end treatment). You'll assign a Joint Group and Joint Class at the time when you build your Spec.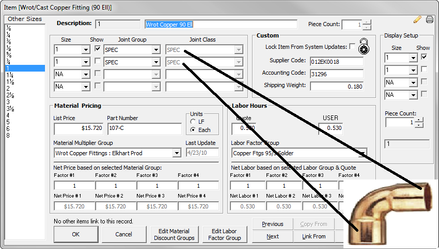
- Select on the Wrot Copper Elbow screen.
- Select 150# Black Malleable Tee (do not select the Item (Size) yet).
- Select the
 button.
Searching for Items
There is a quick way to find items in the database. It’s called  .
.
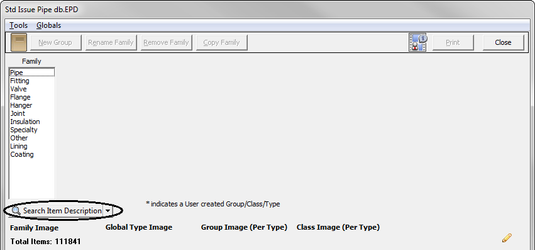
When you click the arrow to the right of Search Item Description, a pick list appears. You can search for: Item Description, Supplier Code, Part Number, Accounting Code, Material Group, Labor Group, or Group/Class Description. When you select one of these items, a screen appears asking for the text you want to search for:
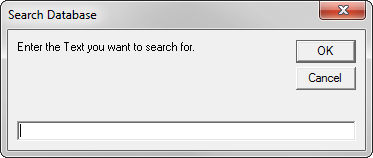
Type the text and click  . The computer searches the database for your icon.
Using Edit All
The Edit All tool is one way Quote Software made it quick and easy for you to set up your system.
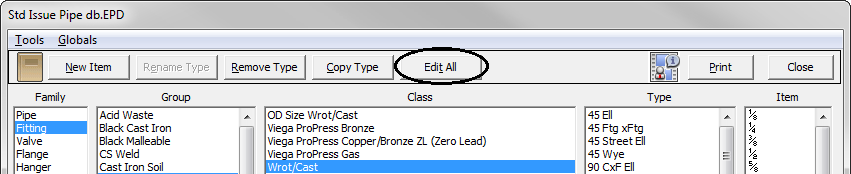
When you selected a screen appears that allows you to change information for all items from a single screen.

You can quickly change the information in each column by clicking on the column header of the information you would like to change. Keep in mind that you cannot change the information in every column. You can only change the columns in circles below.

There are many items in the database that are defaulted to Quoted. Below is an example of a valve that is set to Quoted.
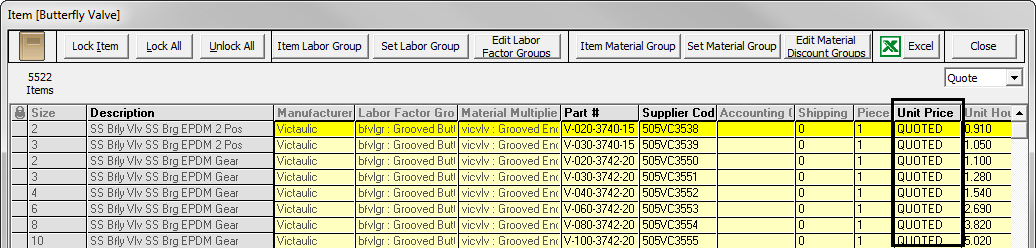
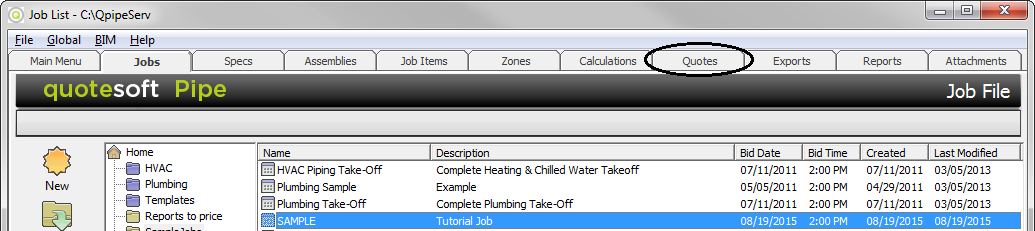
You can see these Quoted items later in the program by selecting the “Quotes” tab.
Exercise 2: Copying Items
If items already exist in the same Family, Group, Class and Type as the new item, then the new item can be copied from one of these as follows:
- Close the “Edit All” screen.
- Click on Pipe (Family), Copper Tube (Group), and Type L Hard (Class).
- Click
 . Confirm by clicking
  .
. - Click
 to accept to Group Copper Tube. A “rename” screen appears.
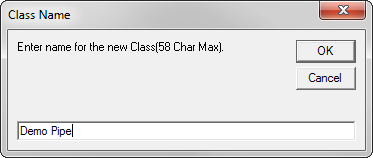
- Type in Demo Pipe.
- Click .
- Click .
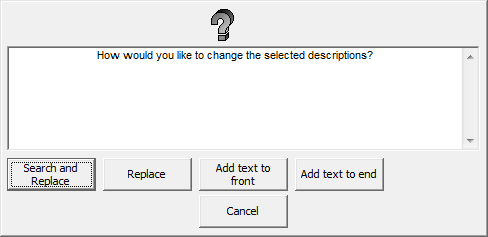
- Click on the Description column header. A screen appears asking what you would like to do. For this example, you will replace the current description with a new description.
- Click
 .
. - Type Demo Pipe.
- Click .

Locking Items
You may want to “lock” items in the database to make sure no one changes prices of items. This is important when you apply Harrison Updates. These “locked” items will not be changed during any kind of update. At the top of the"Item" screen, you will see Lock Item, Lock All, and Unlock All.

Click the appropriate button. If you want to lock a single item, make sure the yellow bar is on the row you would like to lock.
Exercise 3: Exporting Items to Excel

You can export (or import) database items from Excel. Go to the “Edit All” screen for a database item you would like to export or import, click  . A screen appears asking if you would like to import or export:

If you select Export, the data is transferred directly to an Excel workbook.
Practice on Your Own: Finding Items
Find the following items in the database and write on the line the Window where you found the item.
Sleeves – Family: _____________________________________________________________
Check Valve with a Quoted List Price – Subclass:____________________________________
Excavation – Family: __________________________________________________________
Sand Bedding – Group: ________________________________________________________
Victaulic Style 07 Coupling – Group: _____________________________________________
Copper Pull Tee – Subclass: _____________________________________________________
Standard Weld-O-Let – Group: __________________________________________________
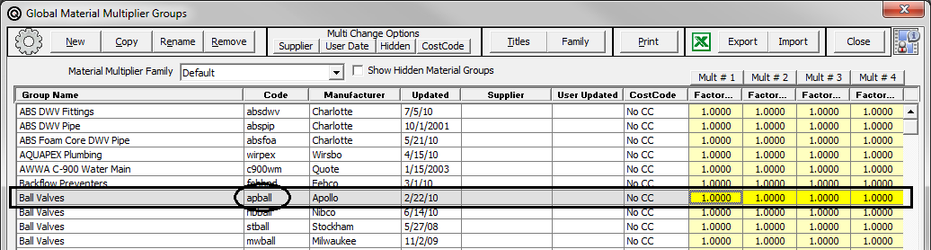
Material Multipliers
In the system, you enter different multipliers for large jobs, small jobs, out-of-town jobs, change orders, etc. Upon receipt of your system, all multipliers are 1.0. It is your responsibility to find and enter the appropriate multipliers to reflect the market conditions for your firm.
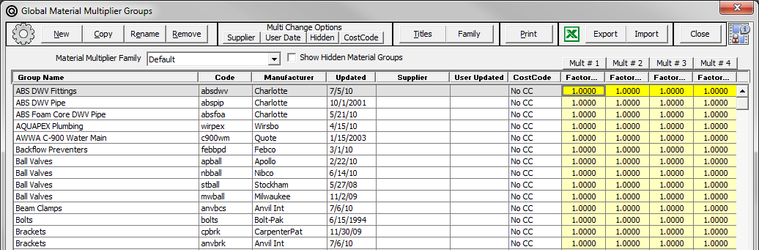
You can access the Material Multipliers screen by clicking  from the Main Menu.
These files store the Multipliers and are set up by Group information. You will be instructed how to store the Multipliers and which Multipliers are used for each Pipe, Fitting, Valve, Flange, Hanger, Joint and Specialty item.
NOTE: This is an important tool to make more money on your change orders.
The Material/Labor Multipliers section will take approximately 30 minutes.
Exercise 4: Hiding Items
You can make your screen more manageable by hiding multipliers you don’t need OR if there is a discount group you’ll never use.
- Select the multiplier you would like to hide and then select
 .
.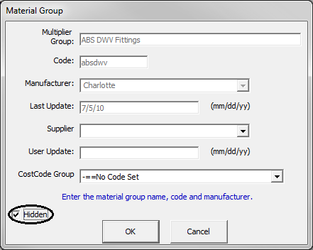
- Select the box next to Hidden.
- Select . The item “disappears”.
- You can view the hidden items by selecting Show Hidden Material Groups from the top of the screen.

Exercise 5: Working with Your Supplier
You can email your list to your supplier and they can help you populate your multipliers. First sort your manufacturers so they are grouped together; then export the file to an Excel document. Your supplier can open the document in Excel.
- Click on the column header
 . The manufacturer column sorts so manufacturers are grouped together.
 - Select
 . A screen appears asking what you would like to Export.
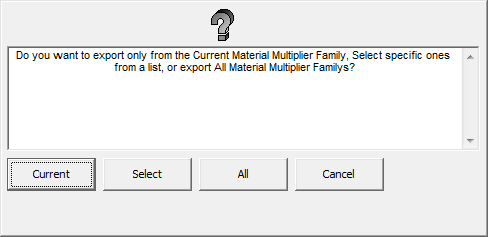
- Select the option you would like. Most likely, you'll select specific multipliers to export to Excel.
- The following screen appears when you select
 .
.
- The following screen appears when you select
 .
.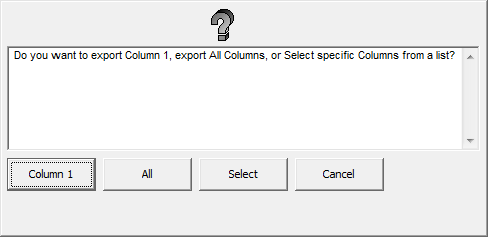
- You would typically export only Column 1; however, you can export whatever you need for your supplier.
- At the end, an Excel file opens containing the multipliers you selected.
- Rename this file and email it to your supplier.
- Your supplier can add multipliers in the Excel file and send it back. Then you can Import it back into the material multipliers page.
Note: The updated column shows the price sheet date. You will want to point this out to your supplier in the e-mail that you send to them. In addition, prior to exporting this to Excel, you will want to make sure you complete a download from Harrison and apply the file to your Quote Software Database. If a manufacturers change their list price, it will show in the price sheet date column.
QUESTION:
Most items in our database have a list price in them. Harrison has pricing for steel pipe in their download file. Is this a list price?
ANSWER: __________________________________________________________________________________________________________________________________________________________________________________________
If an item doesn’t have price in our system and is marked with a “Q”, what does this mean?
How do you know if you have selected a valve in the database that is Quoted?
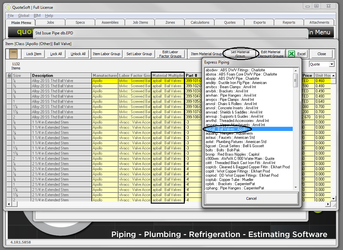
Assigning the Material Multipliers to Database Items
You can change the material multiplier group by going to the Database screen. Just remember to have your multiplier group built first before going into the database to make changes. At the Edit All screen, select  and search through the pick list to the one multiplier group you want to assign.
Database Screen
Exercise 6: Renaming Column Headings
Rename your titles at the top of a column to make it specific to what the multipliers applies to.
- Click on Titles.
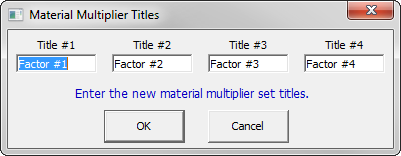
- Change the title to what you'd like and then click . For this exercise, change Title #1 to Plan/Spec; Title #2 to Design/Bld, Title #3 to Change Ord; and Title #4 to List.
Exercise 7: Working with Your Columns
You can quickly fill in your columns with data you need.
- Click the top of the column (Mult #1, Mult #2, etc.) you would like to edit. The system asks what you would like to do with the data in the column.
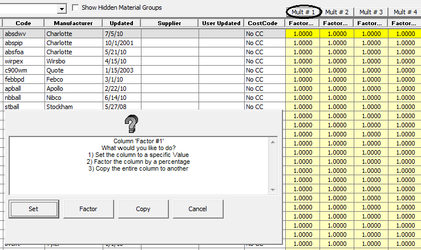
- Select the appropriate button to complete the task you would like to do.
NOTE: You can use a combination of commands. You can enter your multipliers in either manually or from “import” once you receive your multipliers back from your supplier. You now have the three other columns to use. Ideas for the use of these additional column headings will be pointed out in the following exercise. With the above utility, you can copy information from column 1 to any other column and then use the factor column to change the column value.
Exercise 8: Adding a New Material Multiplier Group
Earlier in the workbook, you added Demo Pipe to the database. If you were to use that Demo Pipe in Takeoff, you would still be getting material pricing from the Class you copied from. You need to add a new Material Multiplier Group for Demo Pipe. Then you will go back into the Database and assign this new multiplier to the Demo Pipe.
- Click New.
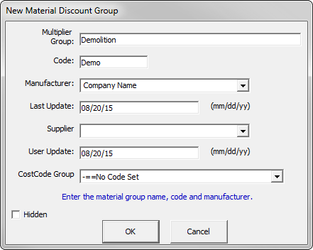
- For Multiplier Group, type Demolition.
- Code: Demo
- Manufacturer: Your company name
- Last Update: Defaults to today’s date
- Supplier: Not necessary to fill out
- User Update: Defaults to today’s date
- Click OK.
- Click Close
- Click Yes to Save Changes
- Go to the Demo Pipe you added earlier. (Database, Pipe, Steel, Demo Pipe).
- Click Edit All.
- Click on
 , scroll to Demolition (it’s alphabetical), and select demo:Demolition. The entire Material Multiplier Group column changes.
NOTE: When you do this in your office, you will want to adjust your labor and pricing. If you don't change these columns, the system will use Harrison Pricing since this is what QuoteSoft Pipe is defaulted to. Also note that the Multiplier Group name and Code must be unique.
Labor Factors
You added multipliers to materials in the Material Multiplier Group. You add factors to Labor in the Labor Factor Group.
You can access the Labor Factor Group by clicking  from the Main Menu.
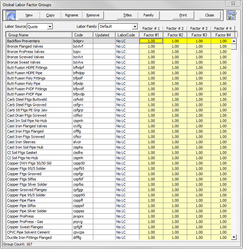
Just like the Material Multiplier Group screen, you can change column titles, change data for the entire column, factor the column values, and copy data from one column to another.
NOTE: Any items that you don’t want to factor the labor on, you will want to leave at 1.00 (e.g. Job Items).