
The Overlay tool allows you to place, or overlay, a separate page from your plans onto the page that you are currently viewing.
1. Select the Overlay button.

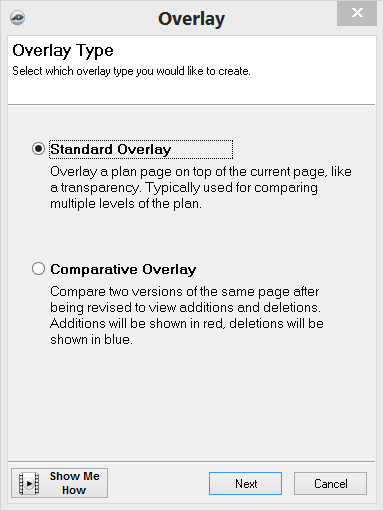
2. Select the type of overlay you want.
Standard Overlay - Places a second page on the current page you are viewing, usually for comparing the two images.
Comparative Overlay - Places a revised plan over the original plan. This will let you view revisions made to the plan. Additions are shown in red, and deletions are shown in blue.
3. Click the Next button to continue.
4. Select the page you want to overlay from the menu. You can select the page by clicking on it, or you can search your job to help find the page.
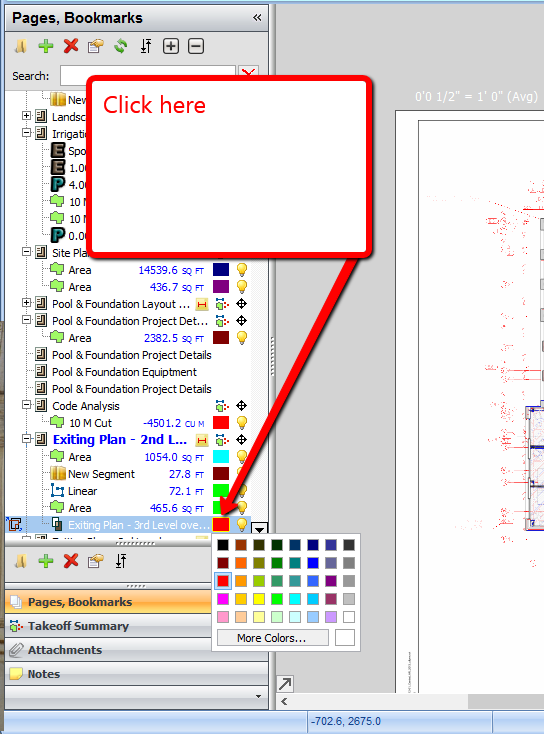
You can also select what color you would like the overlay to be. PlanSwift automatically chooses a color for you; if you want a different color, click on Pages, Bookmarks, click the colored box next to the overlay and then select the color desired.

5. Click Finish to Continue.
This places the overlay on top of your current page. A small window opens asking if you would like to align the overlay; if so, click Yes. This lets you move the overlay to match your current image.
To turn the overlay on or off, simply click the light bulb icon next to its name.
Here's a video that shows how to use the Standard Overlay tool:

And here's one for Comparative Overlay:
