A QuoteSoft Pipe job is comprised of Specs, Zones, Takeoff, Job Items, Reports (Material & Labor), Quotes (Price quotes provided by a supplier), and Worksheets (used for final reports).
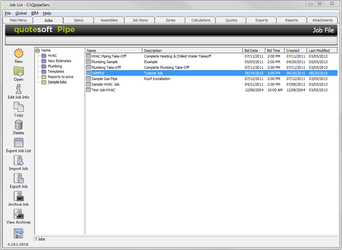
When you select the Jobs tab, the Job File screen appears. This screen allows you to create, modify, and delete jobs. This is another place where you can access the Database.

Note that the Job File screen (and many other screens in the QuoteSoft Pipe system) will display help information in a small pop-up box (e.g. Select a job). If you need a quick reminder of the purpose of a button or control on the screen, simply position the mouse cursor over the area in question and the appropriate text will appear next to the mouse cursor.
Your jobs are stored in folders allowing you to organize your jobs based on your business needs. There are two types of folders: System or User.
When you create a new folder, you will be asked which kind of folder you would like to create. Under normal circumstances, you will want to create User folders that appear at the bottom of the list so that the system and template folders are always readily accessible.
The active (selected) folder is always highlighted and the jobs for that folder are displayed in the Job List to the right.
The following SYSTEM folders are shipped with your software:
Folder containing HVAC Assemblies. QuoteSoft Pipe ships with over 143 HVAC assemblies that are ready-to-use in your takeoffs. These include the hookups for boilers, pumps, coils, steam traps, etc.
Folder containing Plumbing Assemblies. QuoteSoft Pipe ships with over 65 plumbing assemblies that are ready-to-use in your takeoffs. These include lavatories, sinks, water coolers, toilets, water heaters, etc.
Folder containing Template Jobs. These jobs are samples created by Quote Software. You can take them, modify them to match your company standards, and then use them when you create a new job.
To create a new folder, select File > New Folder from the Job List screen.
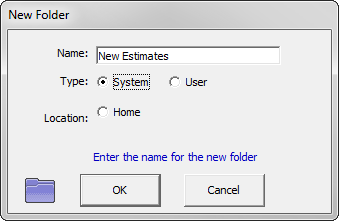
You will be asked to provide a name (up to 16 characters) and a type (System or User).
A folder is removed by selecting File > Delete “Name of Folder.” Note that you MUST delete or move all jobs from the folder before deleting it. This is a safety precaution to prevent accidentally deleting a large portion of a user’s work.
A folder is renamed by selecting File > Rename “Name of Folder” You may change the name or type of a folder.
To move a job to a folder, click on the job name (under Job List), hold down the left mouse button, and drag it over the folder name in the left-hand column. When you have it over the highlighted folder, let go of the mouse button and the job will be moved.
To copy a job to a folder, use the same procedure as moving a job to a folder, but hold down the control key (Ctrl on most keyboards). You will see a small plus sign (+) by the mouse arrow to indicate that the job is being copied, rather than moved.
Before adding a job, make sure the correct folder is selected where you want your new job to reside.
Click  from the Job File screen.
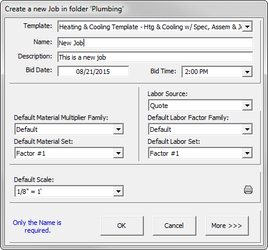
NOTE: Although you can enter all the information in the New Job screen, only the Name is required.
Select a Template from the pulldown menu for your new job. This template could contain specifications, assemblies, and job items that you will need for the new job.
NOTE: You may want to set up a template for change orders and it will default to a different material and labor set.
Enter a Name for the new job, (e.g., JOB00001.)
Enter a meaningful Description for the job (e.g. State Office Building Phase 1.) The space for this description will allow up to 50 characters.
Enter a Bid Date and Bid Time for the job.
You can change the scale so it is specific to this job. Click on  .
.
If you select  at the bottom right side of the screen, the New Job screen expands to include additional fields.
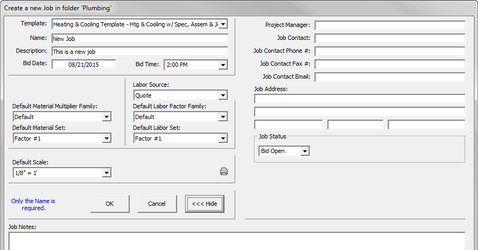
This screen is the same as a New Job screen; however, it’s wider. You can enter all your new job information, including Project Manager’s name, Job Contact’s name/phone/fax/email, and the Job Address. You can also type in Job Notes at this screen. If you click  , the New Job screen closes and the system automatically takes you to the Spec screen (discussed later in the Reference Manual). Specs are used to define pipe, fittings, valves, etc. for a particular piping system. The system takes you to the Spec screen because that is the next logical step after setting up a job. If you click
  , the expanded New Job screen compresses and goes back to the original New Job screen.
To continue learning more about Jobs, exit the Spec screen and return to the Job File screen by clicking on the Jobs tab.
To change the information for an existing job, select that job name with the mouse and click  . The existing job information is opened. Change the information as needed and then click
  .
.
Copying jobs is helpful if you have change orders or you’d like to make modifications without changing the original job. You can compare your changes against the new and the old job. To make a copy of a job, select that job name and click  . Enter the new Name and Description fields and click
  .
.
To remove a job from the Job File screen, select that job name and click  . Note that all data associated with the job will be permanently removed. QuoteSoft Pipe requests that you confirm the removal.
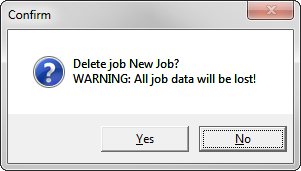
Note that the Confirm screen is a safety mechanism displayed throughout the QuoteSoft Pipe system whenever there is a risk that you could lose critical data. To confirm your request, click  . To cancel the request, click
  .
.
To print the current Job File screen, click  . A list of jobs and related information is printed.
If you would like to transfer jobs from one computer to another, use the Export Job and Import Job commands. Highlight the job you would like to export and select  . The system brings up a browse screen where you can select where you would like the exported job to go. At this time, you can select your portable drive, e.g. thumb drive, or select a directory to put it where you can later use Windows Explorer to back up your job onto a portable drive.
When you are ready to import a job into QuoteSoft Pipe from another computer, use the Import Job command. Either use Windows Explorer to copy the job from a portable drive to your hard drive OR import directly from your portable drive. Select  . QuoteSoft Pipe opens a screen where you can select the folder/file you would like to import. The system tells you when the import is complete.
NOTE: Keep in mind that when you import, the system does not delete the job from the original location. We recommend that you delete the imported job from the portable drive so any confusion is eliminated.
Archive a job when you are done working with the job. Highlight the job you would like to archive. Select  .
.
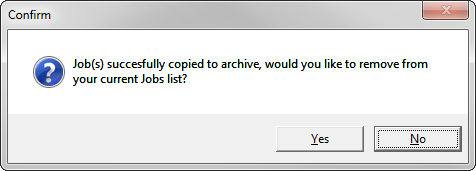
You can retrieve the job using the Import Job button. Browse to the QpipeServ\JobArchive\ to locate it. If you archive a job from the Home directory it will be in JobArchive. If you archive a job from within a subfolder, e.g. Temp, it will be in JobArchive\Temp\.