To open any link in a new tab, preserving your position in the current article, just hold down the <CTRL> key on your keyboard before clicking the link or click using your mouse wheel.
Export by Page Plugin
Challenge
You’ve completed your takeoff but you want to analyze each Page's individual results, versus the cumulative total shown on in the Estimating screens.
Overview
The allows you to export digitizer items to an Excel file, a CSV file, or to the Windows Clipboard. This is particularly handy because displaying the takeoffs individually allows for a better assessment of takeoffs than is allowed by the Estimating screen, which combines all takeoffs of the same type together. The instructions below will guide new users through how to use the Export to Excel by Page Plugin using the new sample plans released with PlanSwift 10.2. The instructions below will guide new users through the basics of using the Export to Excel Plugin.
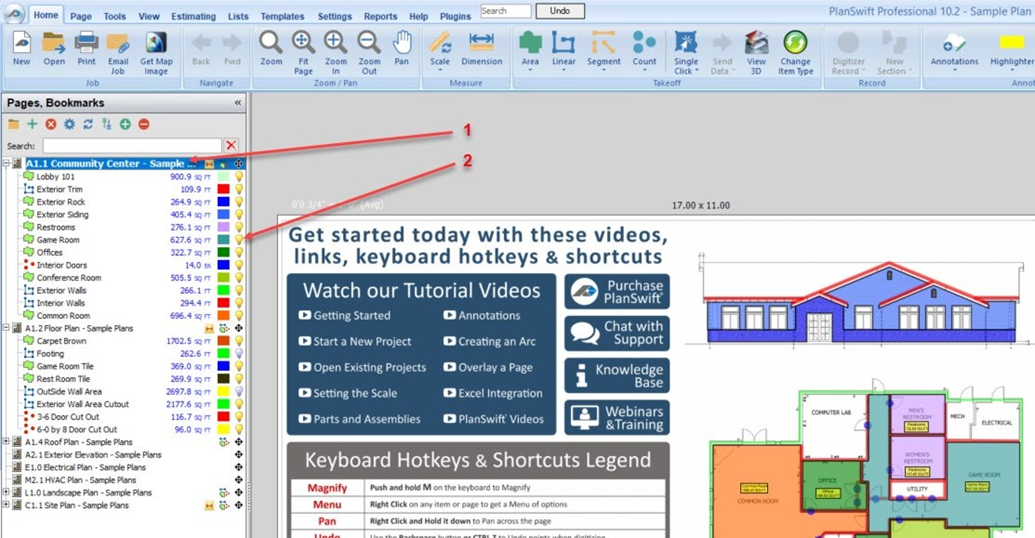
The Export to Excel by Page Plugin adds a button to the Home Tab ribbon bar.

How To Use the Export by Page Plugin
Notes
First, you'll need to download and install your Plugin, see: Downloading, Installing, and Uninstalling a Plugin or Starter Pack
To export to Excel, you must have a full version of Microsoft Excel™ installed and licensed.
Once your new Plugin is installed, follow the steps below to use it.
We encourage you to purchase a training package for accelerated learning and faster customization, see: https://www.planswift.com/support/personalized-training/ for details on scheduling training.
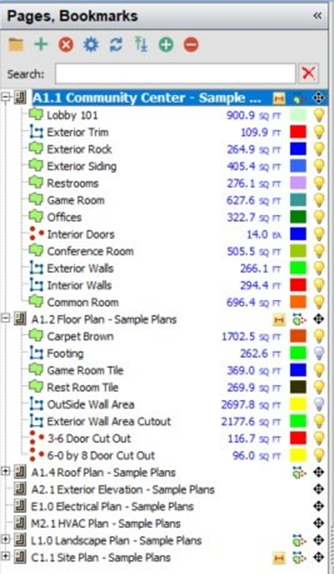
The Export by Page Plugin tool allows you to export takeoffs from the Pages, Bookmarks window into to an Excel file, to a CSV file, or to the Clipboard.
To create this export,
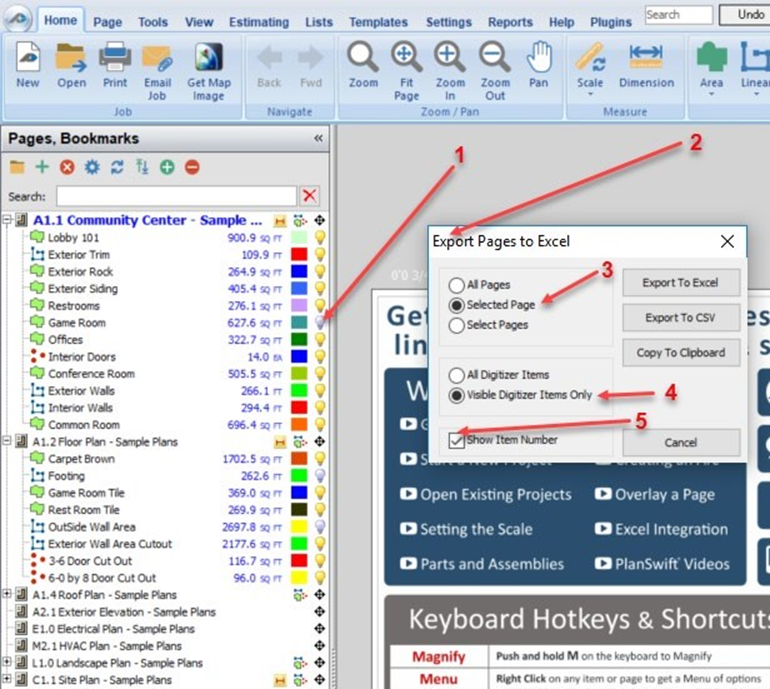
Click on the Export By Page button in the ribbon bar, this opens the Export Pages to Excel window.
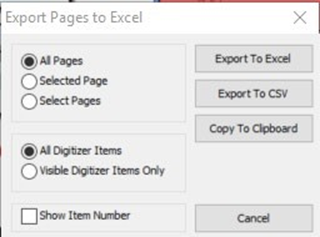
The Export to Excel, Export To CSV, and Copy To Clipboard options allow takeoffs to be exported to an Excel file, to a CSV formatted file, or to the Windows Clipboard, respectively. When exporting to an Excel file, Excel opens automatically.
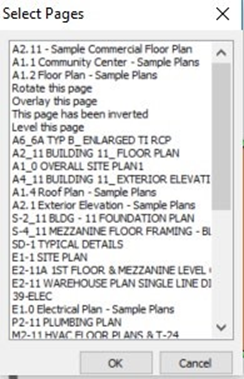
The options in the top left box in the Export Pages to Excel window (Figure 4) allow you to select All Pages, Selected Page, or Select Pages. Selecting All Pages exports takeoffs for all pages in the Pages, Booksmarks window (Figure 3). Selecting Selected Page exports takeoffs only for the selected page in the Pages,Booksmarks window. Selecting Select Pages opens the Select Pages window, allowing you to select one or more pages to export from (use Shift or Ctrl keys to select a range of items or multiple items).
The options in the second box down in the Export Pages to Excel window (Figure 4) allow you to select whether all digitizer items are to be exported or to elect not to export those that have been hidden (yellow lightbulb icons clicked on so that they are grayed out).
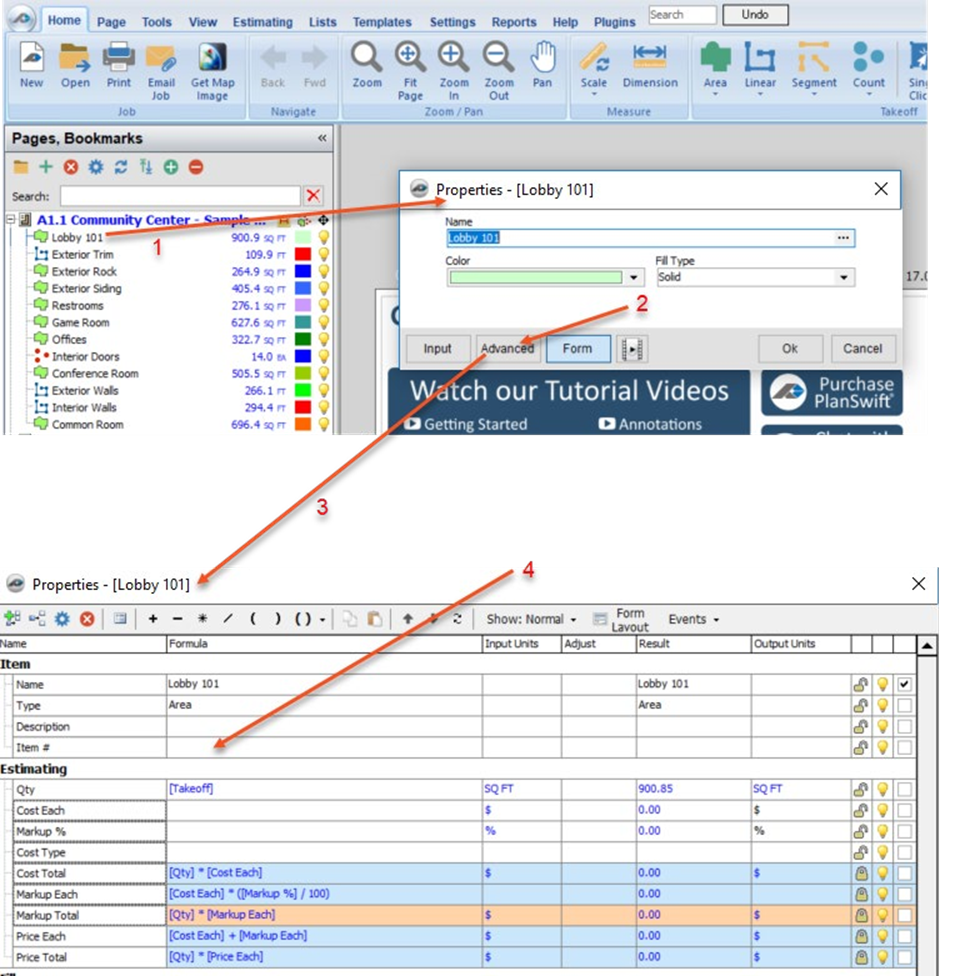
The option in the third box down allows for selection of Show Item Number. Selecting this adds an Item Number column when the takeoffs are exported. The Item #’s may be added in the takeoff’s advanced properties window (Figure 6), which is seen by double-clicking a takeoff item (in this case “Lobby 101”, see arrow 1 of Figure 6), and then clicking on Advanced (arrow 2 of Figure 6). This opens the advanced Properties window for “Lobby 101” (arrow 3 of Figure 6). The item number may be entered in the Formula column on the Item # row (arrow 4 of Figure 6).
As an example, click on the yellow bulb for the “Game Room” takeoff in the A1.1
Community Center - Sample (arrow 2 of Figure 7). Then click on the A1.1 Community Center - Sample (arrow 1 of Figure 7). This selects the A1.1 sample plan and will hide the “Game Room” takeoff from the exported results.
Click on the Export By Page icon (see Figure 2) to open the Export Pages to Excel window (arrow 2 of Figure 8). Notice at arrow 1 of Figure 8 that the “Game Room” takeoff has a grayed-out lightbulb.
Click on Selected Page (arrow 3 of Figure 8). Click on Visible Digitizer Items Only (arrow 4 of Figure 8). And click on Show Item Number (arrow 5 of Figure 8). Finally click on Export to Excel (arrow 6 of Figure 8). This will now export the takeoffs to Excel (Figure 9).
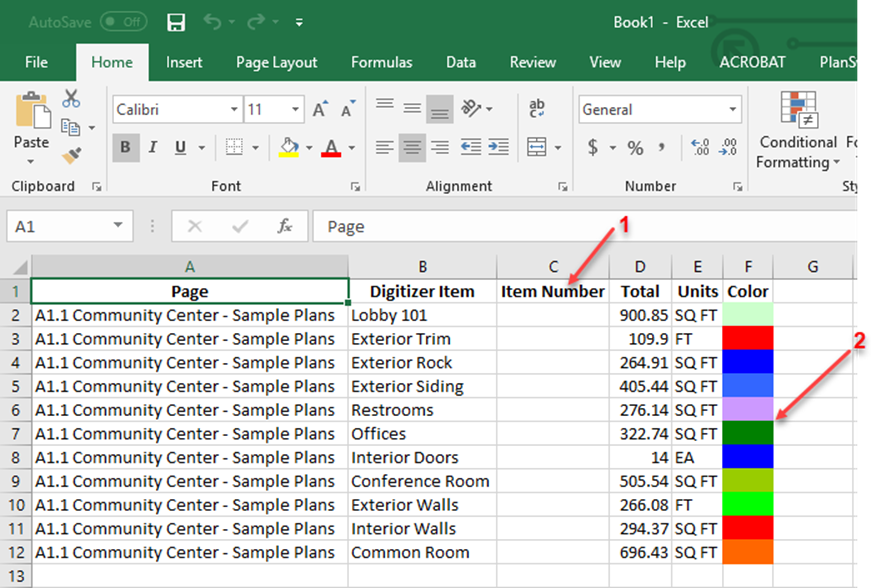
Notice at arrow 2 of Figure 9 that the “Game Room” is not included since its display was turned off and Visible Digitizer Items Only was selected. Notice also that the Item Number column (arrow 1 of Figure 9) is visible because the Show Item Number checkbox was selected. Notice too that only sample plan A1.1 takeoffs are shown because it was the only plan selected and because Selected Page was selected.
If you had clicked on Copy To Clipboard instead of Export to Excel, you could then start an application such as Excel or Word and paste the contents of the Clipboard into that application.
In the exported Excel file, the columns include column A, Page, which is the name of the sample plan page in this case; column B, Digitizer Item, which is the name of the takeoff; column C, Item Number, which contains the item number if Show Item Number was selected when exporting; column D, the takeoff unit value; column E, the Units; and column F, the color of the takeoff.
FAQ
Question: I’ve read this user guide, and I still have questions. What do I do?
Answer: PlanSwift recommends that you purchase a training package. We highly recommend new users purchase a training package, because training is customized to each user. We offer one-on-one training and classroom training. Contact PlanSwift® Training Department Training-ops@ConstructConnect.com.
Question: Can I modify the columns that will be exported to Excel?
Answer: No. However, the Item Number column is the only column that can be included or excluded when you export by selecting or not selecting the Show Item Number checkbox in the Export Pages to Excel window.
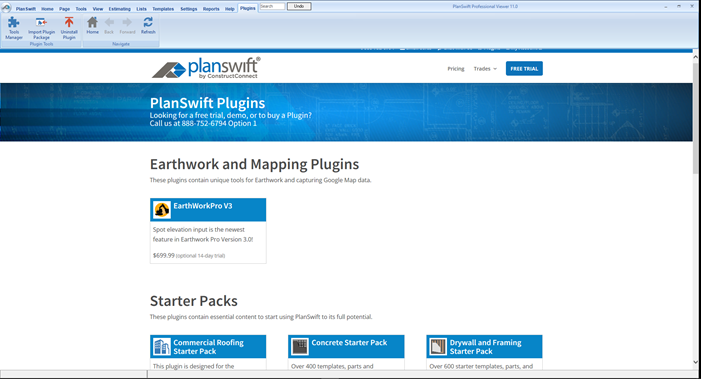
More Plugins and Starter Packs
Information on Plugins and Starter Packs is available directly on the Plugins Tab in PlanSwift...
If you encounter technical difficulty, consult this guide (including the FAQ section of this user manual) or contact the technical support department at:
PlanSwift® Technical Support support@PlanSwift.com
1-888-752-6794 ext. 2
PlanSwift also offers additional training. For training options, contact the training department at:
PlanSwift® Training Department Training-ops@ConstructConnect.com
Copyright 2025 ConstructConnect