To open any link in a new tab, preserving your position in the current article, just hold down the <CTRL> key on your keyboard before clicking the link or click using your mouse wheel.
How To: Modify Labeled Count Tool
This How To guide describes an easy way to modify the Label Count Tool so that you can set the text height of the Labels on the Labeled Count Launch Property window.
CAUTION: you will be modifying types, as well as scripts for this, so if you change anything else besides exactly what is shown, you could potentially break your program. This guide is intended for those familiar with types and who have basic knowledge of software.
1. The Types tab in the Templates screen must be visible to proceed. If you do not already have it showing, here's how to access it: Click Settings -> Click Interface -> Click Show Types Tab in Template Screen.
2. Click on the Types tab in the Templates window.
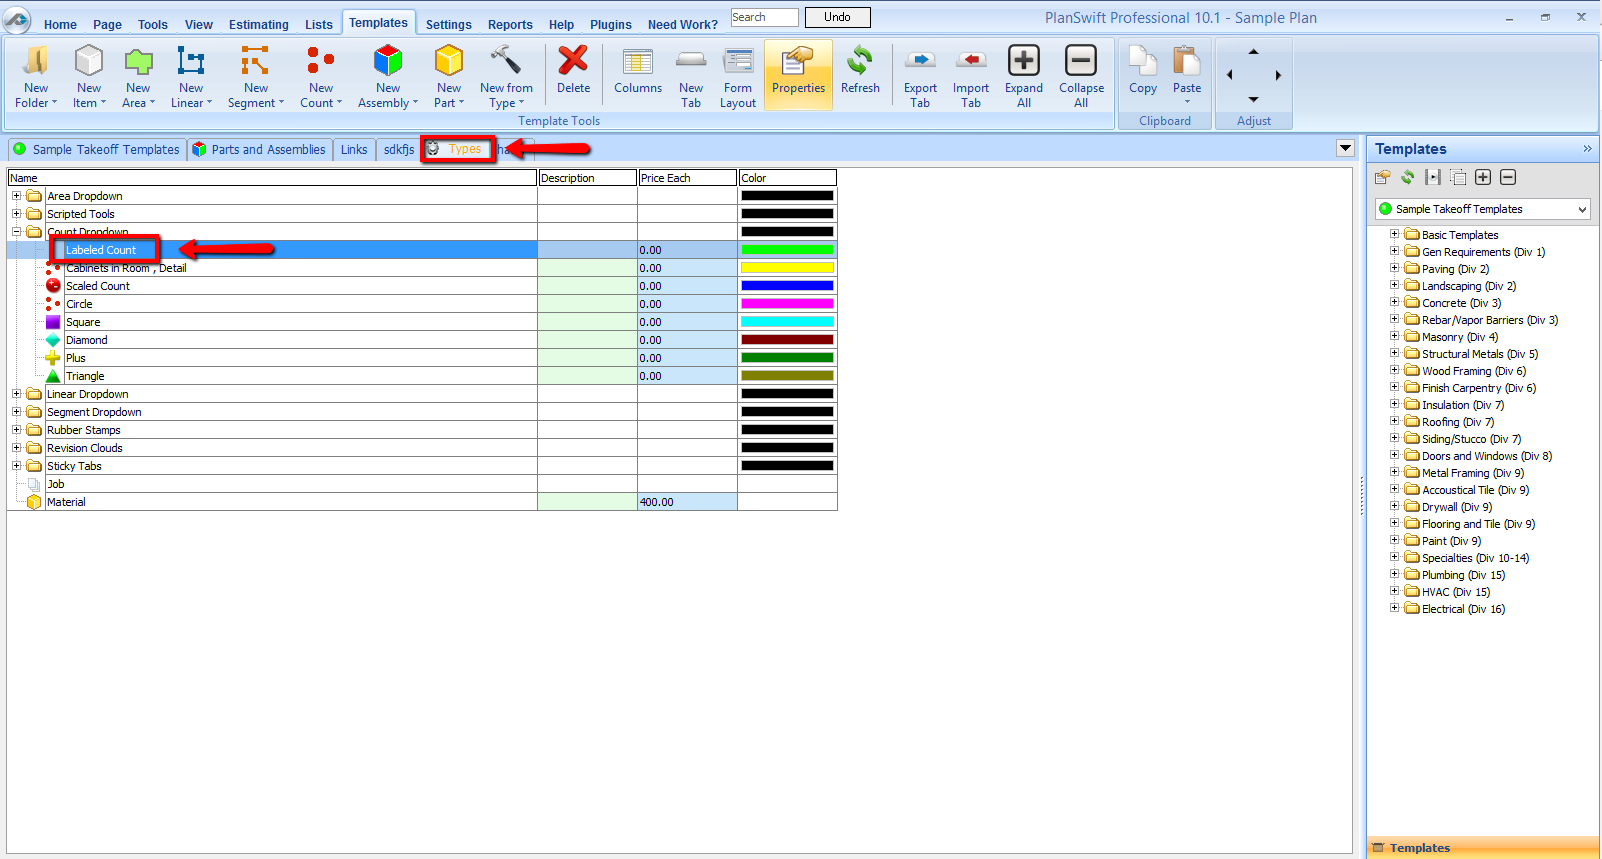
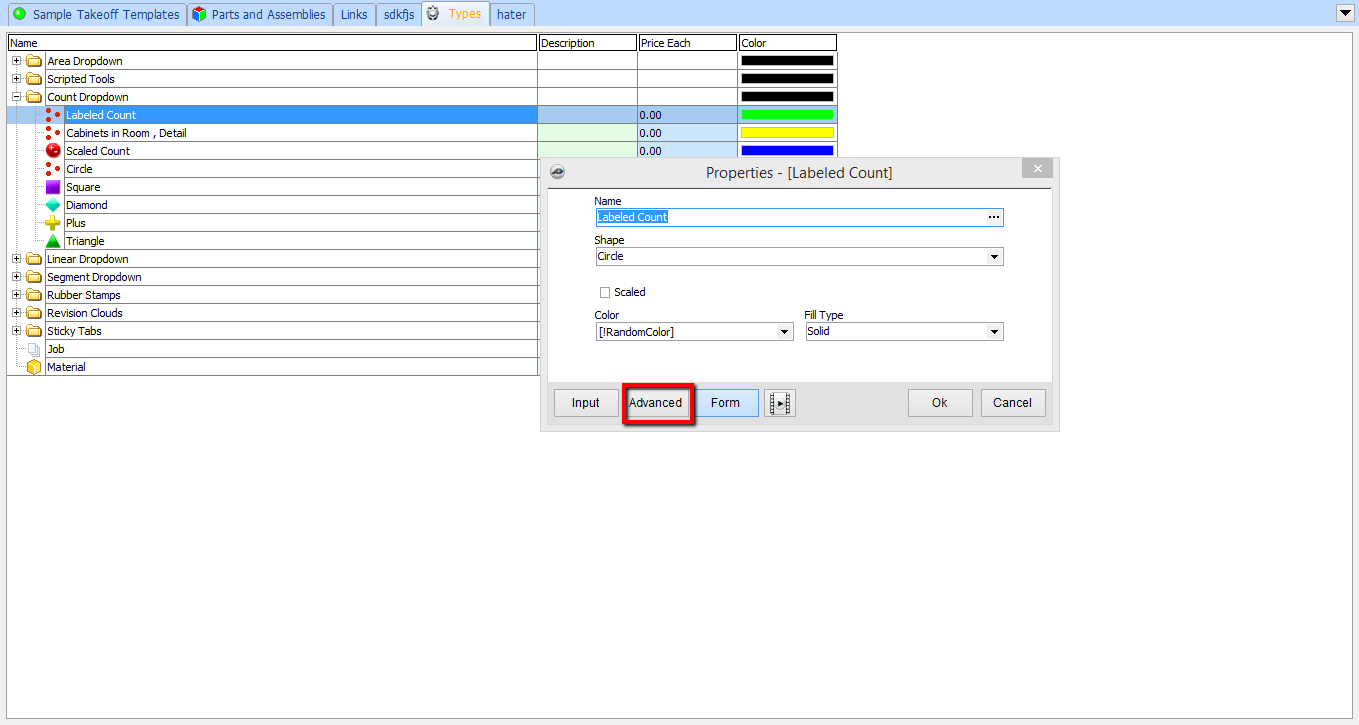
3. In the Types tab, locate the Count Dropdown and right-click on Labeled Count; select Properties, then select Advanced.
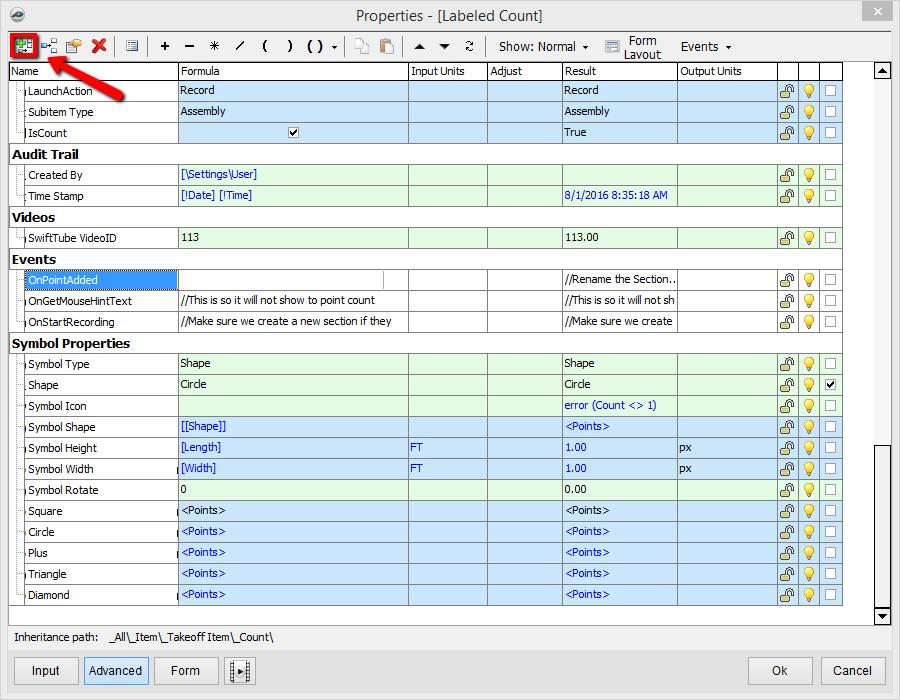
4. In the Advanced window, click the Add New Property (+) button.
5. In the New Property window, you will need to name the new property Note Text Size (the reason for this is to align it exactly with the script we are going to modify); you then need to add it to the Estimating group and check the Input check box.
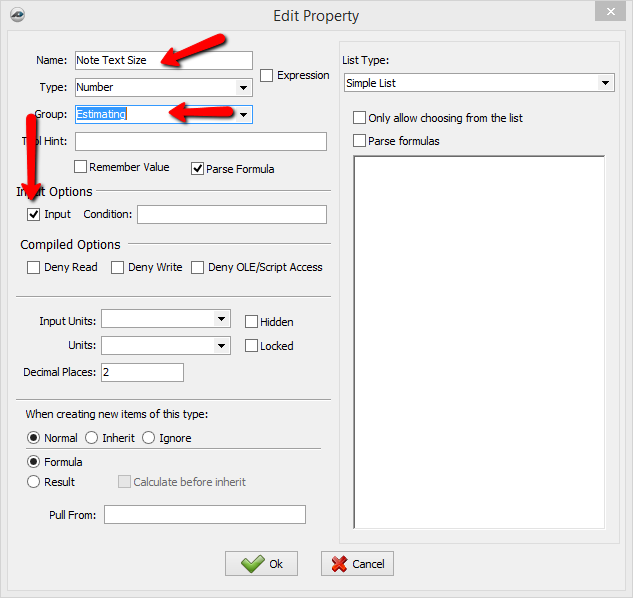
6. Click OK.
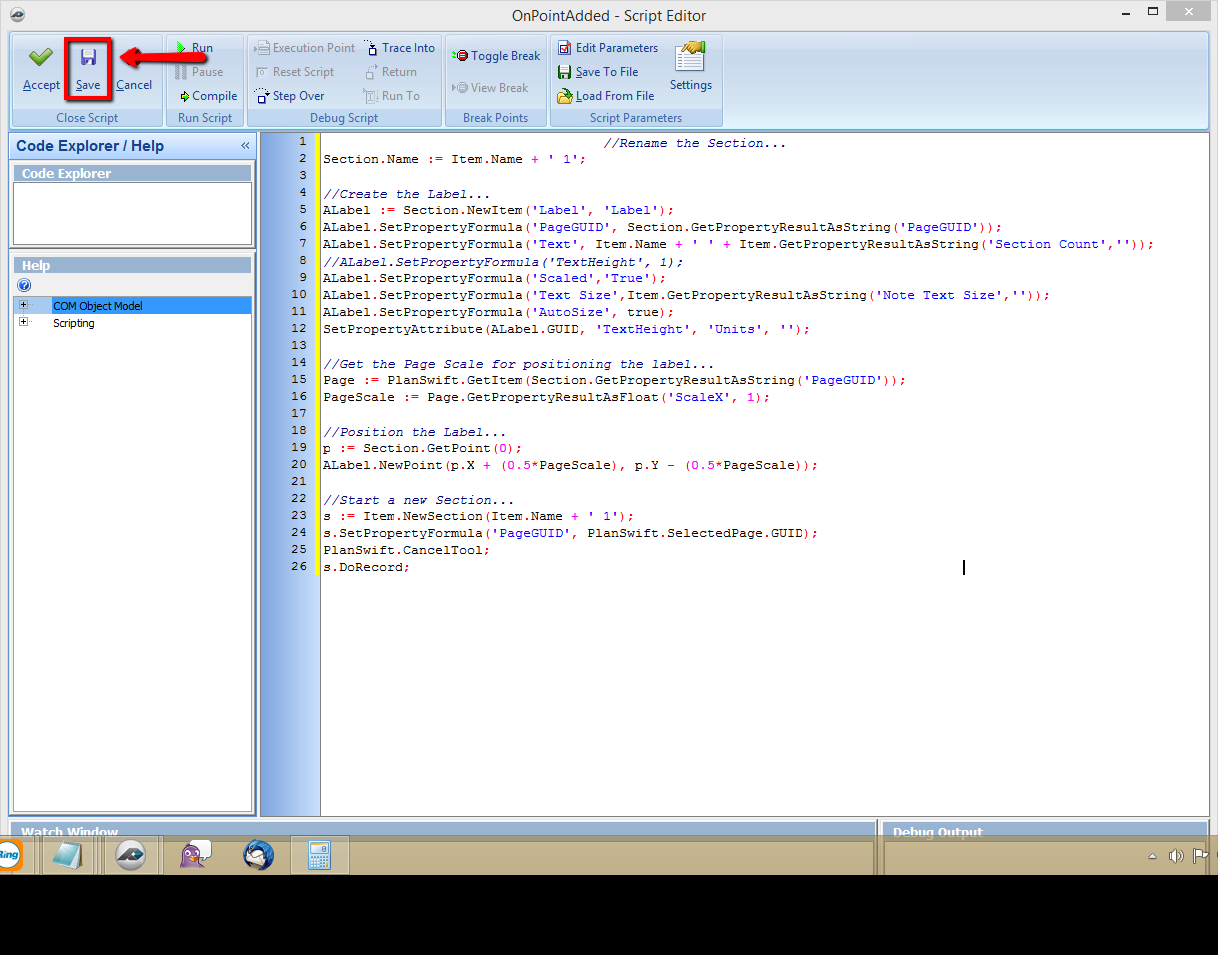
7. Scroll to the bottom of the Properties List and locate the property OnPointAdded.
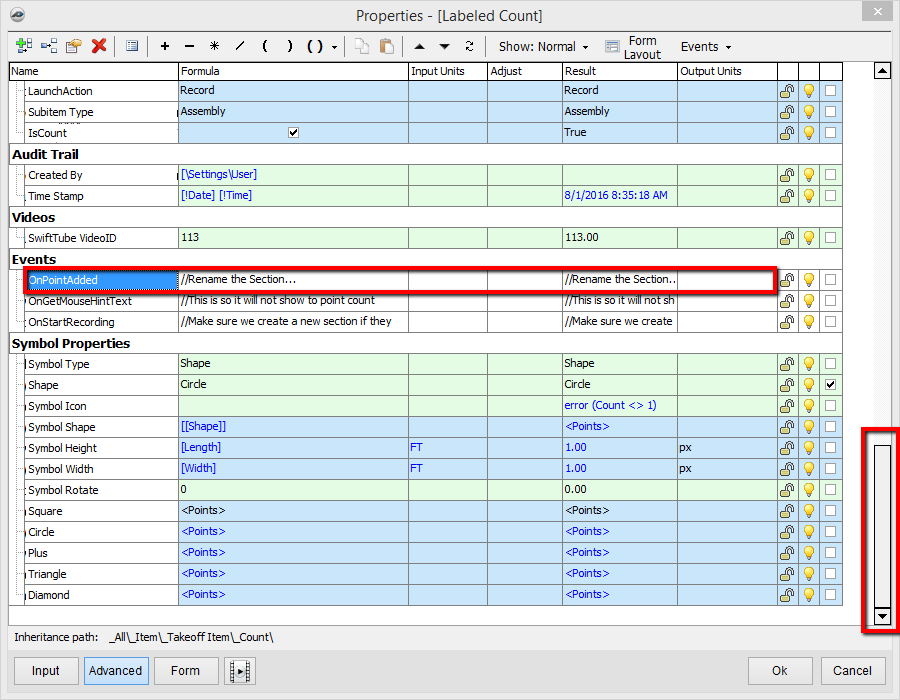
8. If you click on the Formula box for the OnPointAdded property, a box will appear called Edit (the Edit box is not shown here, but it will appear). Click on Edit.
9. A script editor will pop up, sometimes in the background (either click on the PlanSwift Icon on your taskbar to bring the script editor to the front or just minimize the PlanSwift window).
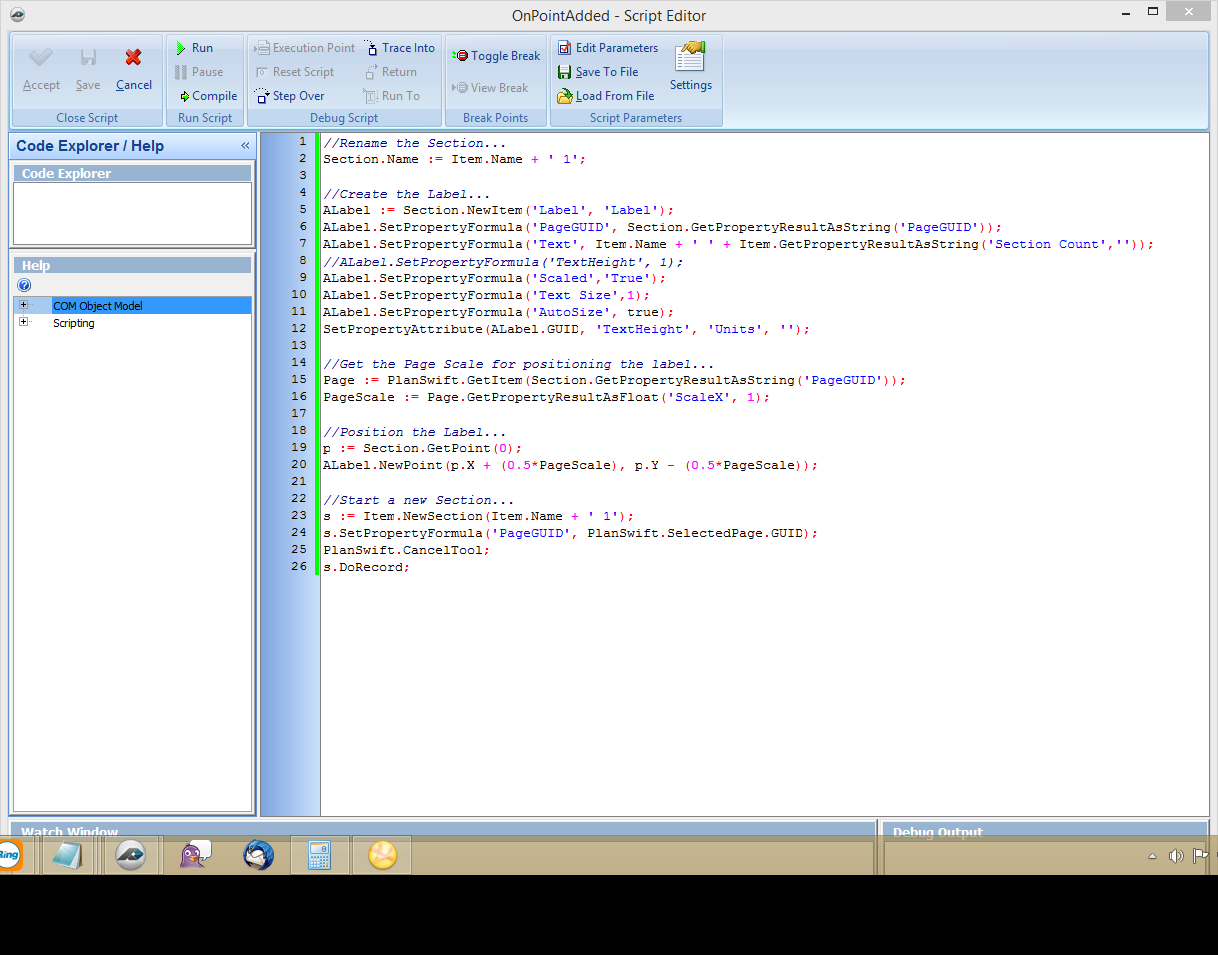
10. Now all you need to do is replace that script with this one: it's nearly identical, with a minor change on Line 10 where it says ('Text Size',1). We are changing that line to ('Text Size',Item.GetPropertyResultAsString('Note Text Size','')) that will allow the script to pull from that new property we created. Then you need to click Save at the top and close the script.
.png?version=1&modificationDate=1569603315534&cacheVersion=1&api=v2)
11. Now go to the Home tab and set your new Note Text Size property to the DPI you want. For example, most pages are converted at 200 DPI, so if you want your text box to be one-inch characters, you would set the note text size to 50.
Copyright 2023 ConstructConnect