Backup and Restore QuoteSoft "Duct" Database
Generalized instructions for performing a SQL Backup and Restore as well as copying the necessary file folders are laid out below. Please consult with a QuoteSoft Product Specialist for specific needs.
This process is used for:
- Moving database and files from one server to another
- Creating backups for offsite storage
- Creating backups for another location to have the same start up data
I. DATABASE BACKUP
- Launch “Microsoft SQL Management Studio” from your start menu.
- Connect to the appropriate instance of the Microsoft SQL Server Database Engine (MachineName\QUOTESOFT).
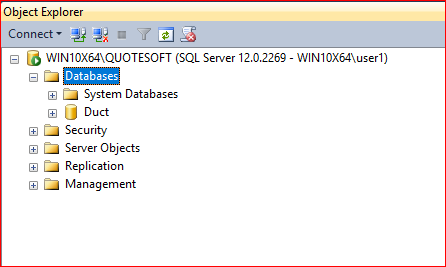
- In Object Explorer, click the server name to expand the server tree.
- Expand Databases
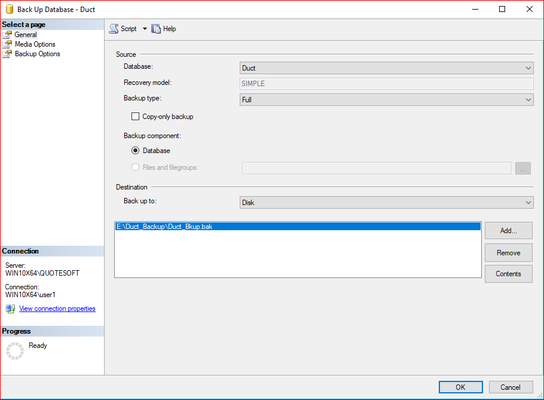
- Right-click the Duct database, point to Tasks, and then click Back Up. The Back Up Database dialog box appear.
- Under Source, in the Database box, verify the database name of Duct is shown
- In the Backup type list box, select Full.
- Add a destination folder and file name for the backup
- Extensions .bak or .trn are suggested
- Click “OK” to perform the backup.
- If desired, move the new backup file to another location/device for safe keeping.
For more information on backing up a SQL database:
https://docs.microsoft.com/en-us/previous-versions/sql/sql-server-2005/ms187510(v%3dsql.90)
II. BACKUP SERVER FILES
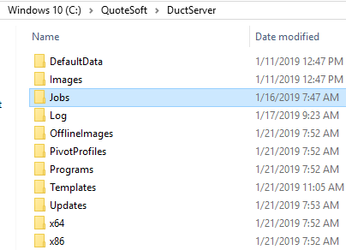
- Using windows explorer, browse to the folder that the server was installed to. Default is: “C:\Quotesoft\DuctServer”
- Two folders are needed for backup:
- Jobs folder (stores plan files and saved reports)
- Open the Images folder, copy the Catalog folder (stores custom catalog images used within the Duct program)
- Typical suggestion is to zip the Jobs and Catalog Images folder together

III. RESTORING DUCT
- Install Duct on the system (Same version as what was backed up)
RESTORE THE DATABASE
- Launch “Microsoft SQL Management Studio” from your start menu.
- Connect to the appropriate instance of the Microsoft SQL Server Database Engine (MachineName\QUOTESOFT).
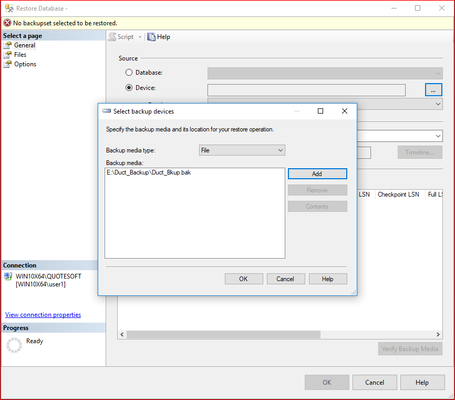
- Right-click DATABASES, point to Tasks, and then click Restore Database. The Restore Database dialog box appears.
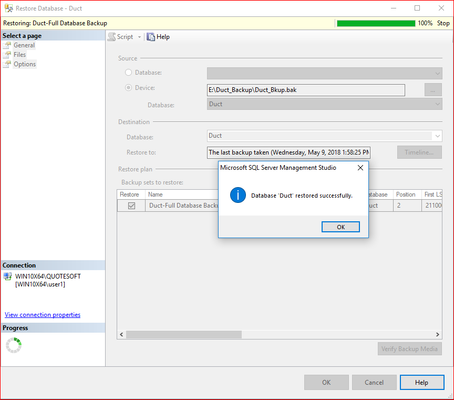
- In the Restore Database Dialog box, Select “Device” then click the browse button (...) to select your backup file.
- Click “OK” to begin the restoration process.
For more information about restoring a SQL database:
https://docs.microsoft.com/en-us/previous-versions/sql/sql-server-2005/ms177429(v=sql.90)
IV. RESTORE THE SERVER FILES
- Using windows explorer, browse to the folder that the server was installed to. Default is:“C:\Quotesoft\DuctServer”
- Jobs Folder
- If there is a jobs folder, it must be deleted before placing the backed up folder in its place
- Catalog Images
- Open the C:\QuoteSoft\DuctServer\Images folder and delete the Catalog folder
- Extract\Copy in the backed up Catalog Images folder
©2022 ConstructConnect, Inc. All rights reserved.