To open any link in a new tab, preserving your position in the current article, just hold down the <CTRL> key on your keyboard before clicking the link or click using your mouse wheel.
PlanSwift and PDFs: Printing, Reprinting, and Blank Pages
What is ‘Printing to PDF’?
Many types of software allow you to either Export File or Save As to different file types (e.g. .docx, .jpeg, .xlsx, .swiftjob, etc.) which can change anything from compatibility with other software to the file format. In the case of a PDF, it has the ability to be exported using the print function when you have a PDF writer installed to your computer. This means that you can take any type of file that has an option to be printed and convert it into a PDF.
When would I need to print to PDF?
The most common reason when using PlanSwift that you are going to want to print to PDF is when you have a file that is already in PDF format but you are unable to load the job converting it into a TIF file as PlanSwift has as a default setting.
Printing to PDF to send the PDF as an email.
Another reason is to send PDF versions of your plans through email. Once you have finished your job, you can 'Print Current View' to save images of your plans as PDFs. Then you can attach them to an email and easily send your plans to others.
(This is most commonly caused because the PDF image needs to be flattened. Architectural PDFs often have layers, which you can see when a PDF opens and loads pieces at a time.)
The symptoms of this can range from:
Pages taking a very long time to pull into PlanSwift
Getting an out of memory error
PlanSwift freezing or stopping once it has reached a specific page during conversion,
Issues pulling in a file type
Or pages pulling in as blank sheets
You also may want to print to a PDF to export your PlanSwift project at higher quality to share with others who do not have PlanSwift.
About PDF Writers
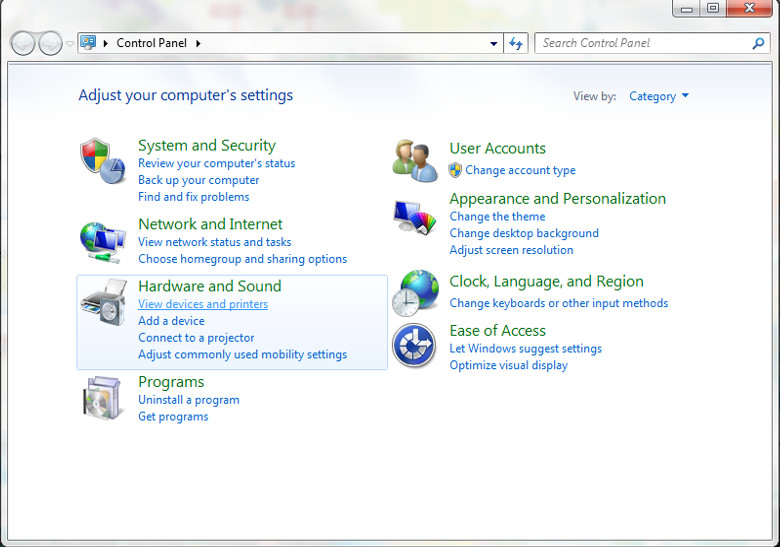
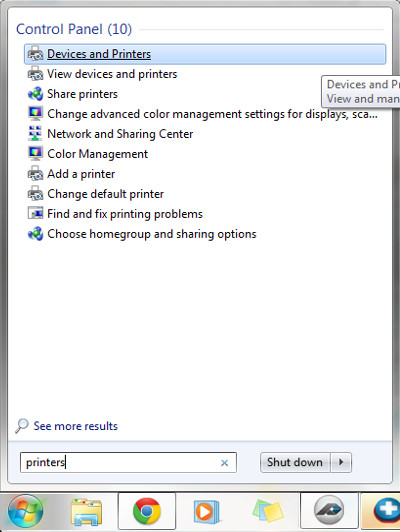
If you own a purchased copy of any Adobe PDF reader or editor, it’s possible you already have a PDF writer installed as part of that software. The easiest way to find out if you have a PDF writer is by going into the print function of any program and selecting the drop-down menu for the printer you would like to use. You should see the physical printer you use, and you may have an option that says PDF writer. You can also go under your Control Panel settings, under theSound and Hardware section: Devices and Printers (this can also quickly be found by searching Printers on your computer). Other programs such as Microsoft, Bluebeam, and Foxit may also have PDF writers as part of their software. (**Note: the printer must be called PDF writer, not to be confused with an XPS writer or any other document writer.**) If you find that you do not have a PDF writer, you can either purchase one or download a free one.
CutePDF
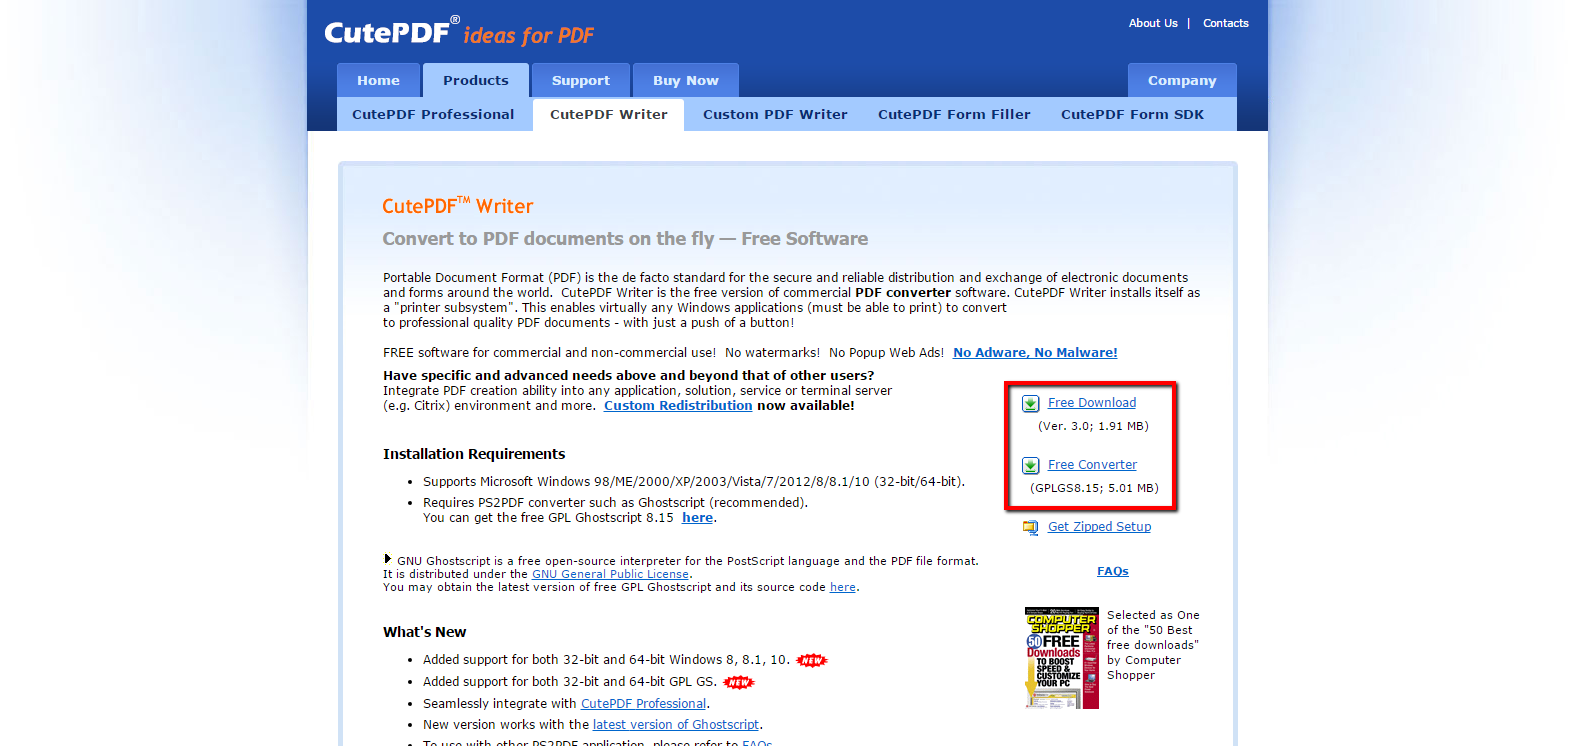
CutePDF is one of our top recommendations, as it is free. To install it, go to (http://www.cutepdf.com/Products/CutePDF/writer.asp). For it to function properly, download both the converter and the writer.
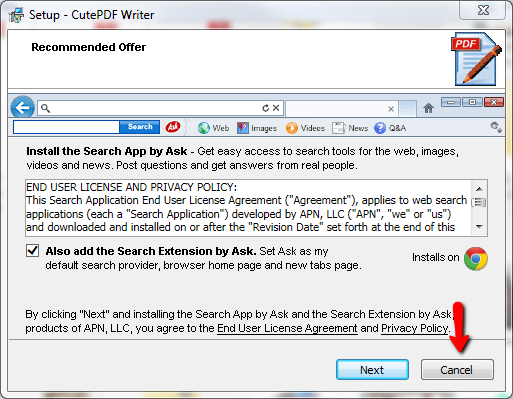
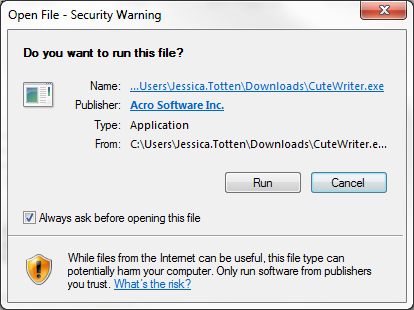
Once you have both downloaded, run the converter, then run the installer for the writer. When going through the install, select Cancel to bypass the add-on offers included.
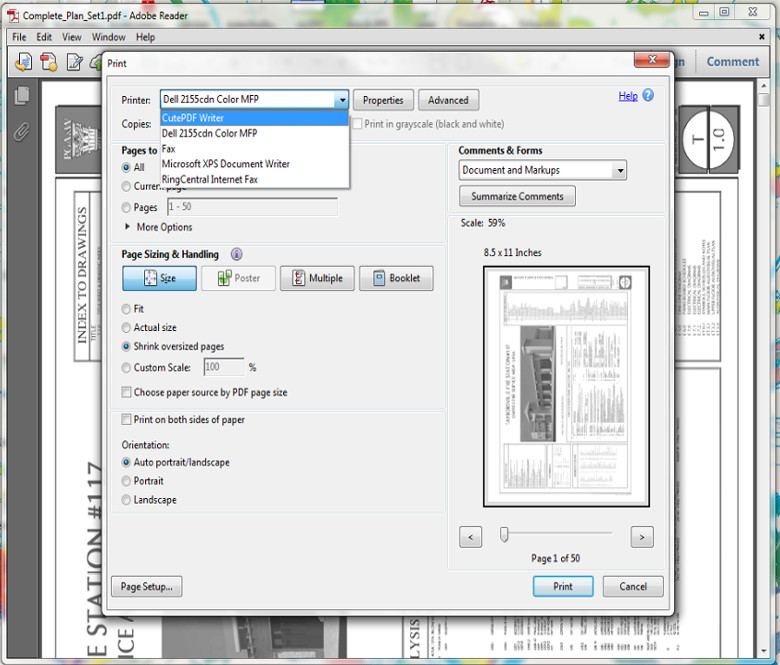
Once the install is finished, it will show up in your Printer Selection drop-down menu.
How to Print/Re-Print to PDF
On our website we do have a walkthrough on how to print PDF files out of PlanSwift for sharing purposes, but what about re-printing PDF plans to bring them into PlanSwift? The first thing you will want to do is open up your PDF in Adobe or another PDF viewer.
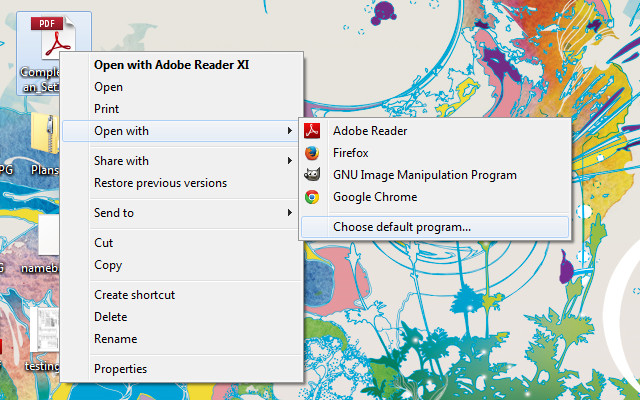
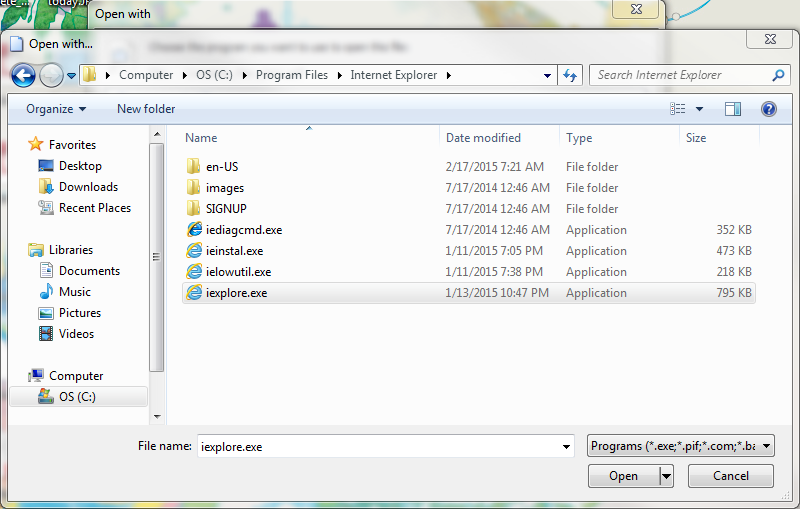
If you do not have a PDF viewer, you can also open it up in a web browser by right-clicking the PDF, selecting Open With, and selecting a web browser.
If you do not have one listed there, you can add one by selecting Choose Default Program. You can browse for a program or select one listed under other programs. (If you are having to browse for the program, find the correct Program folder for it and locate the *.exe for the program.)
Once you have the plan open, open the "Print Function". From the drop-down, select the PDF writer you wish to use.
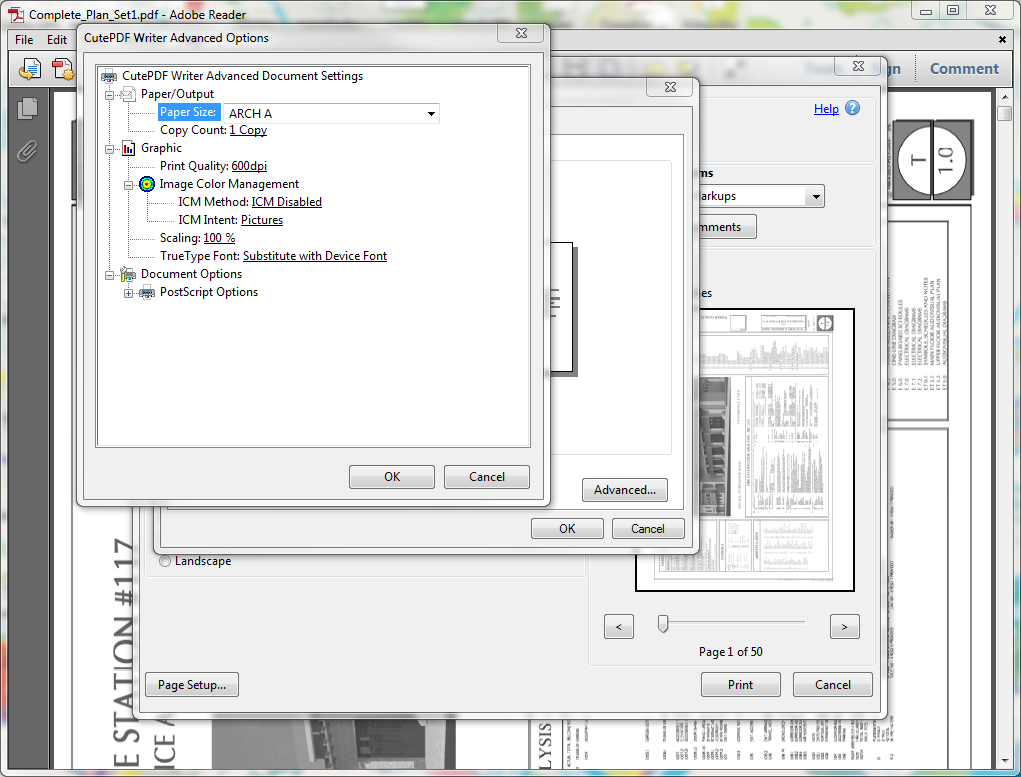
Next, you will want to change the settings. Depending on what you are trying to do, this will vary from selecting individual pages to print, to selecting a different size page. When trying to downsize a page, instead of adjusting the DPI, which can drastically reduce quality, change the page size instead: Arch C to Ledger size is recommended. You can find this setting under"Properties > Layout > Advanced". You can check your page’s current size by selecting the checkbox that reads Choose Paper Source by PDF Page Size, and then choose an appropriate smaller page size (Caution: This will affect auto-scale, and you will need to use the manual scale function to get an accurate scale).
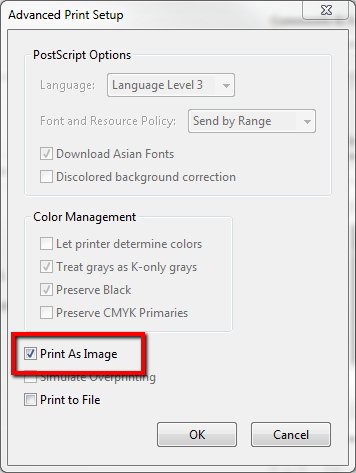
The most important step is to select the Advanced button and select the Print As Image checkbox.
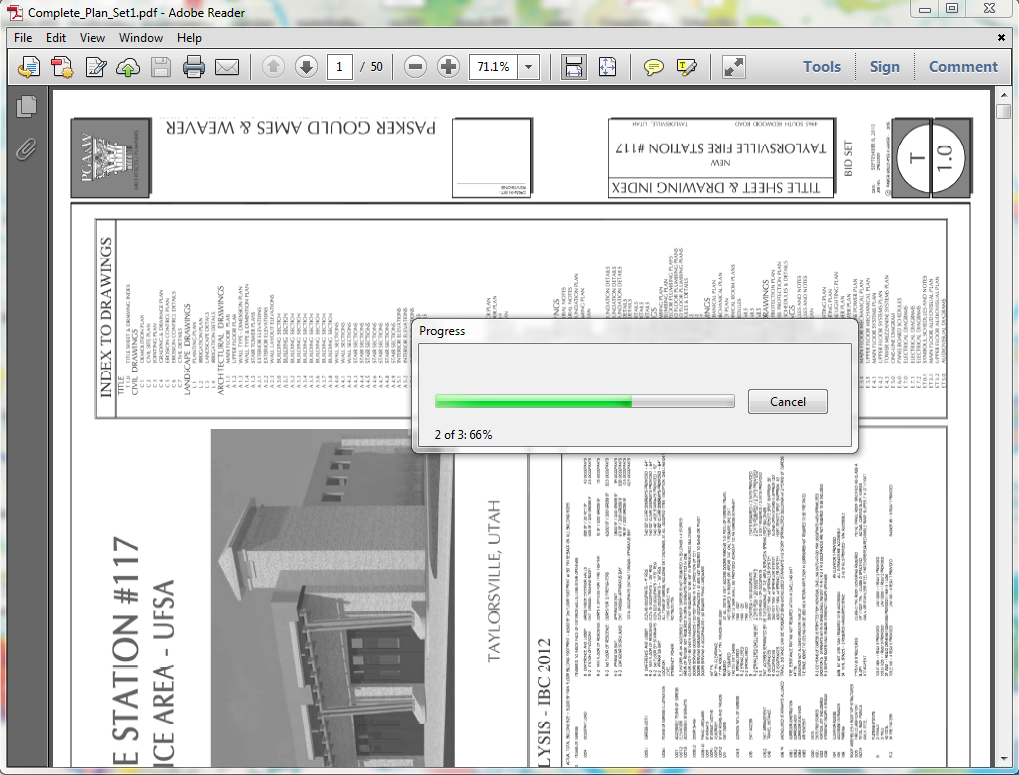
Once you have all these settings, you can Print. It will process the PDF and run through aProgress percentage dialog. This can take quite some time, so be patient: the time spent will save you a lot of time when you bring the file into PlanSwift.
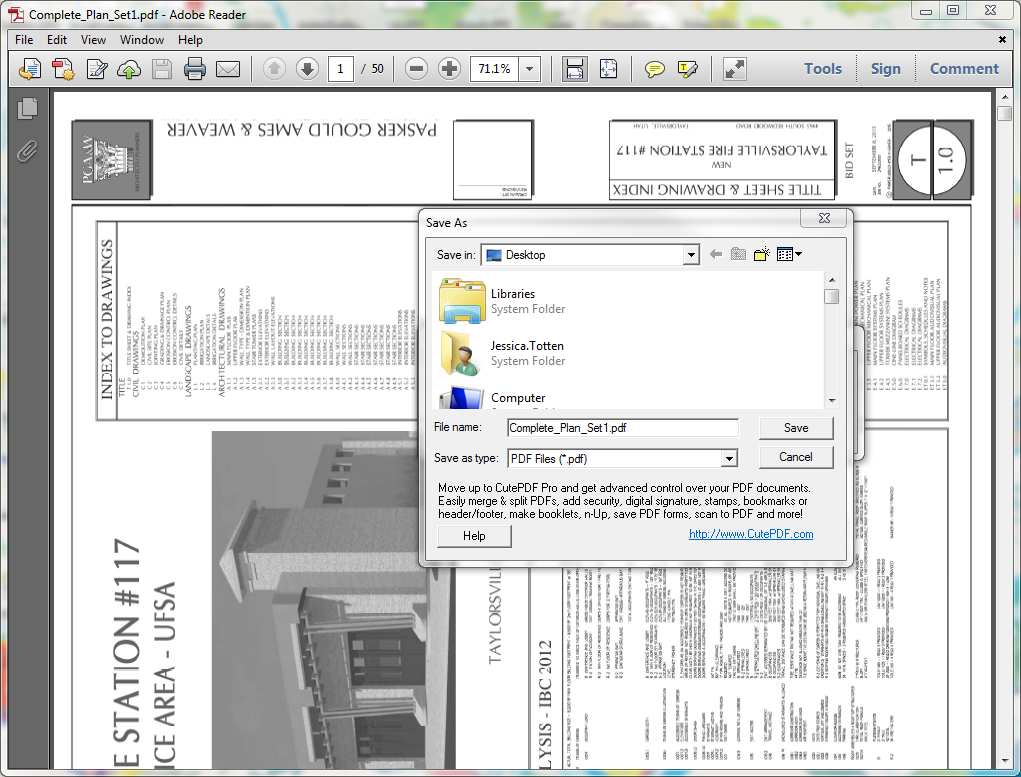
Once it has finished and reaches 100%, a dialog box asking you where you would like to save the PDF will appear. You will need to rename the file because you already have the file with the same name open and are printing it, but it can be as simple of a change as filename1.pdf. At this point, you can try adding the pages into PlanSwift again, and you should be able to bring it in at 200 DPI as normal.
PDFs Printing Blank
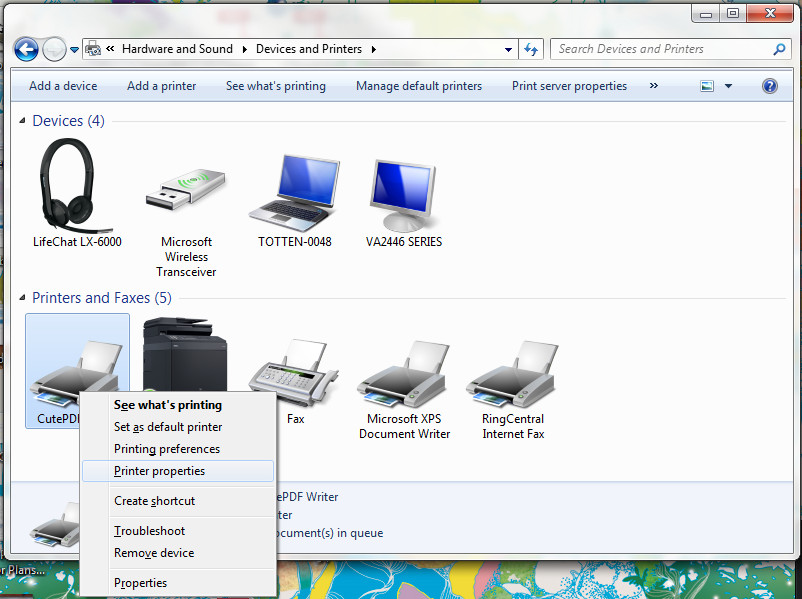
On occasion when printing (PDF's or traditional prints) they can come out blank. You will have the document, but the pages will be completely blank. This is easy to fix. Under your Control Panel, there is a section for Hardware and Sound and inside that Devices and Printers (to find this easily, search for 'printer' on your computer).
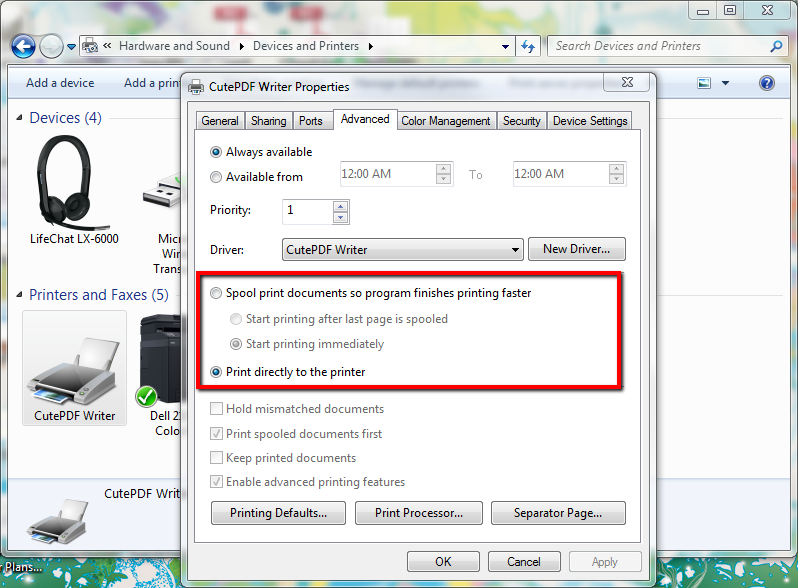
Find your printer from the list (PDF printer or physical printer) and right-click on it and selectPrinter Properties. This will bring up a dialog box from which you can go to the Advanced tab. About halfway down is a section that will have a bubble filled in for Spool print documents; change this setting to Print directly to printer and this will resolve the issue.
If you are unable to access these settings, you may need to have the computer administrator rights. You should be able to get this login information from someone in your company (IT, office administrator, etc.).
Copyright 2025 ConstructConnect
