To open any link in a new tab, preserving your position in the current article, just hold down the <CTRL> key on your keyboard before clicking the link or click using your mouse wheel.
Zone Tool Plugin (Organizing Takeoff into Zones)
Challenge
You’ve completed a takeoff but what to analyze your takeoff results organized into different building areas/zones.
Overview
The Zone Tool Plugin allows users to select takeoffs, assign them to zones with names of their choosing, and select the order in which the zones appear in the Reports.
This Plugin is especially useful to find the total dimensions (areas or linears) of any selected items or subsets of selected items.
The Zone Tool Plugin installs a Set Zone on Selected Items icon in the Takeoff group of the Home Tab ribbon-bar.

How To Use the Zone Tool Plugin
Notes
First, you'll need to download and install your Plugin, see: Downloading, Installing, and Uninstalling a Plugin or Starter Pack
Once your new Plugin is installed, follow the steps below to use it.
We encourage you to purchase a training package for accelerated learning and faster customization, see: https://www.planswift.com/support/personalized-training/ for details on scheduling training.
How to Assign Items to Zones
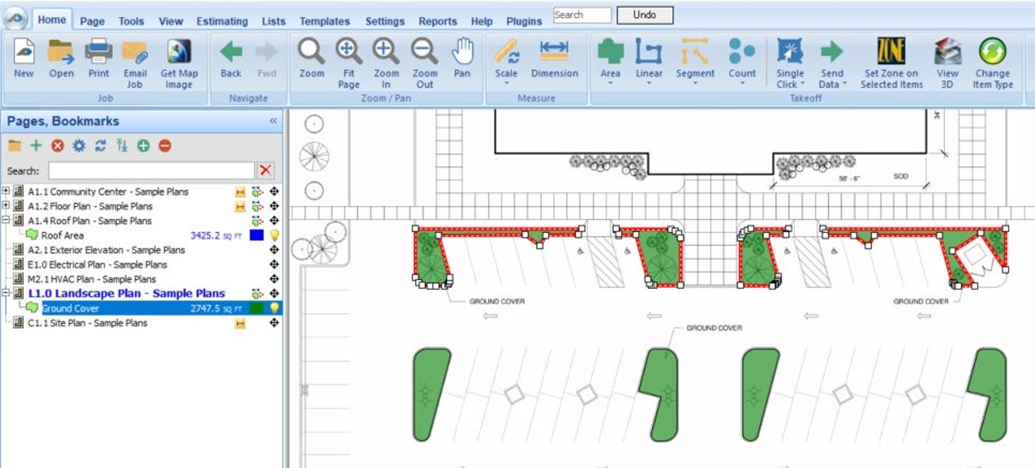
We assume you understand how to draw takeoff, so we're going to skip to the good stuff - assigning existing takeoff to a Zone. We're using the Sample Project's L1.0 Landscape Plan - Sample Plan.
We called the takeoff “Ground Cover.”
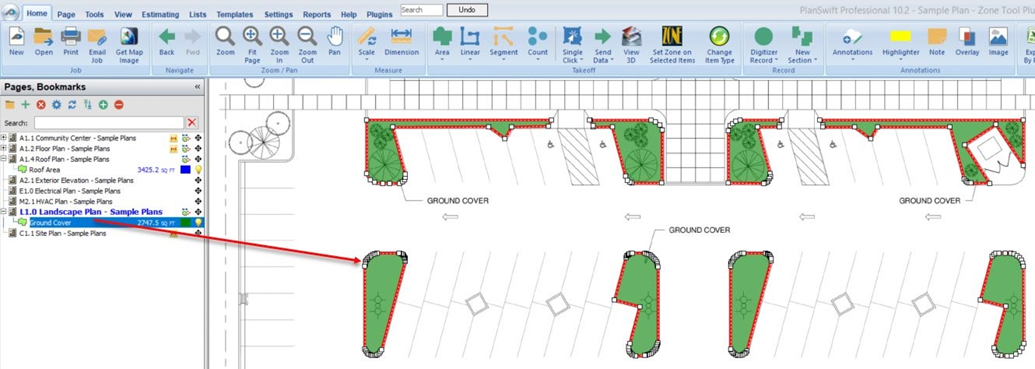
Notice that the area is 2747.5 square feet for all the takeoffs combined.
Now select just the four planter takeoffs at the bottom of the plan (by clicking on them while holding the Shift key or by holding the left mouse button down and dragging the cursor across the four items.
When those takeoffs are selected, they'll be surrounded by a red border:

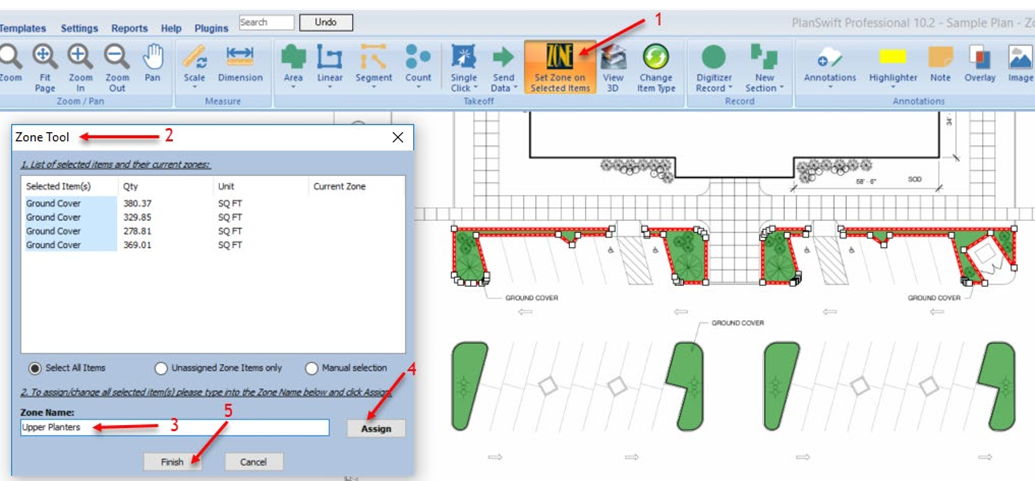
With these bottom planter takeoff takeoffs selected, click on the Set Zone on Selected Items button in the Takeoff group of the Home tab ribbon-bar (arrow 1)
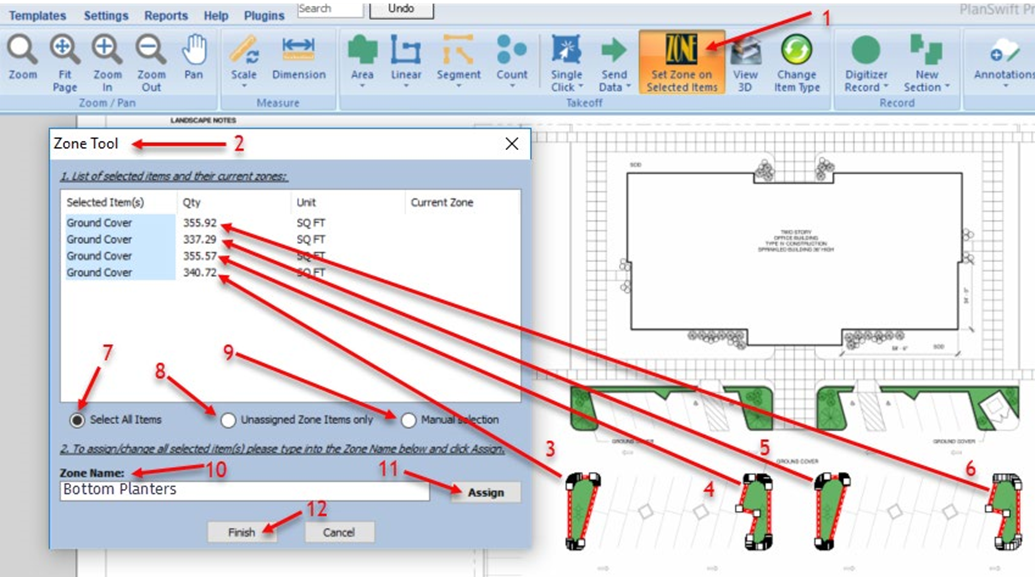
This opens the Zone Tool window (arrow 2). The four selected items that may be assigned to a zone are highlighted (arrows 3 – 6). The Qty and Unit columns in the Zone Tool window contain the items’ measurements and the units of measurement. The Current Zone column displays the zone name if the item has previously been assigned to a zone, or it displays the zone name after the item is assigned to a zone. If you want to assign all selected items to a zone, then click on Select All Items (arrow 7). If you want to only assign items that have not already been assigned to the zone, then click on Unassigned Zone Items only (arrow 8) To manually select items for the zone, click on Manual Selection (arrow 9) then click on the items to be included in the zone (you can use the Shift and Ctrl keys while clicking to select only those you want). Enter a name for the zone in the Zone Name field (we’ve named the zone “Bottom Planters,” arrow 10).
Once you have selected the items you want included in the zone, click on Assign (arrow 11). (By the way, to remove a zone, leave the Zone Name field blank, then click on Assign.)
When you have assigned the zones as you wish, click on Finish (arrow 12).
In this example, we’ve selected all four ground cover items to be included in the Bottom Planter zone.
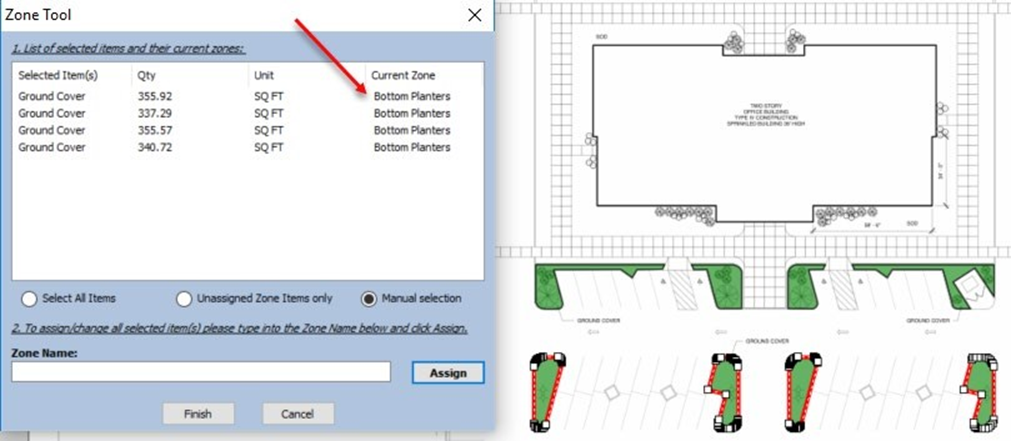
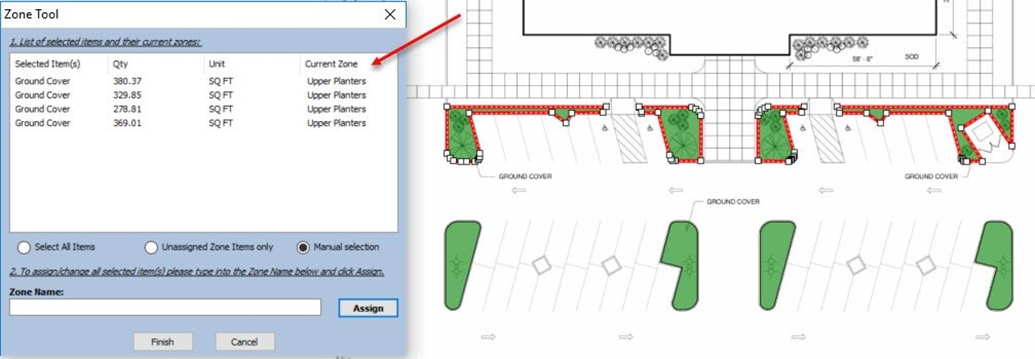
We can see that the four Ground Cover items are assigned to the Bottom Planters zone.
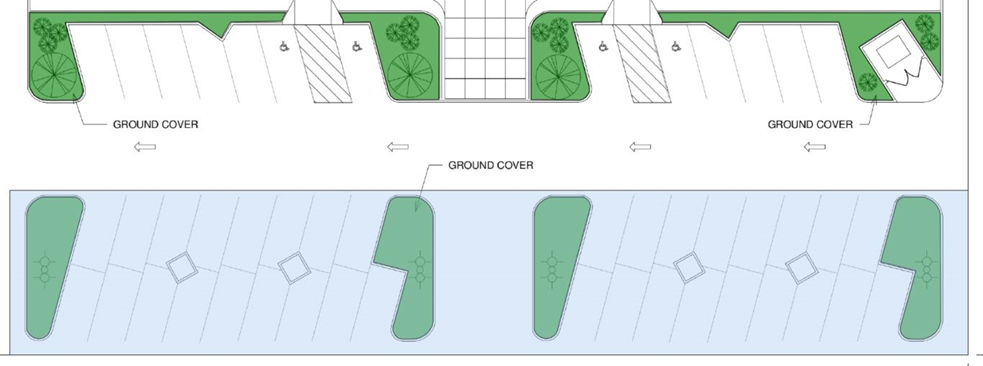
We’ll next do the same for the upper planters. Select the upper planters by clicking and dragging over them.
Click on the Set Zone on Selected Items icon (arrow 1, below) to open the Zone
Tool window (arrow 2), name this zone “Upper Planters” (arrow 3), and click on Assign (Figure 9) to assign all selected items to the Upper Planters zone.
Now we see that the upper planter ground cover items are now listed in the Current Zone column.
Click on Finish to close the Zone Tool window.
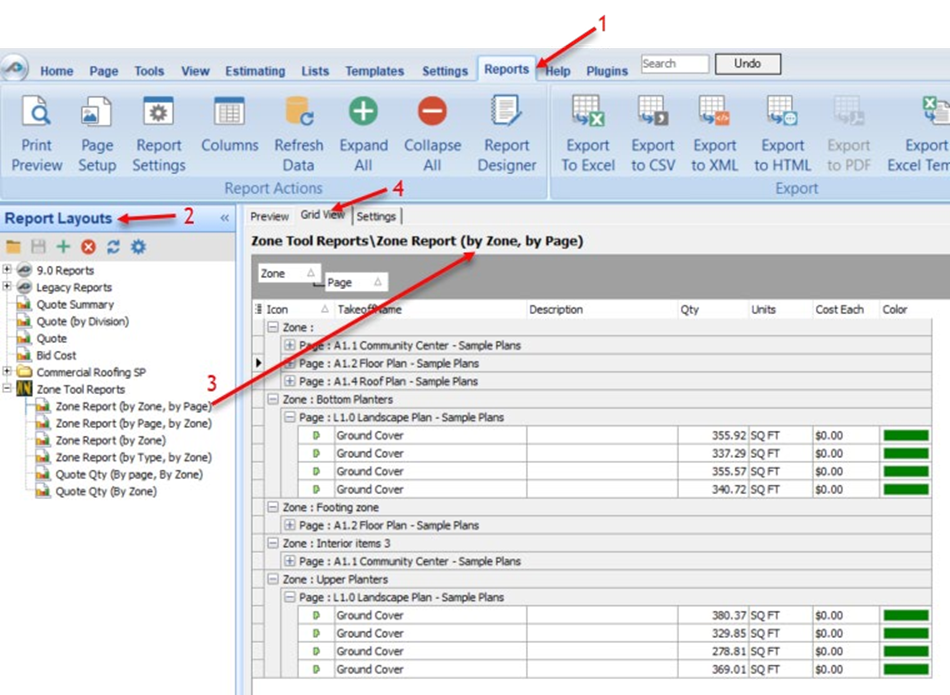
How to View Items in Zone Tool Reports Grid View
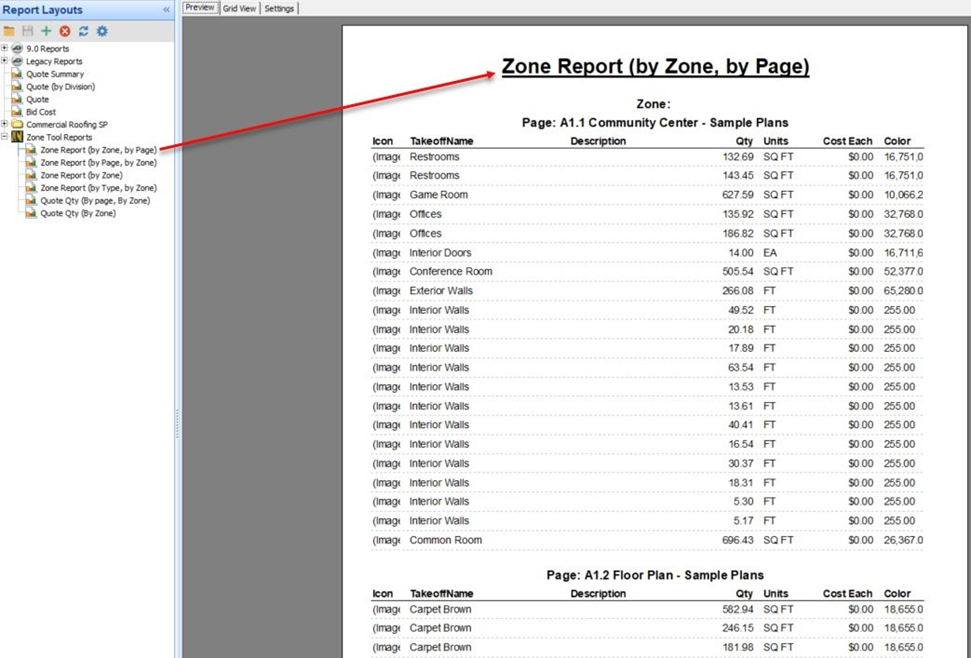
To view the zoned items in report form, click on the Reports tab on the Main ribbon bar menu (arrow 1, below). This opens the Report Layouts sidebar window (arrow 2). Click on Zone Tool Report (by Zone, by Page) (arrow 3), click on Grid View (arrow 4), and then click on the plusses (+) for both the Bottom and Upper Planters to view the ground cover takeoff items.
The Grid View is a simplified view that shows zones listed in alphabetical order (there may, of course, be other zones visible in this report). Properties of zones are displayed in the TakeoffName, Description, Qty, Units, Cost Each, and Color columns. The Grid View also allows users to change the report layout and columns (PlanSwift recommends purchasing a training package for accelerated learning and faster customization).
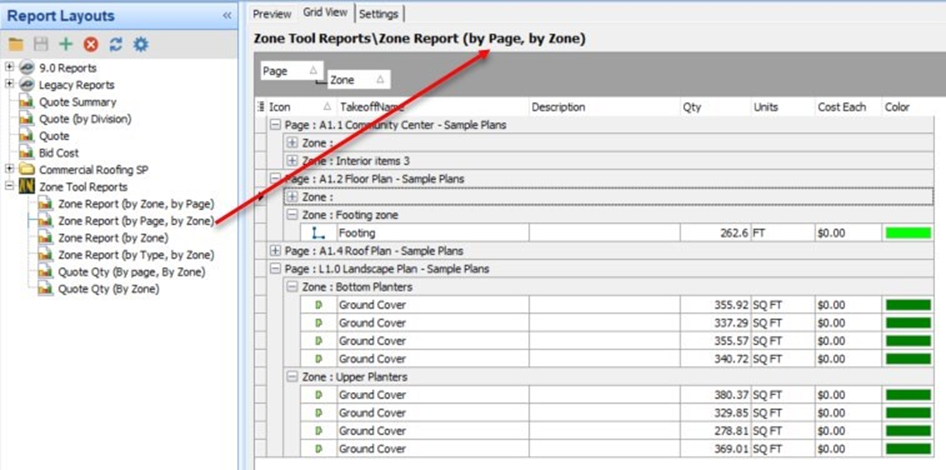
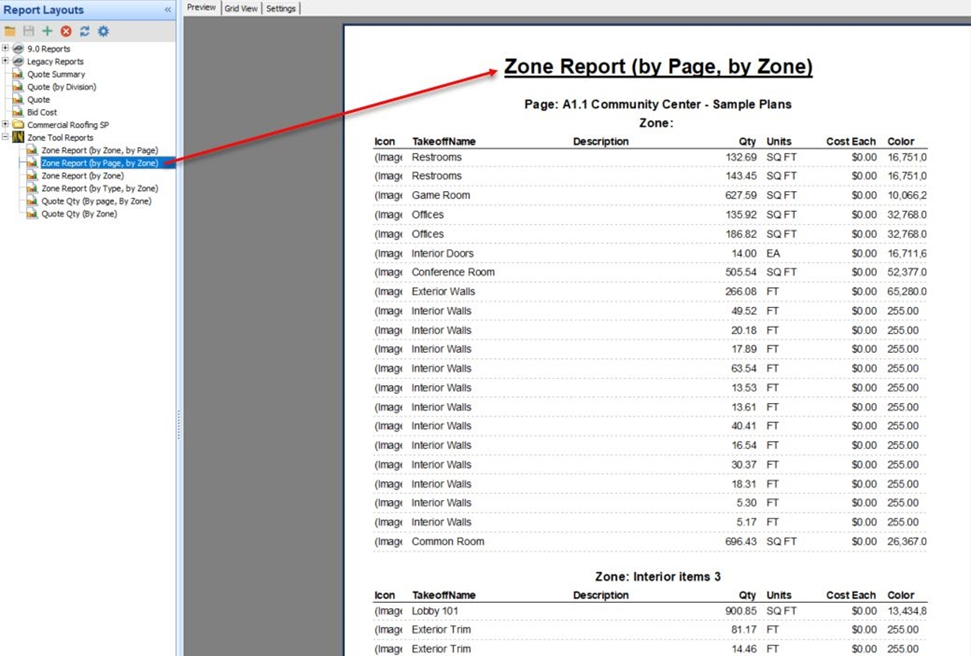
Clicking on Zone Report (by Page, by Zone) displays the zones first by page and then by zone:
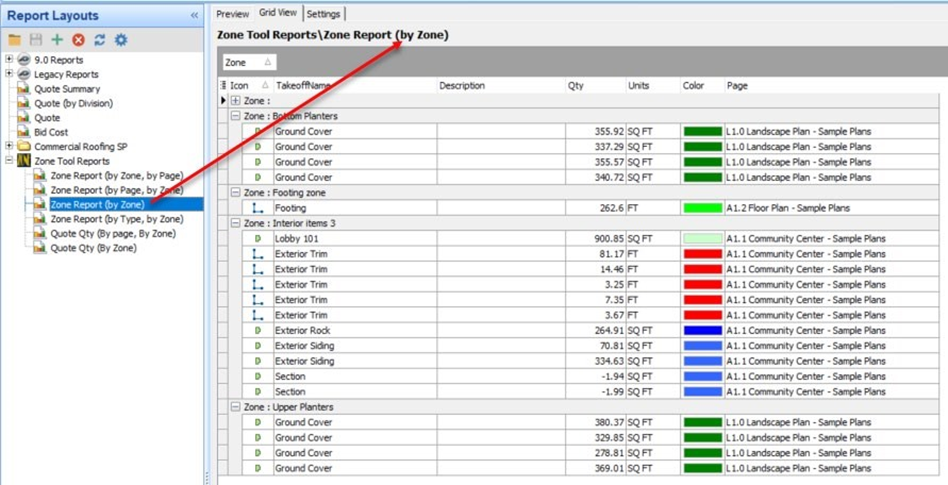
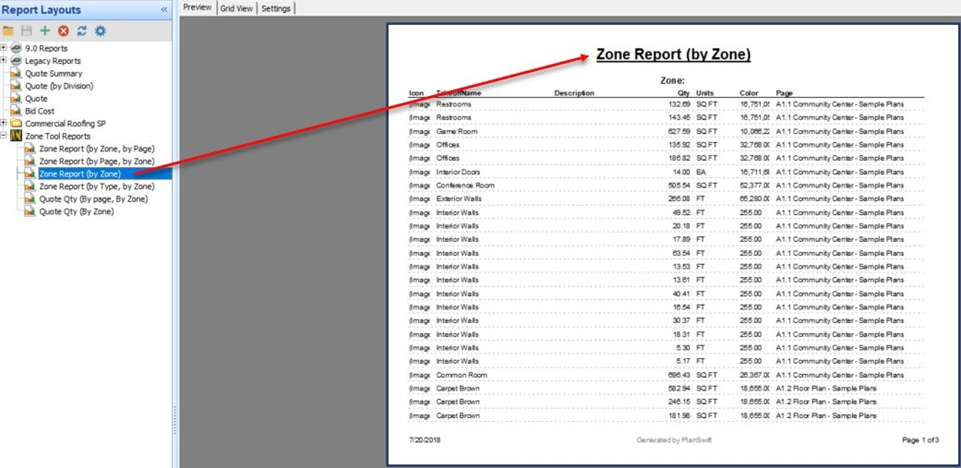
Clicking on Zone Report (by Zone) shows the Zone Tool Report organized by zone:
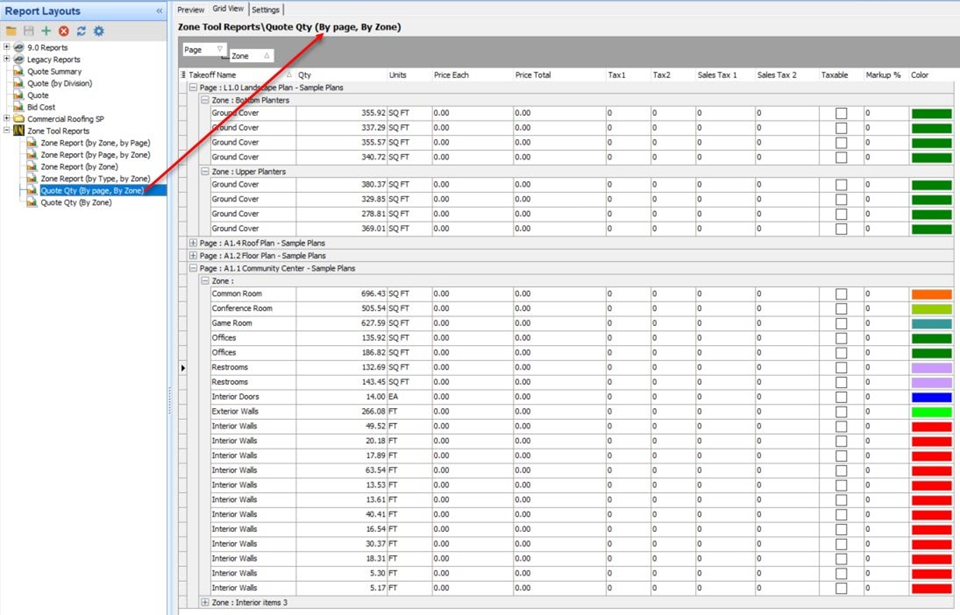
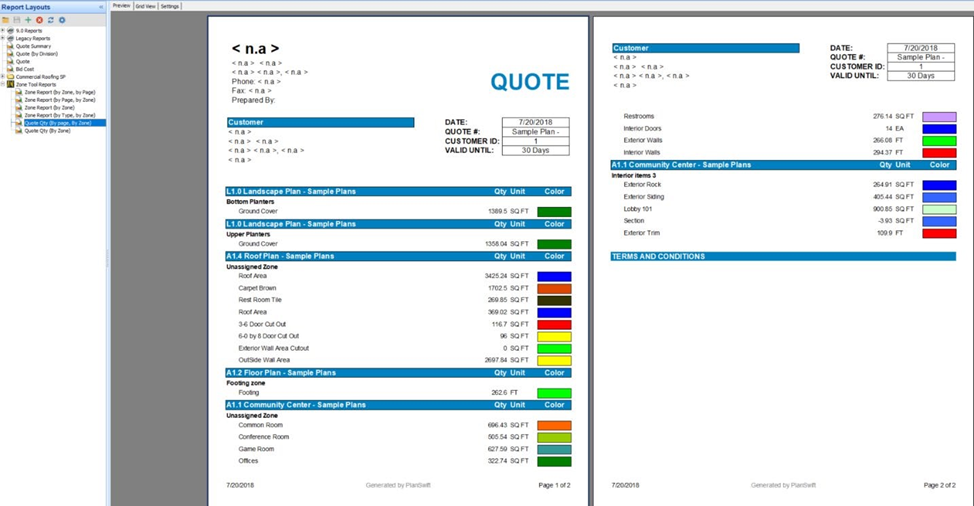
Clicking on Quote Qty (By Page, By Zone) shows the Zone Tool Report organized by quote quantity, page, then zone:
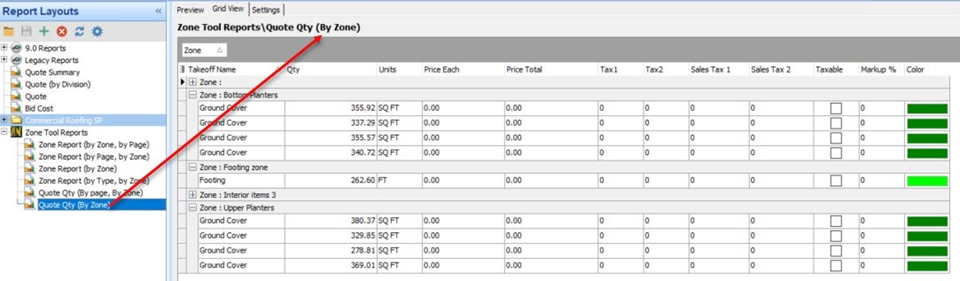
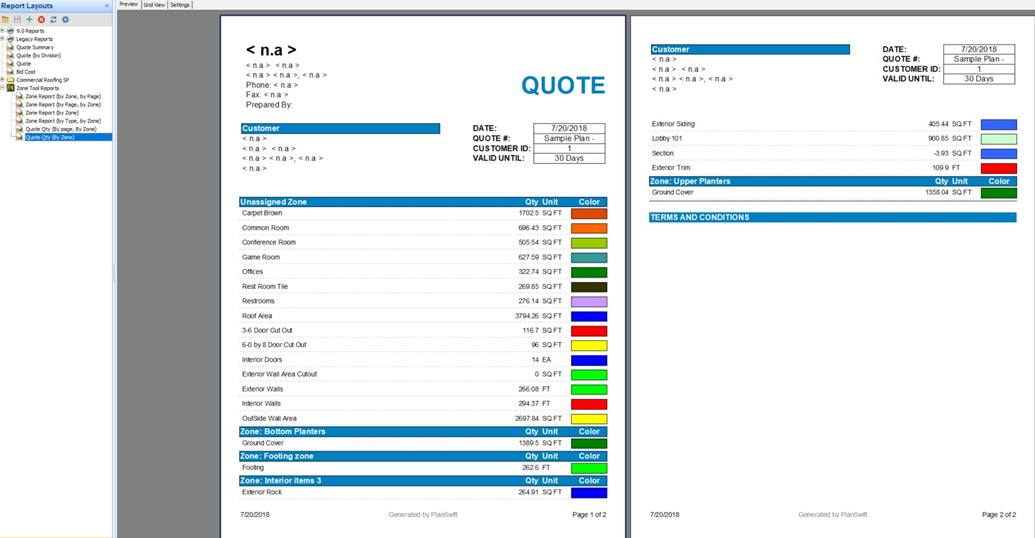
Clicking on Quote Qty (By Zone) shows the Zone Tool Report organized by quote quantity, then zone:
How to: View Items in Zone Tool Reports Preview View
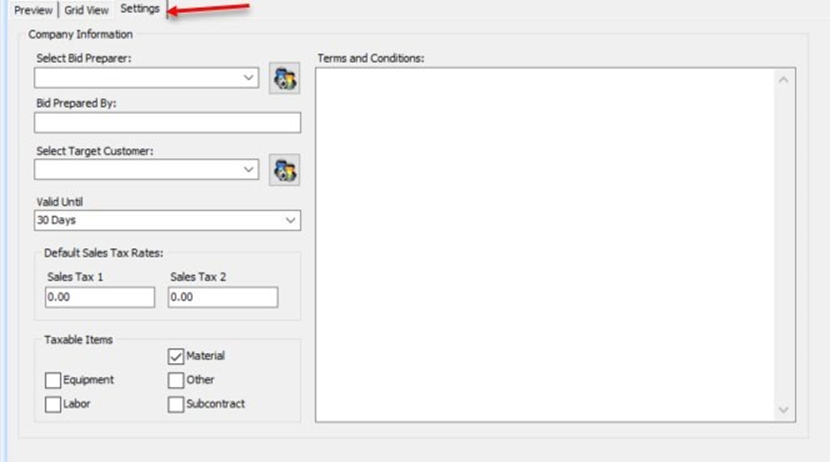
The Preview view provides the ability to add company and client information to some of the Zone Tool Reports by selecting the Settings tab (see Figure 16). (PlanSwift recommends purchasing a training package for accelerated learning and faster customization).
You can view the Zone Report by Zone, by Page
You can view the Zone Report by Page, by Zone:
You can view the Zone Report by Zone:
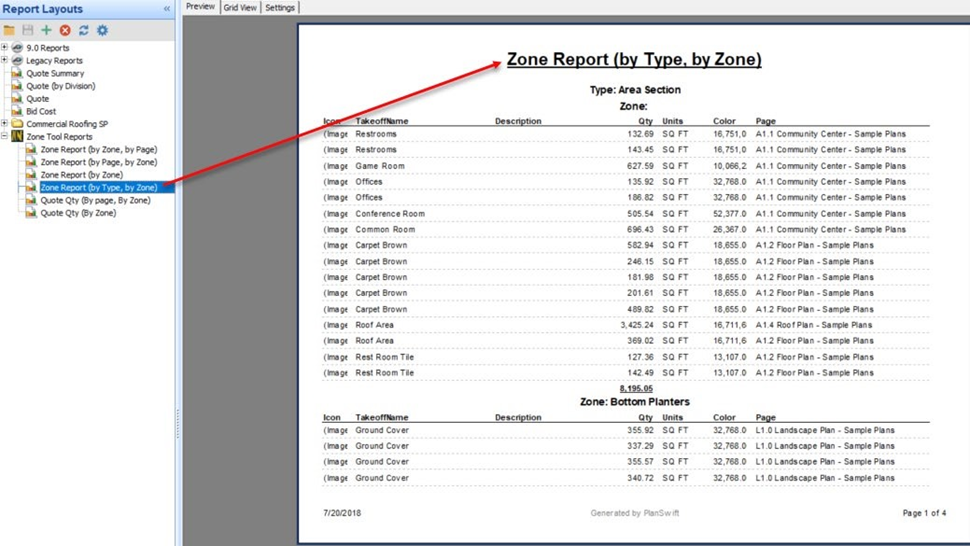
You can view the Zone Report by Type, by Zone:
You can view the Zone Report by Quote Qty (by Page, by Zone).
Use the Settings tab for this report to fill in customer/bid information.
You can view the Zone Report by Quote Qty (by Zone).
Again, use the Settings tab for this report to fill in customer/bid information.
FAQ
Question: I’ve read this user guide, and I still have questions. What do I do?
Answer: PlanSwift recommends that you purchase a training package. We highly recommend new users purchase a training package, because training is customized to each user. We offer one-on-one training and classroom training. Contact PlanSwift® Training Department Training-ops@ConstructConnect.com.
Question: Can I set a zone on my parts?
Answer: No. The Zone Tool Plugin only works with takeoff items and will not set zones on parts.
More Plugins and Starter Packs
Information on Plugins and Starter Packs is available directly on the Plugins Tab in PlanSwift...
If you encounter technical difficulty, consult this guide (including the FAQ section of this user manual) or contact the technical support department at:
PlanSwift® Technical Support support@PlanSwift.com
1-888-752-6794 ext. 2
PlanSwift also offers additional training. For training options, contact the training department at:
PlanSwift® Training Department Training-ops@ConstructConnect.com
Copyright 2025 ConstructConnect