To open any link in a new tab, preserving your position in the current article, just hold down the <CTRL> key on your keyboard before clicking the link or click using your mouse wheel.
Cutout Tool Plugin (Subtracting Doors, Windows, and other Openings from Linear Objects)
Overview
When working with two-dimensional takeoffs, such as a floor or parking areas, it is easy to subtract areas from takeoffs using the right-click menu’s Subtract from Section tools. However, when performing one-dimensional linear takeoffs for wall area takeoffs, it is not so easy to subtract square footage for items like doors and windows. The Cutout Tool Plugin resolves this, allowing you to easily subtract square footage from those takeoffs, providing numerous templates to accommodate for different sizes of windows and doors, and allowing you to customize those items and save them for future use.
Upon installation, the Cutout Tool Plugin adds:
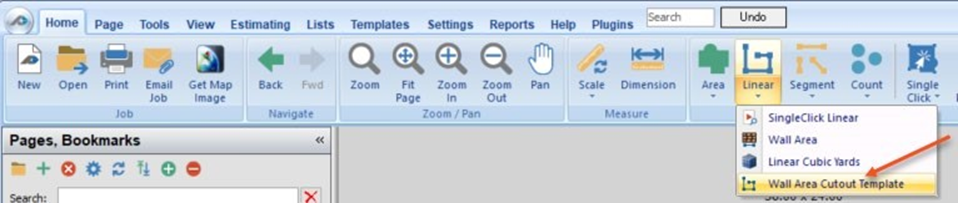
- a Wall Area Cutout Template tool to the Linear takeoff tool drop-down menu in the Takeoff Group of the Home ribbon-bar tab
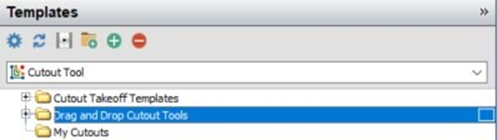
- a Cutout Tool template in the Templates window, which includes Cutout Takeoff Templates, Drag and Drop Cutout Tools, and a My Cutouts folder
How To Use the Cutout Tool Plugin
Digitize a Wall Area with Cutouts
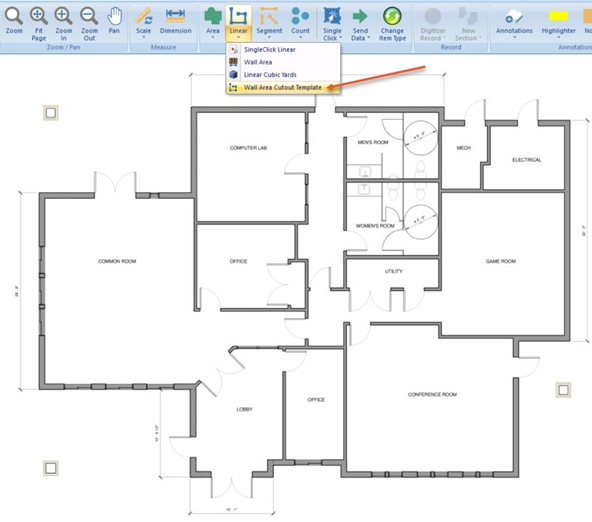
This example of digitizing a wall area with cutouts uses the A1.2 floor Plan – Sample Plans that come preinstalled with PlanSwift 10.2.
To digitize the outside wall,
Select Wall Area Cutout Template from the Linear drop-down menu...
or from the Templates window...

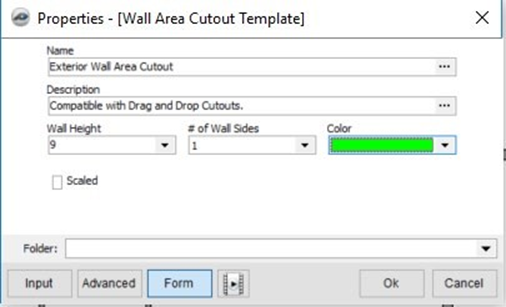
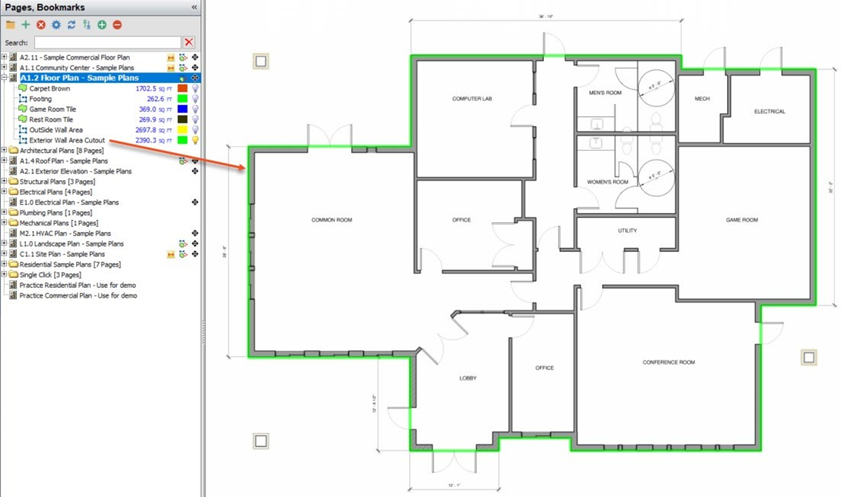
This opens the Properties – [Wall Area Cutout Template] window. Call it Exterior Wall Area Cutout and change any of the other properties, such as Wall Height, Color, etc., that you want.
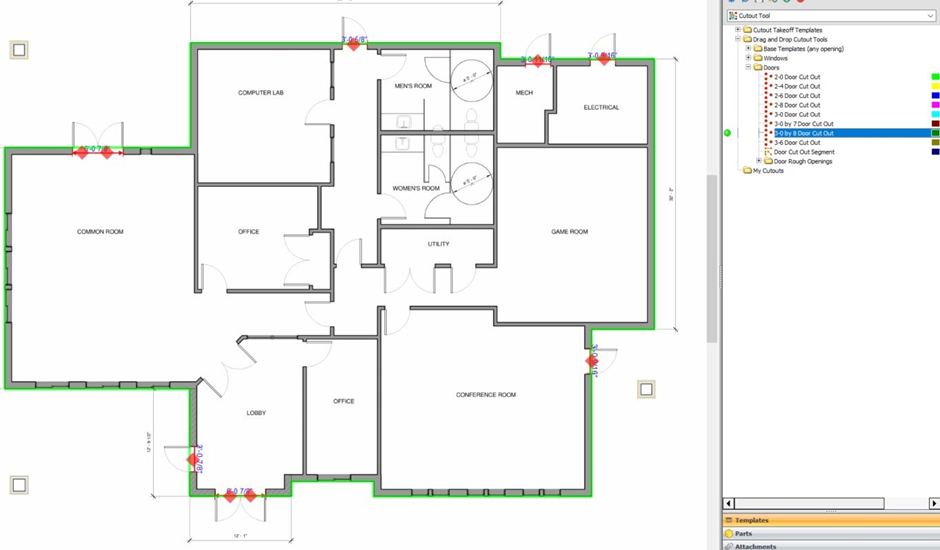
Click on Ok, and the perform the exterior wall takeoff (Figure 7). Note that the Exterior Wall Area Cutout takeoff is 2390.3 SQ FT.
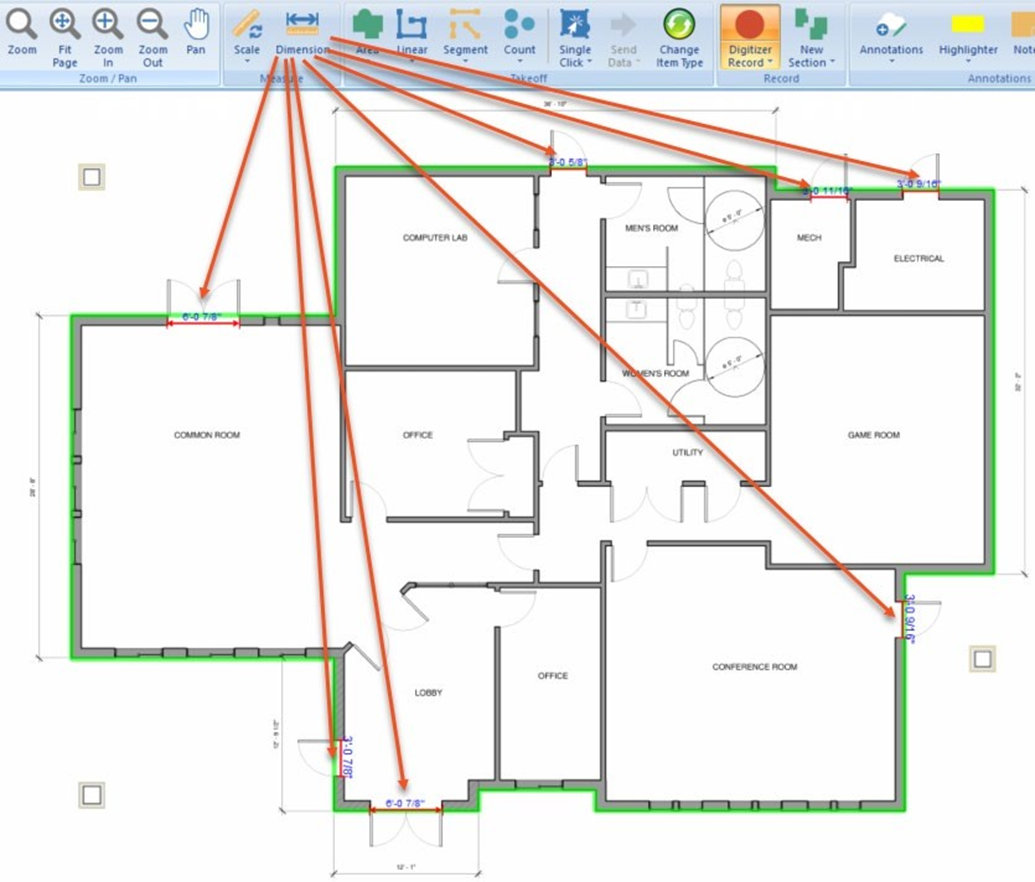
Notice that this plan has five 3’ exterior doors, and two 6’ exterior doors. If you’re not certain of the size of the doors, use the Dimension tool to determine the width (see Figure 8).
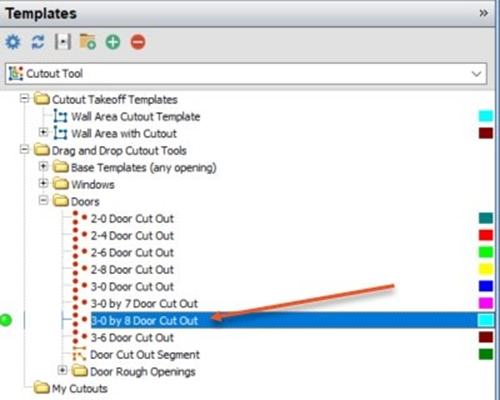
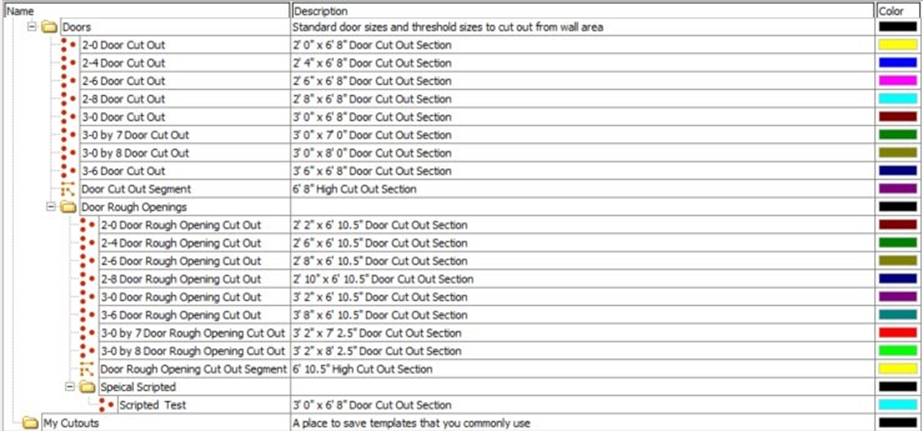
To begin cutting out for the doors, select the Cutout Tool template from the Templates window, open the Drag and Drop Cutout Tools folder, open the Doors folder, and double-click on the 3-0 x 8 Door Cutout.
The Properties – [3-0 by 8 Door Cut Out] window now opens...
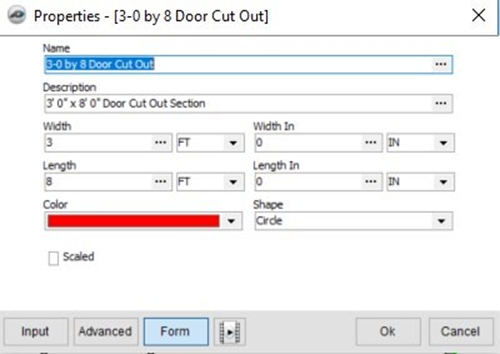
In this window, you can keep the name or give these doors a new name in the Name field. You can change the Width, Length, Width In, and Length In values. Selecting the Scale box will cause the diamonds to scale larger or smaller as the drawing is zoomed in or out on. You can select the color of the takeoff as well as the shape of the takeoff (Circle, Square, Plus, Triangle, or Diamond). For this exercise, change the color to red and the shape to Diamond. Click on OK (which turns the digitize recorder on) and perform the takeoffs by clicking on each of the five 36” (3-0) doors. For the double doors, you can click twice on them, since a double door is two 3-foot doors.
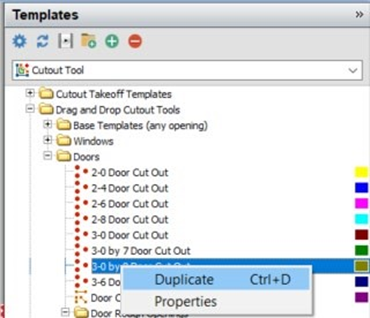
Another option to handle the double doors is to create a custom six-foot cutout for double-doors, allowing you to click only once for double-door takeoffs. To create a custom 6’ cutout that is also 8’ high, right click on the 3-0 by 8 Door Cut Out (Figure 12) and click on Duplicate.
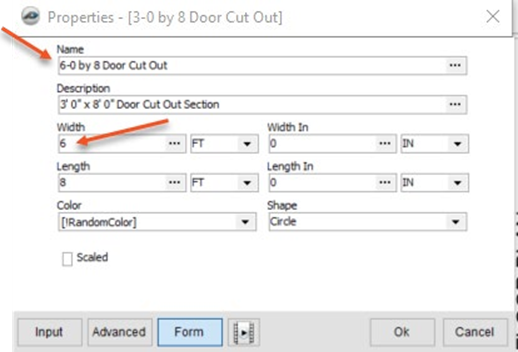
The Properties – [3-0 by 8 Door Cut Out] window opens. Change the name to 6-0 by 8 Door Cut Out. Change the Width field to 6 (see Figure 13). Then click on OK.
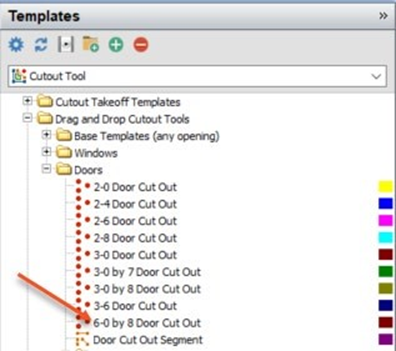
Next, we see the Templates window with a 6’ cutout option. Drag this template over on top of the Exterior Wall Area Cutout.
This opens the Properties – [6-0 Door Cut Out] window. Select yellow as the takeoff Color and leave the Shape as a Circle, then click on OK, which turns the digitize recorder on.

Move the cursor to one of the 6’ double-doors and click (Figure 16). Then move to the next set of double-doors and click.
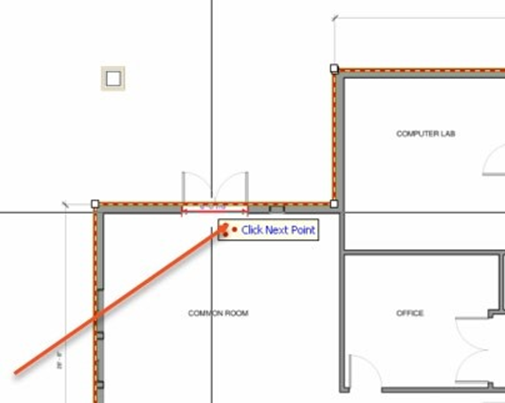
Press Escape to turn off the record function.
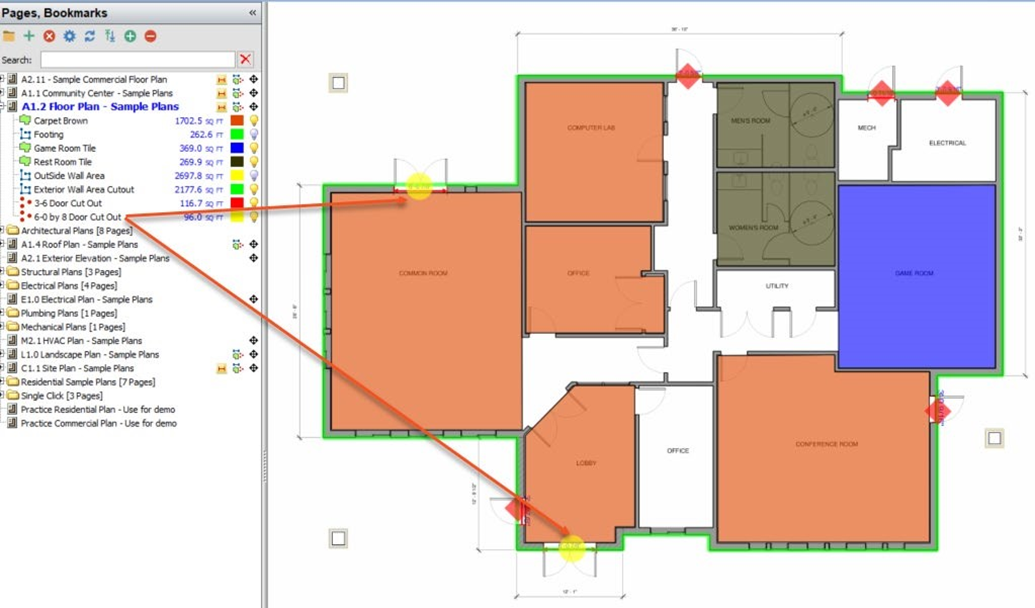
Now we see the yellow 6’ cutout takeoffs. The Exterior Wall Area Cutout (which started out at 2390.3 SQ FT) has now been reduced to 2177.6 SQ FT because of the 116.7 SQ FT reduction for the five 3’ door cutouts and the 96 SQ FT reduction for the two 6’ door cutouts.
If there are windows in the structure, the procedure is the same except that you use a window template to perform the cutout instead of a door template. Numerous templates are available and are listed in the Compendium. Templates, of course, can be modified if necessary as saved as a new custom template to provide for your takeoff needs.
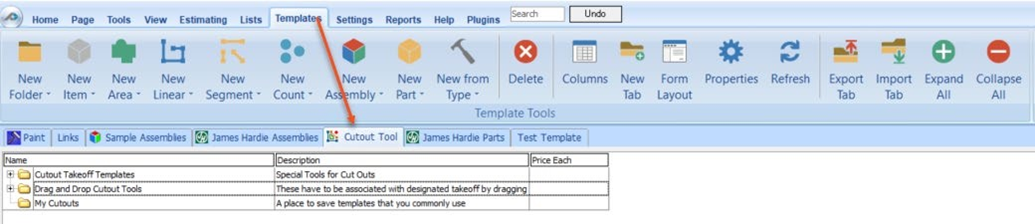
How to: Use the My Cutouts Folder
The My Cutouts folder is useful to store specialized templates you create. To use it, select the Templates tab from the main ribbon-bar, then click on the Cutout Tool tab in the Templates tab window. The My Cutouts folder is should now be visible...
Expand the folders until you can see the template you want to move to the My Cutouts folder. In this case we’ll assume you want to move the 6-0 by 8 Door Cut Out into the My Cutouts folder...
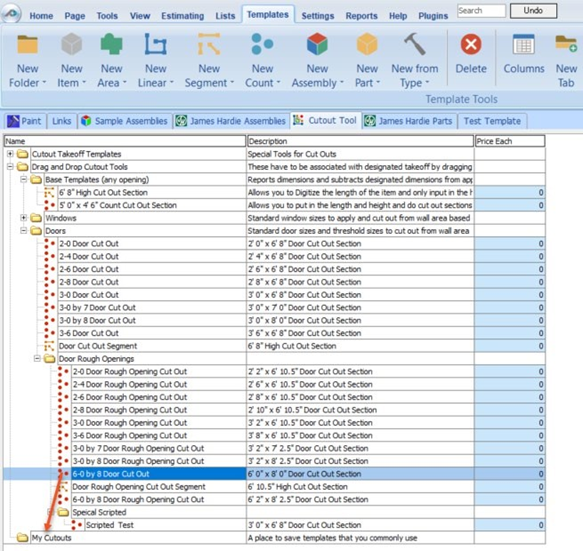
Now simply click on the 6-0 by 8 Door Cut Out template and drag it down and drop it into the My Cutouts folder. It will now be easily available in that folder when you do your takeoffs.
Any modifications that a user makes to templates should always be tested and verified by that user to ensure quantities and calculations are accurate. PlanSwift cannot verify the accuracy of modifications made to templates, parts and assemblies by the user.
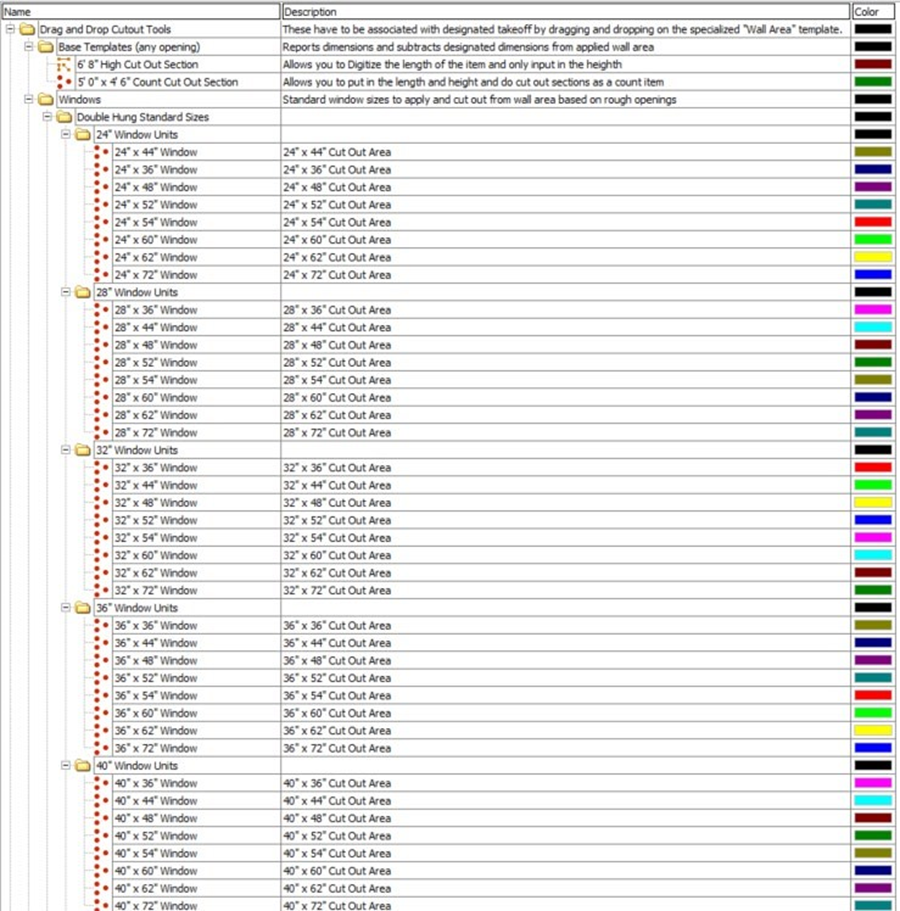
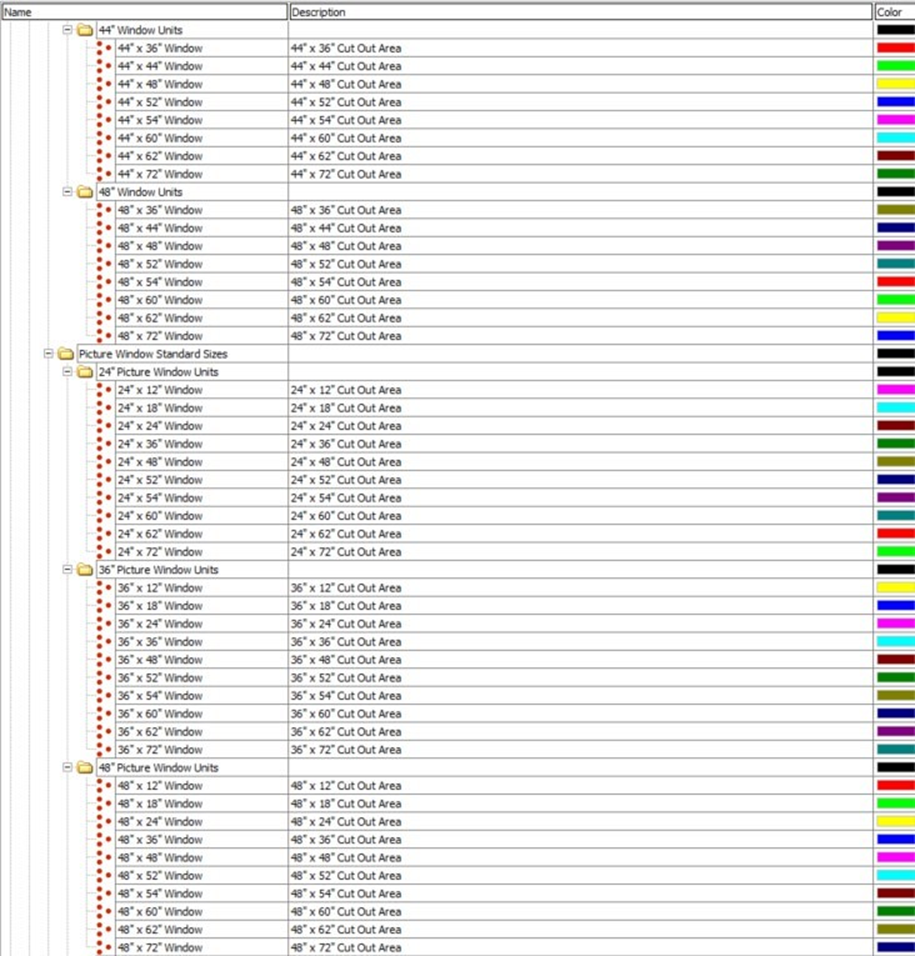
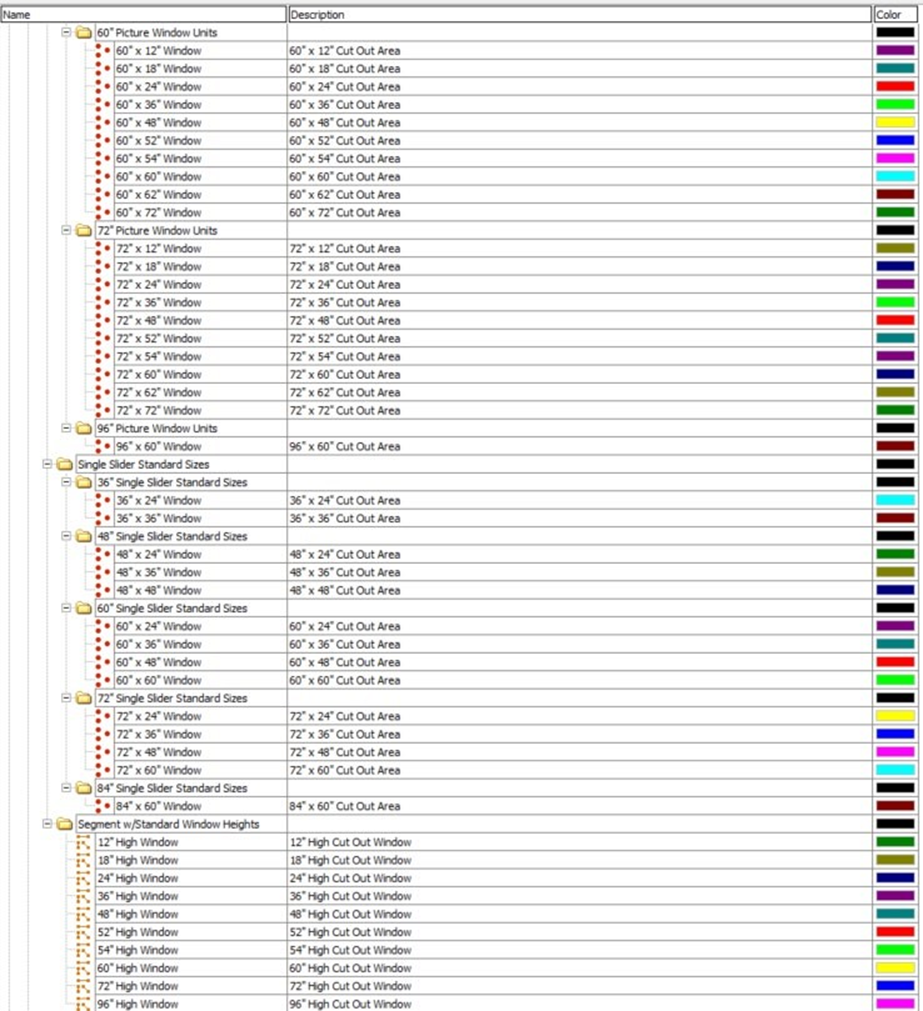
Templates Included with this Plugin
Cutout Takeoff Templates

Drag and Drop Cutout Tools
FAQ
Question: I’ve read this user guide, and I still have questions. What do I do?
Answer: PlanSwift recommends that you purchase a training package. We highly recommend new users purchase a training package, because training is customized to each user. We offer one-on-one training and classroom training. Contact PlanSwift® Training Department Training-ops@ConstructConnect.com.
More Plugins and Starter Packs
Information on Plugins and Starter Packs is available directly on the Plugins Tab in PlanSwift...
If you encounter technical difficulty, consult this guide (including the FAQ section of this user manual) or contact the technical support department at:
PlanSwift® Technical Support support@PlanSwift.com
1-888-752-6794 ext. 2
PlanSwift also offers additional training. For training options, contact the training department at:
PlanSwift® Training Department Training-ops@ConstructConnect.com
Copyright 2023 ConstructConnect