Challenge
You’ve completed your takeoff but you want to analyze each Page's individual results, versus the cumulative total shown on in the Estimating screens.
Overview
The allows you to export digitizer items to an Excel file, a CSV file, or to the Windows Clipboard. This is particularly handy because displaying the takeoffs individually allows for a better assessment of takeoffs than is allowed by the Estimating screen, which combines all takeoffs of the same type together. The instructions below will guide new users through how to use the Export to Excel by Page Plugin using the new sample plans released with PlanSwift 10.2. The instructions below will guide new users through the basics of using the Export to Excel Plugin.
The Export to Excel by Page Plugin adds a button to the Home Tab ribbon bar.

How To Use the Change Takeoff Item Plugin
| Info | ||
|---|---|---|
| ||
First, you'll need to download and install your Plugin, see: Downloading, Installing, and Uninstalling a Plugin or Starter Pack You To export to Excel, you must have a full version of Microsoft Excel™ installed and licenses to use this exportlicensed. Once your new Plugin is installed, follow the steps below to use it. We encourage you to purchase a training package for accelerated learning and faster customization, see: https://www.planswift.com/support/personalized-training/ for details on scheduling training. |
The Export
...
by Page Plugin tool allows you to export takeoffs from the Pages, Bookmarks window
...
into to an Excel file, to a CSV file, or to the Clipboard.
 Clicking
To create this export,
Click on the Export By Page icon button in the ribbon bar, this opens the Export Pages to Excel window.
...
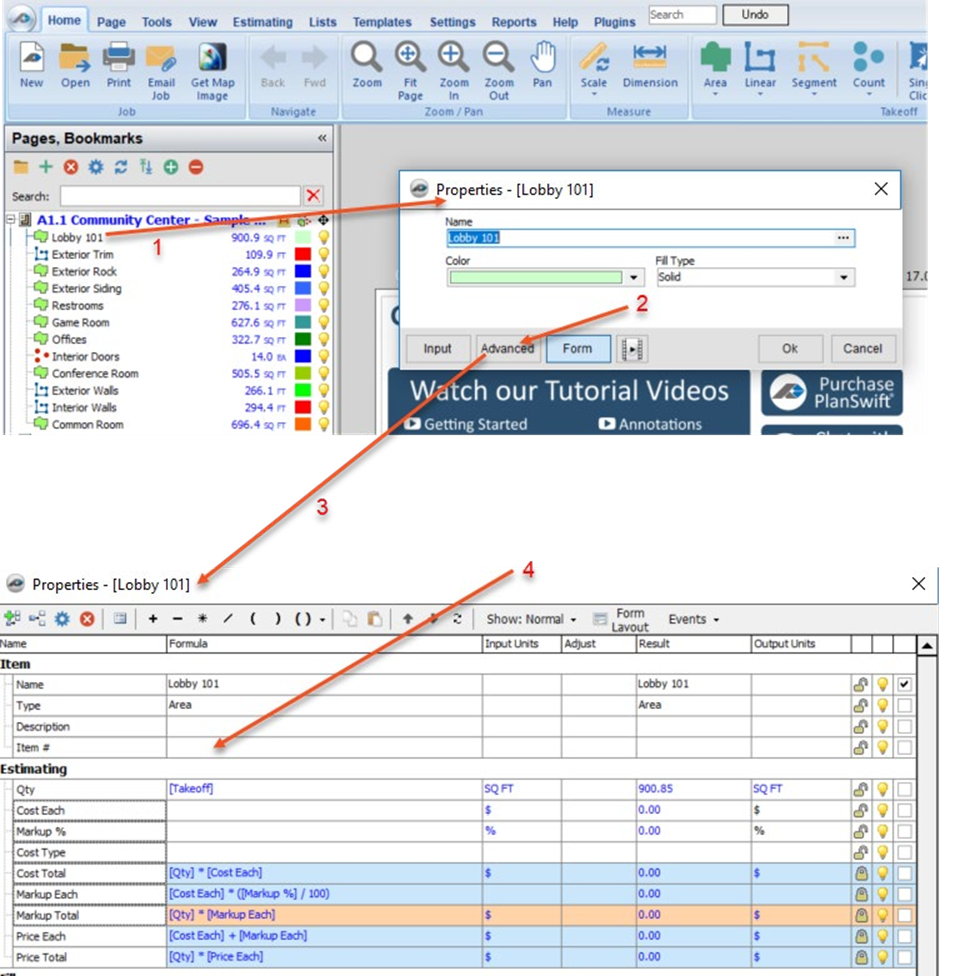
The option in the third box down allows for selection of Show Item Number. Selecting this adds an Item Number column when the takeoffs are exported. The Item #’s may be added in the takeoff’s advanced properties window (Figure 6), which is seen by double-clicking a takeoff item (in this case “Lobby 101”, see arrow 1 of Figure 6), and then clicking on Advanced (arrow 2 of Figure 6). This opens the advanced Properties window for “Lobby 101” (arrow 3 of Figure 6). The item number may be entered in the Formula column on the Item # row (arrow 4 of Figure 6).
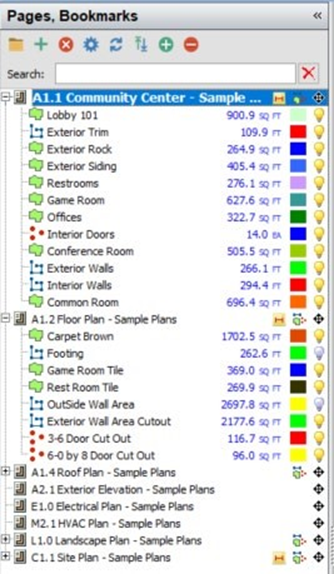
As an example, click on the yellow bulb for the “Game Room” takeoff in the A1.1
...
In the exported Excel file, the columns include column A, Page, which is the name of the sample plan page in this case; column B, Digitizer Item, which is the name of the takeoff; column C, Item Number, which contains the item number if Show Item Number was selected when exporting; column D, the takeoff unit value; column E, the Units; and column F, the color of the takeoff.
FAQ
Question: I’ve read this user guide, and I still have questions. What do I do?
...
Answer: No. However, the Item Number column is the only column that can be included or excluded when you export by selecting or not selecting the Show Item Number checkbox in the Export Pages to Excel window.
More Plugins and Starter Packs
Information on Plugins and Starter Packs is available directly on the Plugins Tab in PlanSwift...
...