...
- The Map From column will show the Scope category in the exported job
- The Value column will show what was used for that Scope category
- Example; System would be the Scope and then Supply would be the choice the user made
- Click the Item to map on the left then select the Scope Label on the right
- If needed, the available pick list options will be shown below
- Supply, Return, Rough-In, are examples of the pick list options.
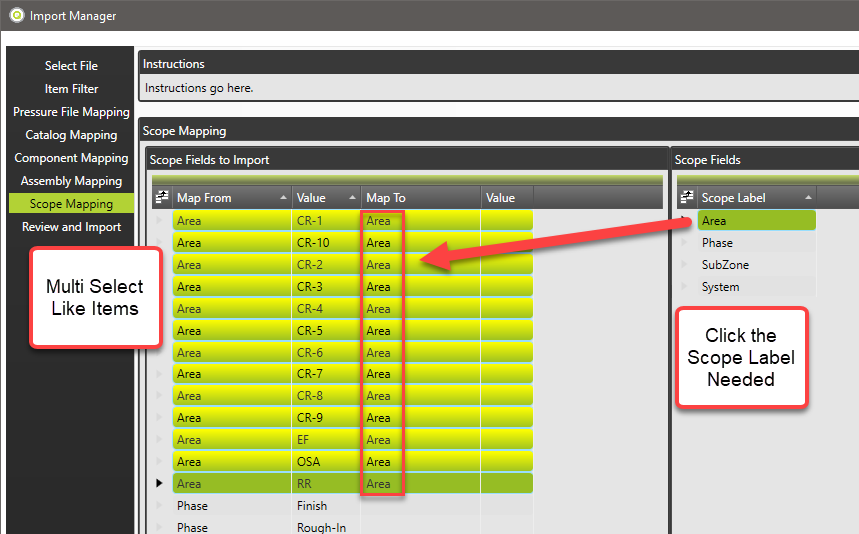
The user can multi-select using CRTL or SHIFT + Left Click to select a group of Map From values, then click the Scope Label needed.
Scope labels that have pick list options (like System, which has options Supply, Return, Exhaust, etc) are mapped in 3 steps.

When complete click the Next Stage button on the lower right or the Review and Import menu item in the navigation section.
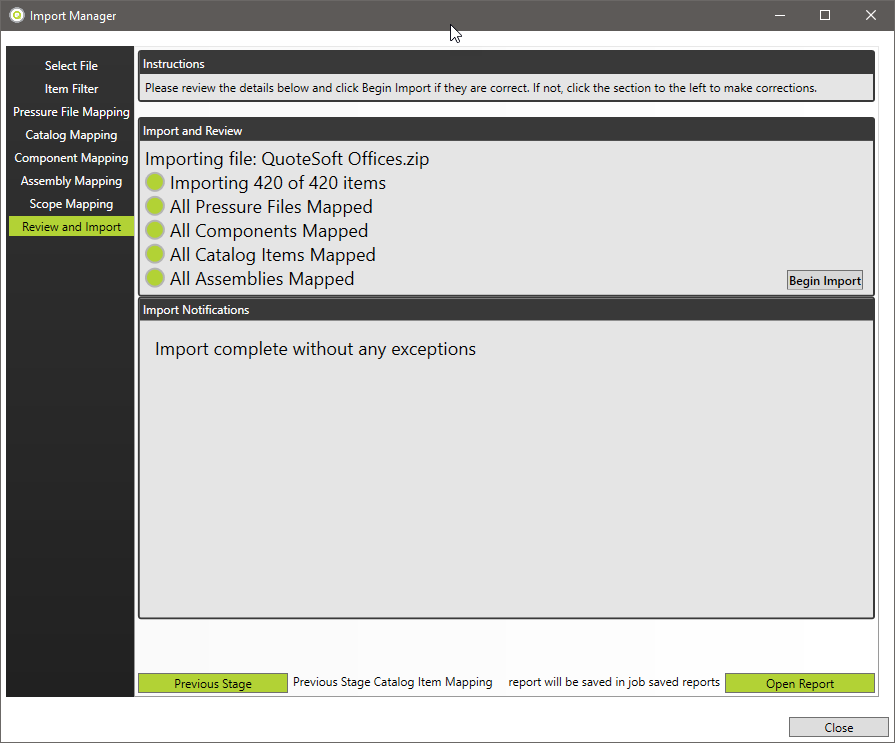
Review and Import Stage
The Review and Import stage will show the user the details of what is about to be imported.
If the information looks correct, click the Begin Import button. After import any items skipped will be displayed in the notifications area below. This information is also saved in a report which can be opened with the button below.
Once the import is complete, the user can then open the zone in takeoff and see all the items, the annotations, the scope information, exactly as it was during job creation.