Export and Import Takeoff
- Matt Long (Unlicensed)
Exporting a Job and Importing it on another Duct database will allow the users to map flexible components and assign pressure classes on import.
Click the link below for a short 8 minute video walk through of exporting and importing a Takeoff. A written instruction is listed below.
I. Exporting the Job after completing Takeoff
After a takeoff is complete it can be exported for import on another duct database.
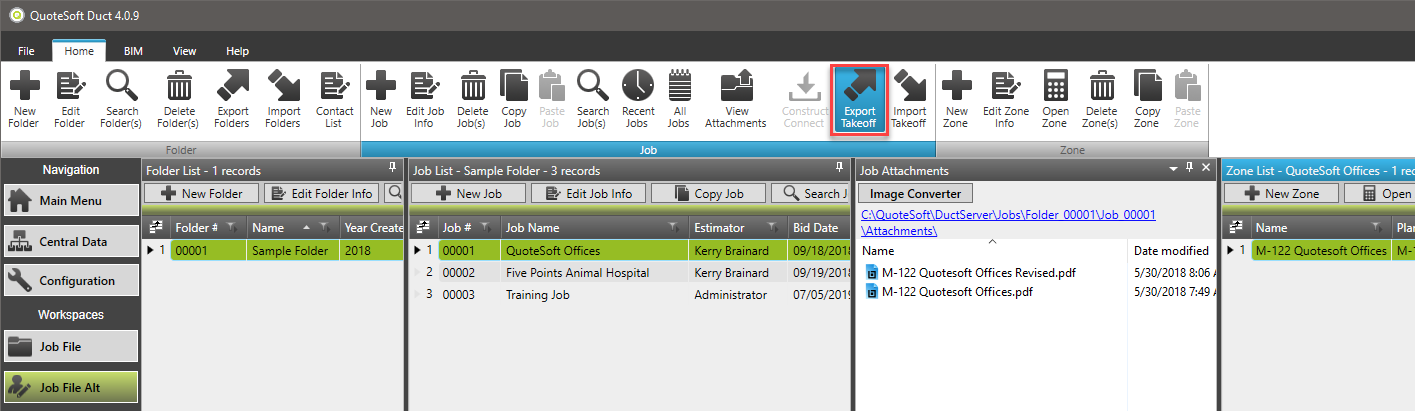
- In the Job File click on the Job to be exported
- In the ribbon menu at the top of the Job File click on Export Takeoff in the Job section
- Select a location to save the exported file
- Verify the name of the file
- Click Save button
The plan files associated with the zones within the job will be exported in a zip file.
II. Importing a Job
A job that was created in a different duct database can be imported using these steps.
- In the Job File click on the folder the job should be imported into
- In the ribbon menu at the top of the Job File click on Import Takeoff in the Job section
- This will open the Import Manager window
- Click the Browse button and select the file to import
- Click Next Stage button on lower right or the Item Filter stage on the left navigation menu
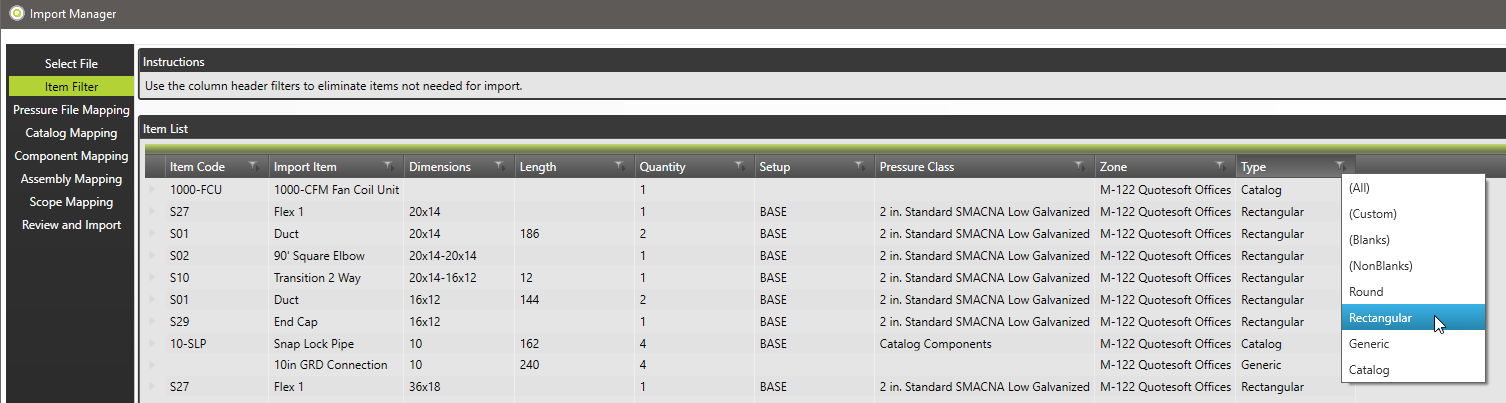
Item Filter Stage
The Item Filter stage allows the user to filter the list down to only the items desired to import. If for example it is only desired to import rectangular items, use the Type filter and select only Rectangular. The rest of the items within the job will be skipped. Once the list is filtered to the desired items, click Next Stage on lower right or click on Pressure File Mapping in the navigation menu.
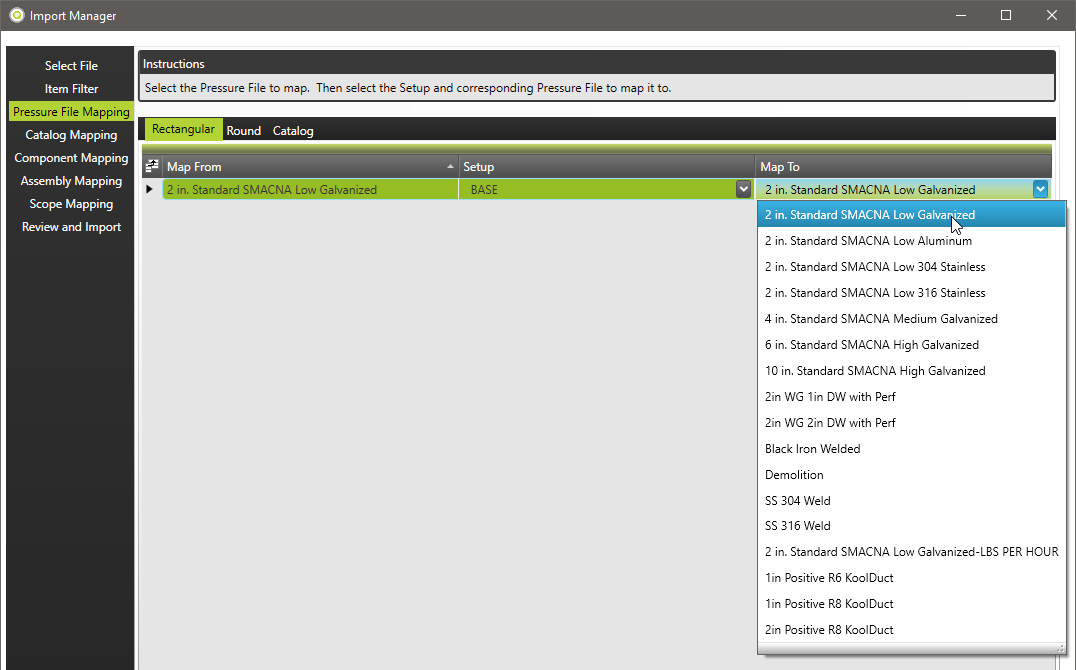
Pressure File Mapping Stage
Each pressure file used in the exported job will need to be mapped during the import process. The program will retain mapping configurations so the next time through pressure files should show up already mapped.
- Map From will show the name of the pressure file used in the exported job
- Click Setup and choose the desired setup to use
- Click the Map To drop down menu to select the pressure file to map to
Be sure to check the Round and Catalog tabs at the top of the stage. When complete click the Next Stage button on the lower right or the Catalog Mapping menu item in the navigation section.
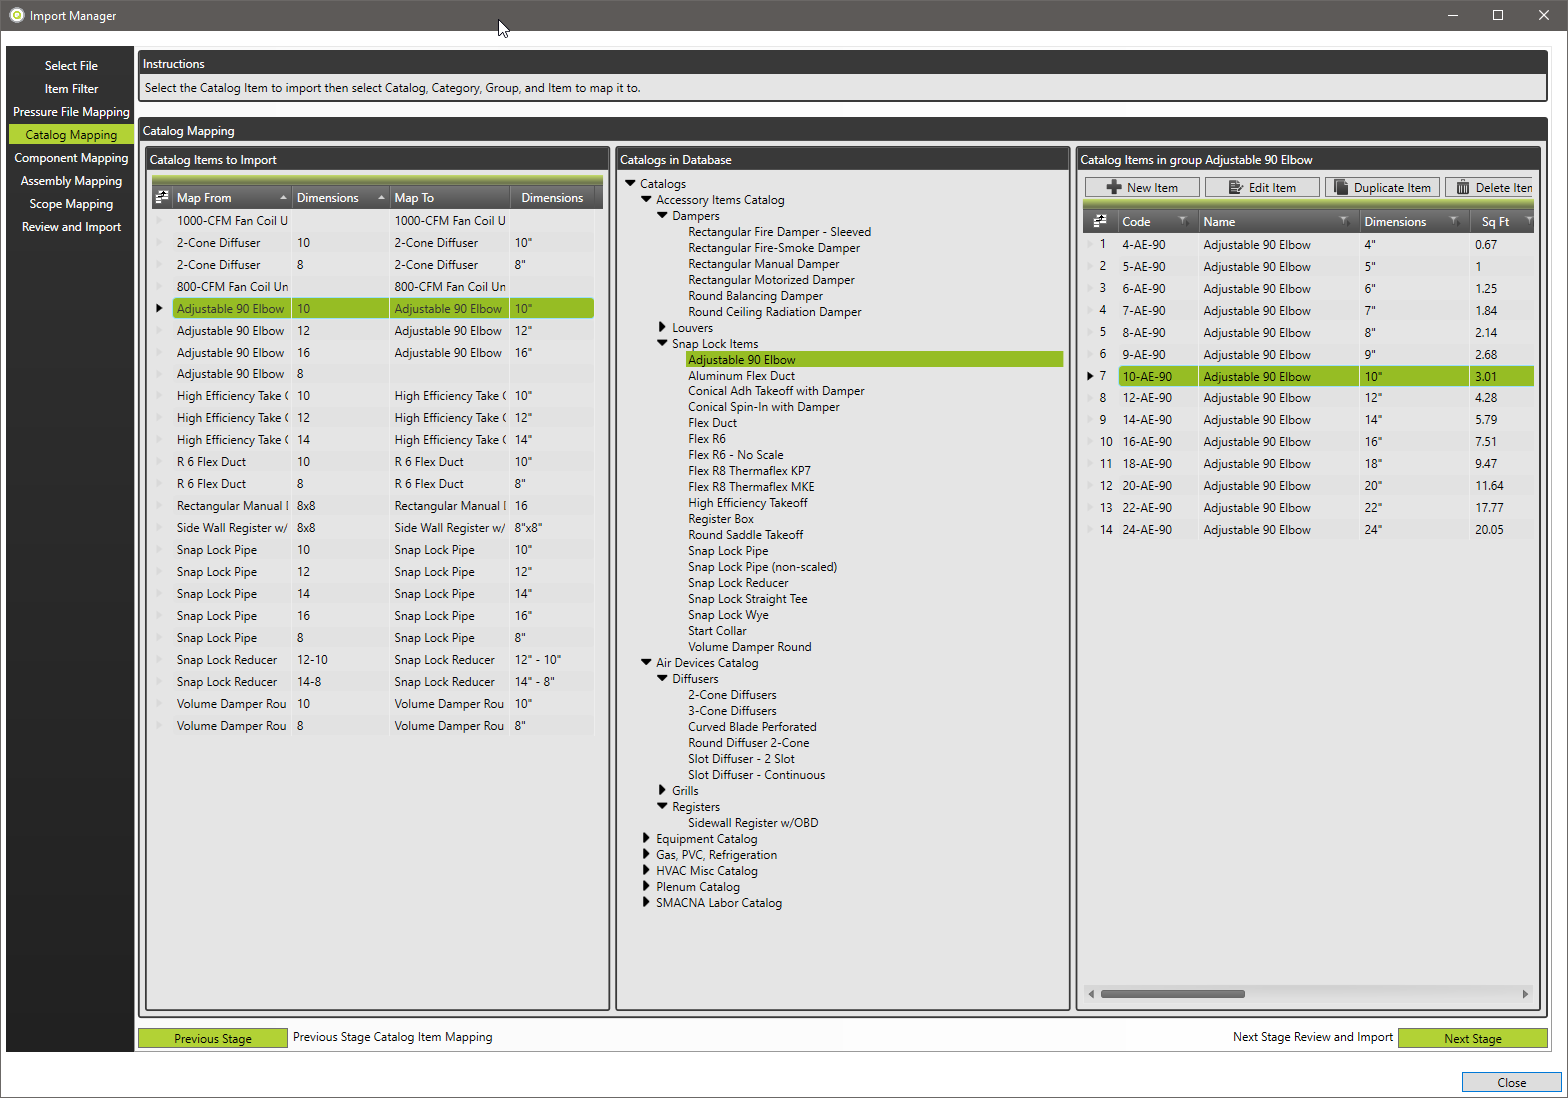
Catalog Mapping Stage
The items in the job that came from the Catalog will need to be mapped to items in your Catalog.
- Map From and Dimensions will fill with the items in the imported job
- Select an item and use the catalog navigation windows and select the desired items
- The mapping will be saved so the next import will have the items mapped only requiring verfication
When complete click the Next Stage button on the lower right or the Component Mapping menu item in the navigation section.
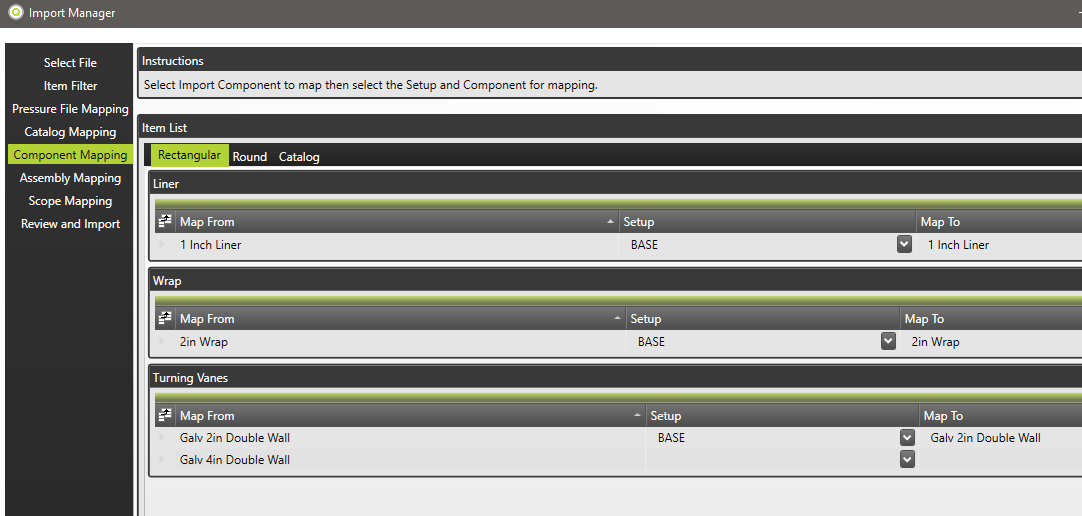
Component Mapping Stage
Only the flexible components need to be mapped. Items such as Liner, Wrap, and Vanes are considered flexible components. The rest of the components will be set based on the pressure file mapping stage.
- Map From will display the component used in the imported Job
- Assign the setup to get the list of available components
- Click the Map To drop down to select the component
Be sure to check the Round and Catalog tabs at the top of the stage. When complete click the Next Stage button on the lower right or the Assembly Mapping menu item in the navigation section.
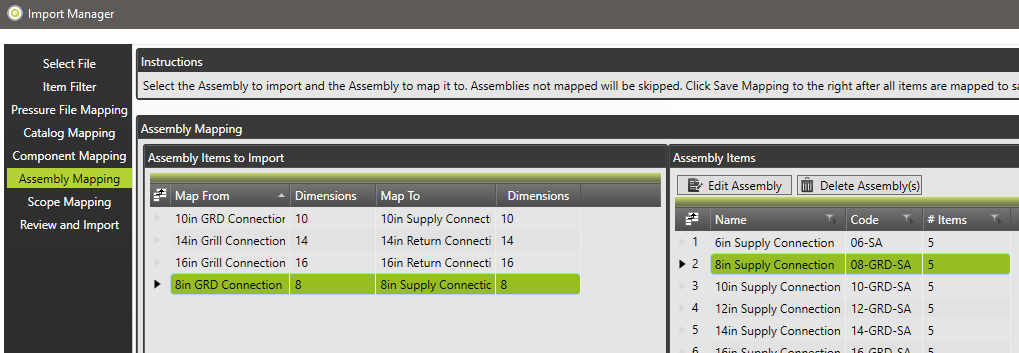
Assembly Mapping Stage
If the exported job contains assemblies they will be displayed on this stage for mapping.
- Map From will display the imported assembly name
- Select the desired assembly to map to on the right
- The Map To column will show the mapping made
When complete click the Next Stage button on the lower right or the Scope Mapping menu item in the navigation section.
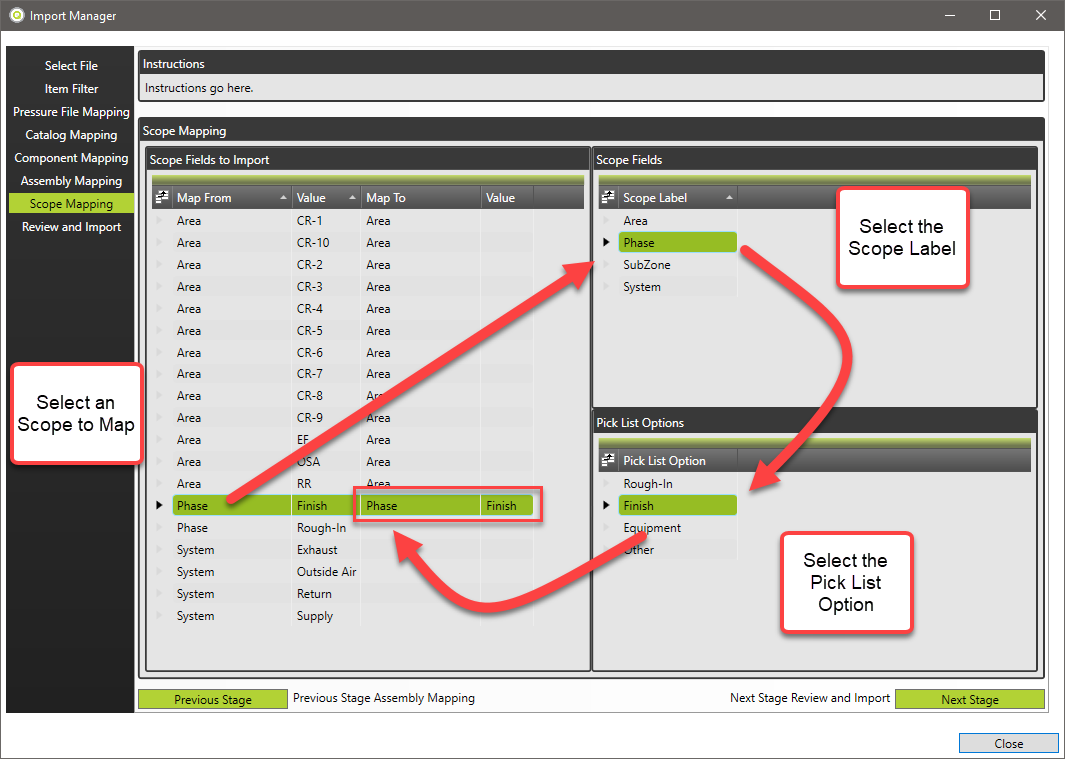
Scope Mapping Stage
The scoping used in the exported job will need to be mapped to the available scope options within the destination duct program. Similar to the other stages, this is done with mapping.
- The Map From column will show the Scope category in the exported job
- The Value column will show what was used for that Scope category
- Example; System would be the Scope and then Supply would be the choice the user made
- Click the Item to map on the left then select the Scope Label on the right
- If needed, the available pick list options will be shown below
- Supply, Return, Rough-In, are examples of the pick list options.
The user can multi-select using CRTL or SHIFT + Left Click to select a group of Map From values, then click the Scope Label needed.
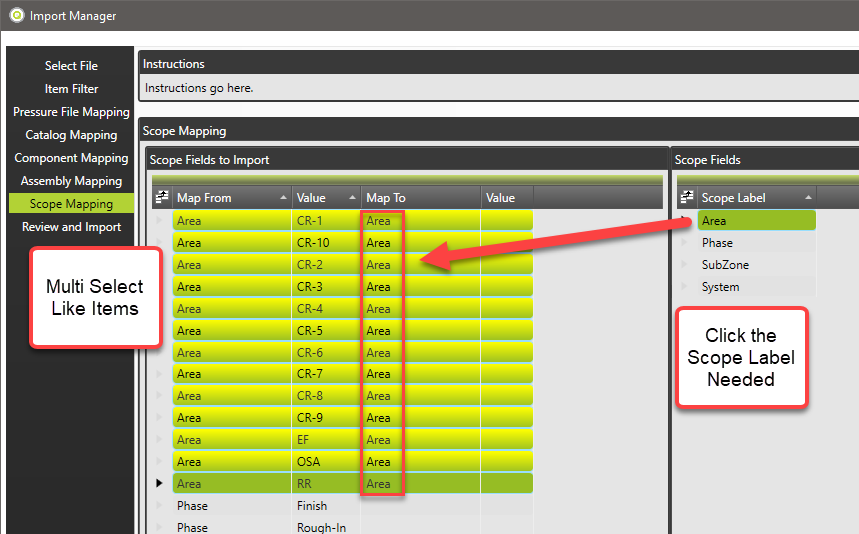
Scope labels that have pick list options (like System, which has options Supply, Return, Exhaust, etc) are mapped in 3 steps.
When complete click the Next Stage button on the lower right or the Review and Import menu item in the navigation section.
Review and Import Stage
The Review and Import stage will show the user the details of what is about to be imported.
If the information looks correct, click the Begin Import button. After import any items skipped will be displayed in the notifications area below. This information is also saved in a report which can be opened with the button below.
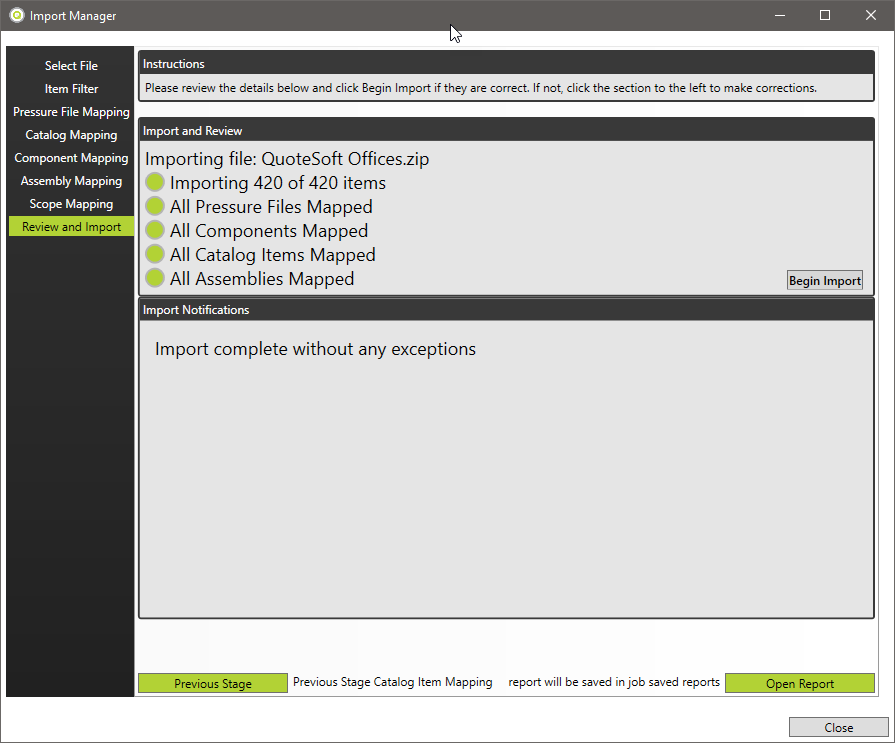
Once the import is complete, the user can then open the zone in takeoff and see all the items, the annotations, the scope information, exactly as it was during job creation.
©2022 ConstructConnect, Inc. All rights reserved.