Liner Stop Fitting - Rectangular
- Matt Long (Unlicensed)
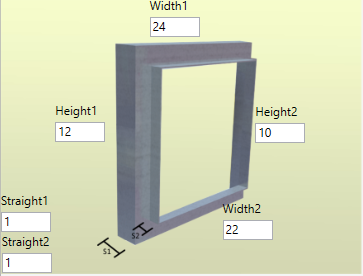
New to QuoteSoft Duct 4.0.8 is the Liner Stop fitting. This fitting is designed to be a short transition that allows the user to step down from lined duct to unlined duct. The fitting will automatically turn off liner and reduce the exit end by the thickness of the liner that was used. For example, duct with 1in liner that is currently 24x12 and then the liner stop fitting. Liner will be disabled and the small end of the fitting will be 22x10.
In order to use the item you must visit the Item Options and Pressure Class Files to validate the setup of the item.
Liner Stop - Validating Item Options
The Liner Stop fitting has two options that should be validated for the item prior to using in Takeoff.
- Open Central Data and click on Setups
- Expand your Setup (each setup will need to be validated)
- Expand Item Options
- Click on the Liner Stop fitting (last in the list of items)
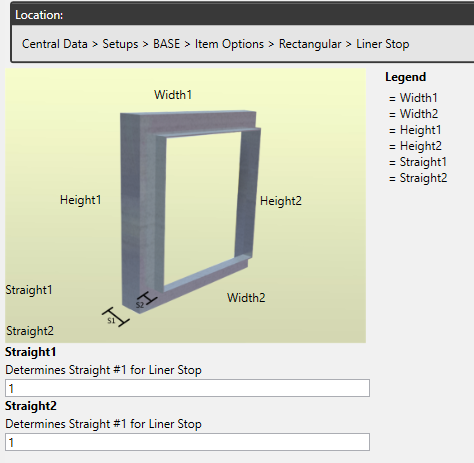
On the item page there are two options to determine Takeoff default values
- Straight 1 - the length of the metal needed BEFORE the large end joint allowance is added
- Straight 2 - the length of the metal needed BEFORE the small end joint allowance is added
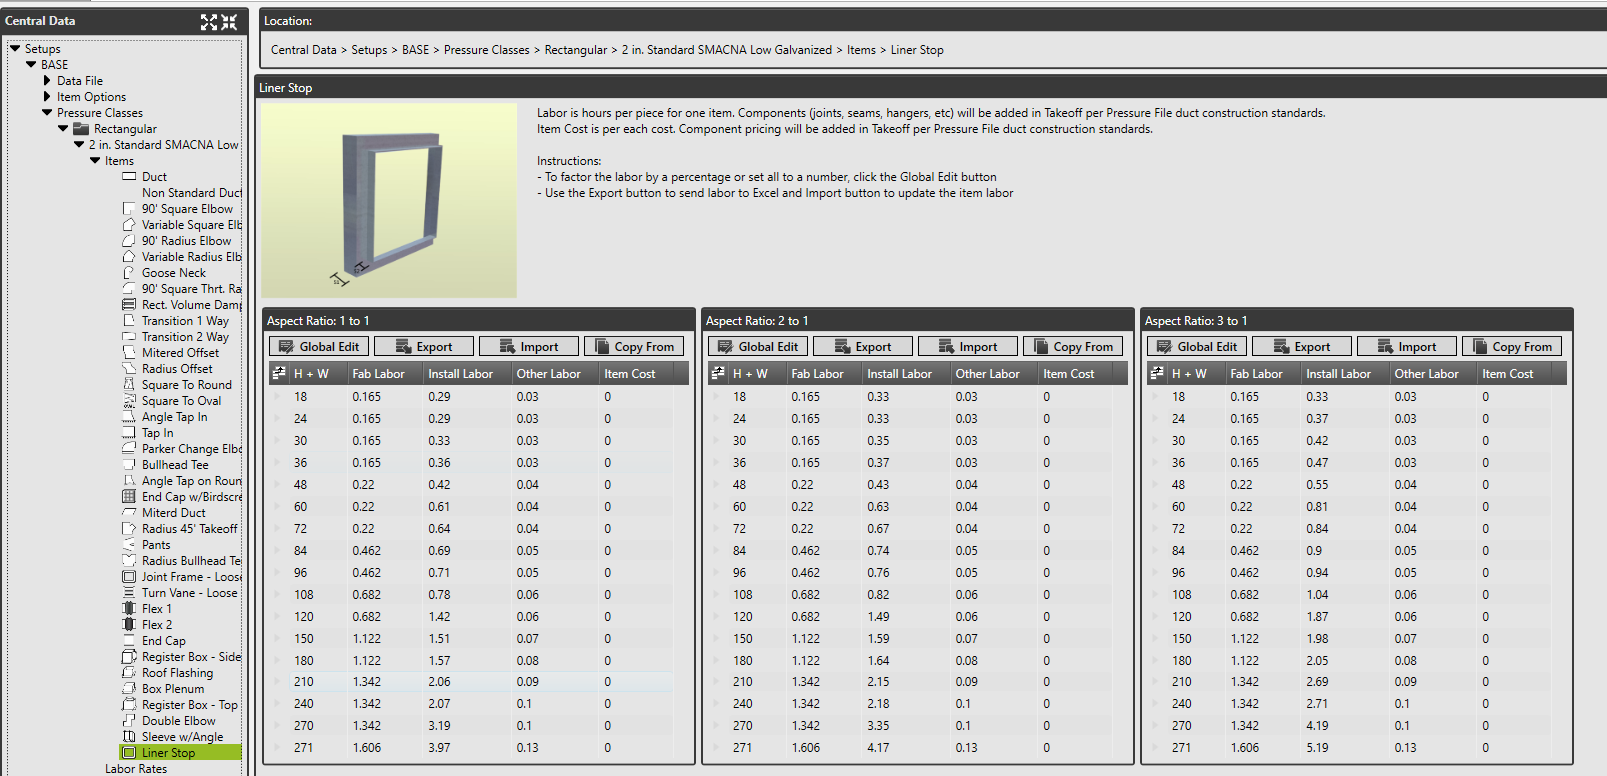
Liner Stop - Pressure Class Labor Validation
Each pressure class will have the Liner Stop fitting added to it, thus requiring validation of the labor hours associated with the item.
- Open Central Data and click on Setups
- Expand your Setup (each setup will need the labor validated)
- Expand the Pressure Files folder
- Expand the Rectangular folder
- Expand any Pressure Class
- Expand the Items
- Click on the Liner Stop fitting (last in the list of items)
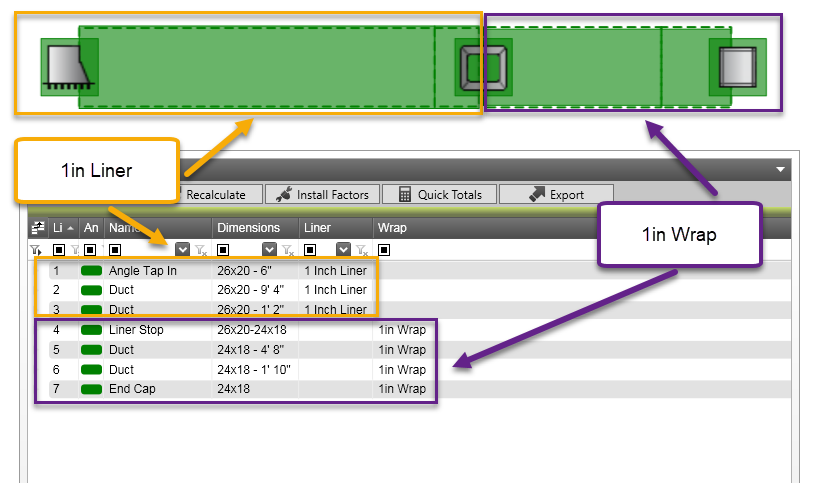
Liner Stop - Takeoff Use
The fitting is designed to be the end of the Lined duct. The program will automatically remove the liner that was on prior and reduce the fitting by the thickness of the liner.
An example using Auto Scale while in Takeoff:
- Select a rectangular angle tap in and input dimensions of 24x18
- Turn on 1in Liner and the dimesions are changed to 26x20 by the program
- Place the fitting on the plan file
- Select the Liner Stop fitting
- Notice Liner is now turned off and the items small end is reduced by the liner thickness
- Turn on 1in Wrap
- Place the fitting on the plan file
- Select a rectangular end cap and place on the plan file
Annotations on the plan file and audit trail should look like the image below
©2022 ConstructConnect, Inc. All rights reserved.