The Takeoff screen for a Zone is built using the Spec for this Zone, including sizes, types of pipe, fittings, valves, hangers, and specialties. The information in the Header of the Zone is in the upper left hand corner of the screen.
...
With your mouse, touch the 1″ size, touch  , touch 15′ and then touch
  .
.
...
- Click on the size to be taken off and then click
 . Note that the Information Box contains Pipe Info from the Spec.
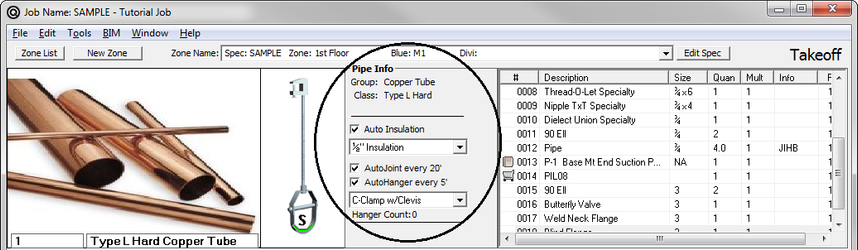
This information includes the Group and Class of the pipe. But the takeoff of pipe also has the following features:
AutoJoint – If this is selected, the system automatically includes the joint defined in the Spec at the spacing shown. AutoJoint will automatically be engaged when you click on pipe, but can be disabled by clicking on the check box on the screen. When activated, AutoJoint will provide for calculation as many joints required for the length of pipe taken off.
AutoHanger – If this is selected, the system automatically includes a hanger contained in the Spec at the spacing shown. The type of hanger is shown in the window below AutoHanger. If a Spec contains more than one type of hanger for a given size, you can choose the hanger you wish to have by clicking on the down arrow button and selecting from the list. AutoHanger will automatically be engaged when you click on pipe, but can be disabled by clicking on the check box. When activated, AutoHanger will provide for calculation as many hangers (rounded to the nearest hanger) required for the length of pipe taken off. - To continue with pipe takeoff, enter the desired length in feet.
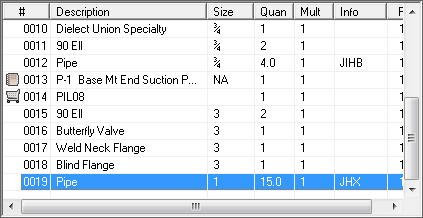
- Once a length of pipe is taken off, it will be logged into the Takeoff List in the upper right hand corner of the Takeoff screen.
A beep will sound to confirm that the previous item was inserted into the Takeoff List.
When AutoJoint is activated, a JX appears in the Takeoff List following the pipe taken off. When AutoHanger is activated, a JHX appears in the Takeoff List following the pipe taken off. (Do not be alarmed that the length is not long enough to require a hanger and/or joint; the calculation of this feature occurs later and will generate a joint quantity of 0.)
Fittings, Valves, Flanges, and Specialties Takeoff (Without Digitizer)
...
- Determine the scale of the drawing from which you are going to take off items.
- Using the mouse, select the desired size and click on Pipe.
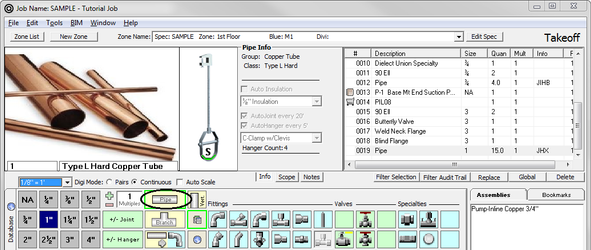
- Underneath the picture of pipe, click
 .
.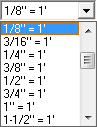
- A pulldown list of pre-loaded drawing scales appears. Select from the list.
...
- Select a size.
- On the template, touch a 90 elbow. The scale window appears. Since this is a fitting and not a run of pipe, you will be in “count” mode instead of “length” mode.

- Touch all the elbows in a pipe run, and then touch Accept (or touch the top button on the touchpen OR double touch on the last elbow).
...
The system is now in quantity mode. Touch on all of the fittings in a pipe run.
Generating 90 Elbows “On-The-Fly”
You may want to generate fittings while you are in takeoff.
- Select
 .
. - Touch all fittings.
- Notice the scale window is showing the count of fittings.
...
NOTE: Multiples is a great feature; however, REMEMBER TO TURN IT OFF. When you take off multiples, you will hear a beeping sound. Those beeping sounds keep you aware that you are in “multiple mode.”
There are times when, after you finish your takeoff, changes occur that require you to take quantities OUT of your takeoff. Multiples can be toggled to negative to deduct those quantities. Turn your multiples to negative and it will turn red.
Making Changes to Your Takeoff List
...
When you are done making changes, click  . The changed line item will appear in your Takeoff List.
...
Deleting an item in the Takeoff List is simple. Click the item and click  . If you want to confirm that you want that item deleted, go to File ⇒ > Takeoff Options and change the setting for deletion.
...
When you take off a new item, the system automatically puts it at the end of the list in the Takeoff List. If you want to replace an item in the list with another item (when you cannot simply edit the item), click  . This is helpful is you want to keep the order of takeoff.
...
When you select multiple items in the Takeoff List (by holding the shift key or Control key), the Replace command changes to the  command. This command is used when you want to convert valves or flanges from one type to another. It is mainly used for Value Engineering. For example, use this command if you want to change from a grooved system to a welded system. You would change Grooved Butterfly Valves to Flanged Butterfly Valves.
...
If you would like to change the same attribute for multiple items in the Takeoff List, you can use the  command. Highlight all the rows you would like to change (Control-Shift to highlight just the rows you want.) Select the button. The Resize window appears.
...
Change the items you wish and then click .
Printing Items
You can print the Takeoff List by clicking  .
.
Viewing a Visual Takeoff
After you've taken off your blueprint, you can bring up a screen that shows you a visual of your takeoff. This is helpful for you to get a quick glance to make sure you got all your pipe runs. First you have to configure your system to show the visual audit trail. Then, when you are in takeoff, you can press a single key to see the diagram.
- On the Main Menu, click
 . The Workstation configuration screen appears.
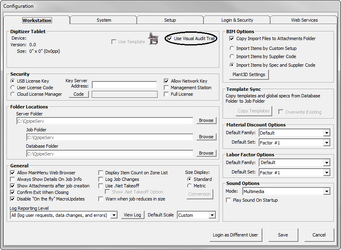
- Check the box next to Use Visual Audit Trail.
- Click .
- Go to your takeoff.
- Press F2 on the top of your keyboard. A picture of your takeoff appears.

...
The Database in Takeoff is very similar to the Database on the Main Menu. When you click  , the Database screen appears where you select Family, Group, Class, etc. Select the quantity by clicking on the number pad on the right. Click Accept.

When you are done adding Database items, click  .
.
Bookmarks
Bookmarks can be any items from the Database that you repeatedly use in this takeoff. You have 50 buttons per palette available with an unlimited number of palettes. You set up bookmarks so that they can default to the Specification selected.
...
You can change anything on this screen. When you are ready to save the changed information, click  .
.
Adding a New Item to Bookmarks
...
To delete a Bookmark, move your cursor to the item you would like to delete and click your right mouse button. On the bottom right side of the screen that appears, click ![]() .
.
Adding a Palette
...
- Use the Load command to bring in a completely different set of 50 bookmarks.
- Use the Copy command when you want to copy in a set and then make changes.

Click the  button to bring in an existing palette. NOTE: Any changes you make to this palette will be permanent.
...
- When you click
 , a screen appears confirming it is what you would like to do.
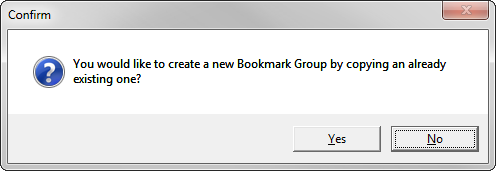
- Click
 . A screen appears asking what you would like to name the copied group.
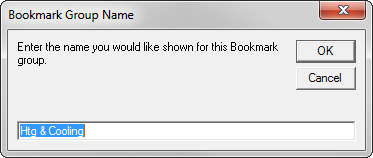
- After typing the name and clicking OK, a window appears with a list of palettes. Click on the palette you would like to copy.
...
You can enter new job items by clicking  on the left side of the screen. You will be presented with a list of all items currently defined for this job.
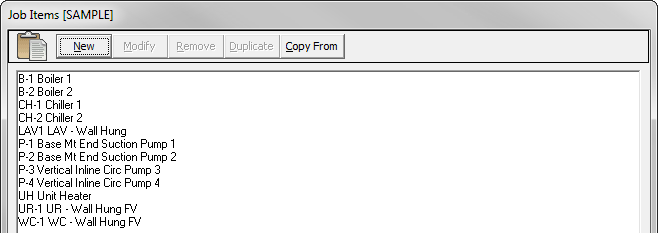
- Click
 . A New Job Item screen appears.
- Type in the information you want for the new Job Item. Click
 .
. - The list of Job Items returns. Select the Job Item you want added to the Takeoff List and click
 or double click on the Job Item. The Takeoff screen reappears.
...
When you are done taking off all the items on your blueprint, you are ready to run reports. To save and close Takeoff, click  on the upper right corner of the screen.

NOTE: The system will NOT ask if you want to save your Takeoff. It will automatically be saved and closed.