...
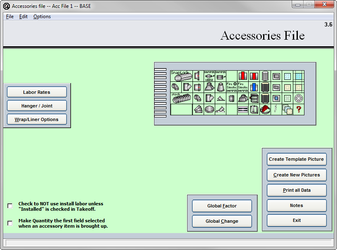
See Table of Contents for specific pages detailing information about the Accessories File.
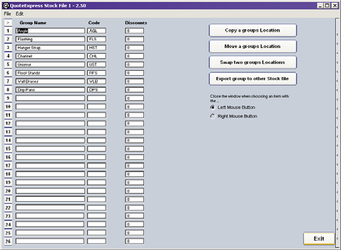
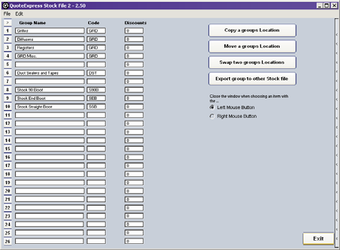
Stock Files
The stock files are being phased out of QuoteSoft Duct.
They have been replaced by the Catalog File. The catalog file has all the features of the stock files and many additional features not possible in the stock files.
Please do not use the stock files, they remain for legacy use only.
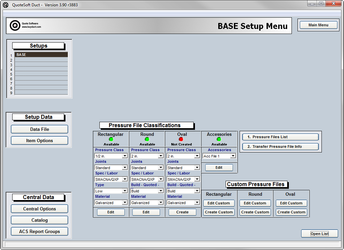
Pressure File List
Click on the Pressure File List button to view pressure files that you have created.
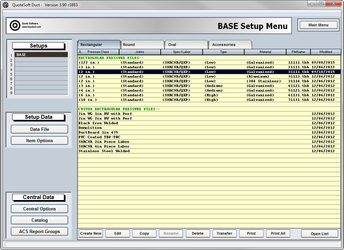
Click on any pressure file to open, make changes, or delete. Right click on a pressure file name, to assign it to be the default pressure file.
Close List: Will revert you to the classic drop down style.
Pressure File Transfer
After having made a copy of the default pressure file you can decide what information you wish to have copied form any other pressure files that have been created previously by you.
First you must choose which file you are copying from. Then select which information to be copied by checking the appropriate boxes. Now you must select the pressure files listed below to copy the information into.
All of these options are the same whether you are copying a rectangular, round or oval pressure file.
![]()
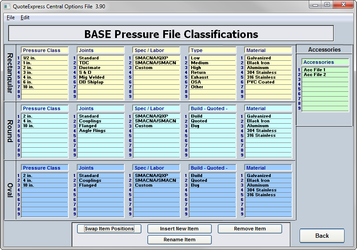
Pressure Classifications
You can find your pressure file classifications by first going to the Central Options File and then into program architecture. The different classification options that are available on the Data File Center main page for your pressure files are listed here. What ever is listed on this page will be shown in the drop down menus on the data file center’s main page.
New Pressure Files
The first thing you should do when creating a new pressure file is choose a file that currently exists to base the new one off of. You should take into consideration that if you choose a pressure file that has similar standards to the one you wish to create there are fewer changes that will need to be made.
Once you have chosen a suitable file to copy click on it to highlight it. Now click the copy button at the bottom of the page. For this exercise we will be creating a custom 2†pressure file. Choose custom off of the window that pops up. Your next step will be to name this pressure file. Name it “2 in. Custom.”
After you have named your pressure file you will see it on your pressure file list. We must now go into that pressure file. To do that simply double click it on the list. The pressure file will now be open to edit it.
After you have named your pressure file you will see it on your pressure file list. We must now go into that pressure file. To do that simply double click it on the list. The pressure file will now be open to edit it.Once opened you will see a list of options on the left hand side. On the right hand side is a template of the available ductwork and fittings. First we will click the labor rates button. On the labor rates page you will be able to choose which labor rate you would like to have used for this pressure file.
Once opened you will see a list of options on the left hand side. On the right hand side is a template of the available ductwork and fittings. First we will click the labor rates button. On the labor rates page you will be able to choose which labor rate you would like to have used for this pressure file.
...