...
To return to Excel Export screen click the Excel Settings button.
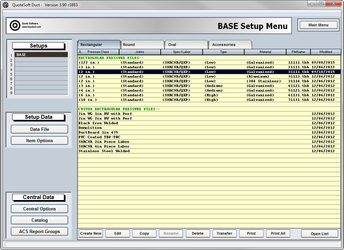
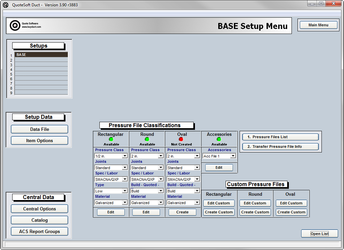
Setup Menu

This is the center point for all navigation throughout your pressure files and your Data File. This section will allow you to create, view and edit your pressure files as well as establish your Data File.
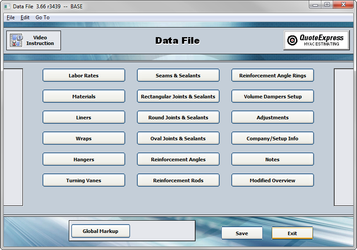
The first area of data entry you should visit and input is the Data File. This file will need to be established in order to have some sort of guidelines for your pressure files to fall under. In the Data File you will also assign the pressure classification information required to create the pressure files. The Data File is an accumulation of data that is required for the processing and building of your ducting systems.
This information is all collectively stored here for ease of use by you and by Server. All of the data should be current and correct for the program to run efficiently.
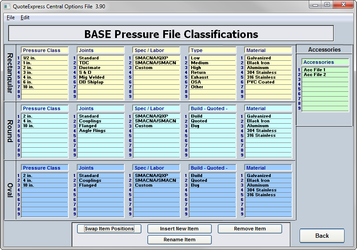
To create a rectangular pressure file you must first select the classifications in which you wish the file to be created. Starting with: Pressure Class: This is the pressure class you wish to have your ducting created under. Such as low (2 inch), medium (4 inch) or high (6 inch).
End Treatment: You must select the end treatment you wish for your ducting. Such choices as TDC, S and Drive and many more are available to you to choose from. No matter which end treatment or joint system you choose, you can still have a combination of end treatments in one pressure file. The treatment that is going to be used more prevalent should be chosen here.
Standard: This is the standard under which you wish the duct to be built.
Reinforcement: Which ever procedure you use to reinforce your ducting systems should be selected. The options are listed in the drop down menu.
Material: Whatever the material is that you are creating this pressure file for. Pressure files for materials such as aluminum, stainless steel, duct board and any other materials you use can be created.
Once you have selected the correct classifications for your pressure file you may then click on the button “Edit/Create”. FABshop will then look to see if there is such a pressure file created and stored, if not you will be asked to choose which already existing pressure file to base it on, or you can select to create it after the default pressure file.
In order to create a pressure file that is unique to one customer simply click on the “Create Custom” button and select a new name for this pressure file, usually the name of the customer you are creating it for. Then you will have to choose a pressure file to create it after, either a file you all ready have or after the default file.
Once you have created this company specific pressure file in order to edit it you will have to click on the “Edit Custom” button in order to choose that file. Then you may edit the pressure file just as you would any of the other files.
All of the round and oval pressure files procedures are the same as that of the rectangular.
If you wish to see a list of all of the pressure files created click on the button “Pressure File List”. This will show you to see a list of all of the pressure files that have been created and stored.
In order to better transfer pressure file information you can use the Transfer Pressure File Info option. This option is designed so that you can designate what info you wish to have transfer from one file to another; you can be as specific as you wish.
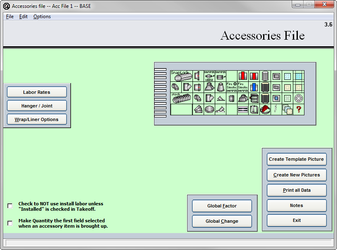
The Accessories page is where you assign the Stock/Misc. File and item line number to each of your miscellaneous items.
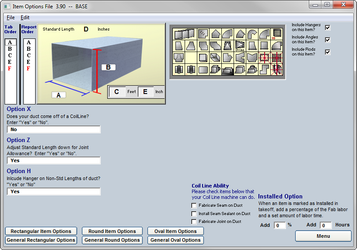
The Central Options File will allow you to assign all of the procedures you wish the takeoff screen to take while viewing fittings. You can assign the default throat lengths for a 90′ square elbow or the default length of a 2-way transition for example.
Item Options

- Default Data
Input default data such as the default throat lengths for a 90° square elbow, or the default length for a two-way transition. - Tabbing Order
Customize the tabbing order for takeoff by assigning field order. - Length Adjustment
Customize the base length and corresponding percentage changes in labor. If a length is greater or lesser than the default length, increase or decrease the labor by the specified percentage. - Rectangular, Round, Oval
The same options are available for Rectangular, Round and Oval. Click on any of the duct system tabs at the bottom of the screen and continue customizing information. - General Options
Secure valuable takeoff data by establishing what data can be changed by another user. For example, the administrator may want to secure the labor data for the Rectangular data file. This ensures that another estimator can only delete or change certain pieces of information from their Takeoff screen.
Data File
The Data File is an accumulation of data that is required for the processing and building of your ducting systems. This information is all collectively stored here for ease of use by you and by Server. All of the data should be current and correct for the program to run efficiently.
This is the area where you will keep all of your data for such things as your labor rates, liner, wrap, hanger systems, etc. All of this information should be updated and checked regularly or as often as possible.
This information will be used in the specific pressure files that you create for your company and that of your customer’s files as well.
The Data File tells the program how you would like to build and design the ducting systems that you use. This data is very important to the program and it is strongly recommended that you password protect these files to keep unnecessary changes from being made.
See Table of Contents for specific pages detailing information about the Data File.
Accessories File
The accessory file will tell you where to install all of the data for your accessory items. Snap lock pipe, adjustable elbows, wyes and other fittings such as these are all located in the miscellaneous files, but you need to visit this section to know where to input the proper information.
All of your accessories are the items that you buy, the items that are not classified as rectangular, round or oval. Such items would be your snap lock pipe, adjustable elbows, snap wyes, flex, etc. These items are generally bought items and don’t have any fabrication hours, but if you are fabricating them there is an area for the labor hours to be included.
See Table of Contents for specific pages detailing information about the Accessories File.
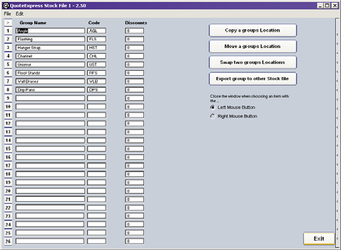
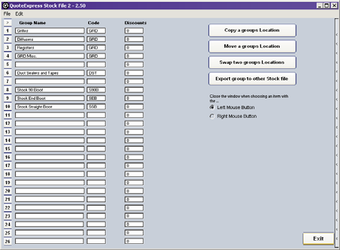
Stock Files
The stock files are being phased out of QuoteSoft Duct.
They have been replaced by the Catalog File. The catalog file has all the features of the stock files and many additional features not possible in the stock files.
Please do not use the stock files, they remain for legacy use only.
Pressure File List
Click on the Pressure File List button to view pressure files that you have created.
Click on any pressure file to open, make changes, or delete. Right click on a pressure file name, to assign it to be the default pressure file.
Close List: Will revert you to the classic drop down style.
Pressure File Transfer
After having made a copy of the default pressure file you can decide what information you wish to have copied form any other pressure files that have been created previously by you.
First you must choose which file you are copying from. Then select which information to be copied by checking the appropriate boxes. Now you must select the pressure files listed below to copy the information into.
All of these options are the same whether you are copying a rectangular, round or oval pressure file.
![]()
Pressure Classifications
You can find your pressure file classifications by first going to the Central Options File and then into program architecture. The different classification options that are available on the Data File Center main page for your pressure files are listed here. What ever is listed on this page will be shown in the drop down menus on the data file center’s main page.
New Pressure Files
The first thing you should do when creating a new pressure file is choose a file that currently exists to base the new one off of. You should take into consideration that if you choose a pressure file that has similar standards to the one you wish to create there are fewer changes that will need to be made.
Once you have chosen a suitable file to copy click on it to highlight it. Now click the copy button at the bottom of the page. For this exercise we will be creating a custom 2†pressure file. Choose custom off of the window that pops up. Your next step will be to name this pressure file. Name it “2 in. Custom.”
After you have named your pressure file you will see it on your pressure file list. We must now go into that pressure file. To do that simply double click it on the list. The pressure file will now be open to edit it.
Once opened you will see a list of options on the left hand side. On the right hand side is a template of the available ductwork and fittings. First we will click the labor rates button. On the labor rates page you will be able to choose which labor rate you would like to have used for this pressure file.