Versions Compared
| Version | Old Version 11 | New Version Current |
|---|---|---|
| Changes made by | ||
| Saved on |
Key
- This line was added.
- This line was removed.
- Formatting was changed.
The ConstructConnect Platform prequalification feature lets contractors interested in your work submit their prequalification form for you to complete and return. You can also save your own completed prequalification form to have on file for submission upon request.
The Prequalification process prequalification process is used to limit bidders to only those contractors that can demonstrate themselves to be qualified to work on a particular project.
To access the ConstructConnect Platform prequalification section, Prequalification fundamentals
The ConstructConnect prequalification tools let you find the general contractors that are looking to work with you! They can send your firm prequalification forms where you can showcase your qualifications, insurance and past work. When you get a request, filling out your forms promptly ensures you get the highest possible number of invitations.
This section contains the following topics:
| Table of Contents |
|---|
Accessing prequalifications
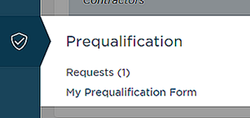
To access your prequalifications,
- click the Prequalification shield icon in the sidebar on the left side of any window and select either Requests or My Prequalification Form:

This section contains the following topics:
Working with
yourprequalification
form Working with prequalificationrequests
| Anchor | ||||
|---|---|---|---|---|
|
Contractors interested in the work you perform can contact you through through the ConstructConnect Platform with prequalification forms for you to complete and return. The following table describes the information for the request.
| Field | Description |
| General Contractor | The name of the contractor submitting the request. |
| Form Name | The name of the form given by the general contractor. |
| Requested | The date the request entered the system. |
| Submitted | The person submitting the form. |
| Last Changed | The date that you submitted the completed form. |
| Changed By | The person making the change to the form. |
| Auto Update | The Auto Update Form feature copies changes you make to your Subcontractor Qualification Form to the GC prequalification form. You do not need to enter the revised data in both forms. To set the Auto Update Form,
Result: Any changes you make to your own prequalification from is automatically copied to the attached GC form. |
Working with your prequalification form
| Anchor | ||||
|---|---|---|---|---|
|
You can complete and save your own prequalification form to have on file for submission upon request by a general contractor. You can make edit, export and add notes to your form, and view a log of any changes made to your form.
Accessing your prequalification form
To access your form,
- click My Prequalification Form.
Result: The prequalification form for your account is displayed.
The form is divided into ten sections that you can access independently using the sidebar menu. Each menu has clear instructions about the information required to complete the section including uploading relevant documents. You do not need to complete a section before saving it.
To save any changes you make to the form,
- click Save Changes at the top of the menu.
Exporting your form
You can export your prequalification form in PDF, CSV and Excel formats. You can select to include any attached documents in your download.
To export your form,
- click Export Form at the top of the menu.
Result: The export runs and a message is displayed letting you know that the export is ready. - Click on the message to save your form to your local device.
Adding notes to your form
The note feature lets you add notes to your form that are only visible to your account. The notes that you add are shown directly below the section title Most Recent Note and are listed in descending chronological order.
To add a note,
- click All Notes.
- In the All Form Notes menu, add your note in the box.
- When you are done, click Add Note.
Result: You Your note, your name and the date are displayed below the box. - When you are done, click Return to Form at the top of the menu.
Result: The form main menu is displayed and your note is shown in the Most Recent Note section.
Viewing the form Change Log
To view your change log,
- click Change Log at the top of any page.
Result: The Change Log page is displayed showing the changes made to the form by date and time, the user making the change, the company name, and the location and any value change made. - To return to the menu, click Return to Form.