To create a New Project, start
| Widget Connector | ||
|---|---|---|
|
Start by clicking the New Job icon in button on the Home tabTab's ribbon bar.
The New Job Properties properties dialog box opens.
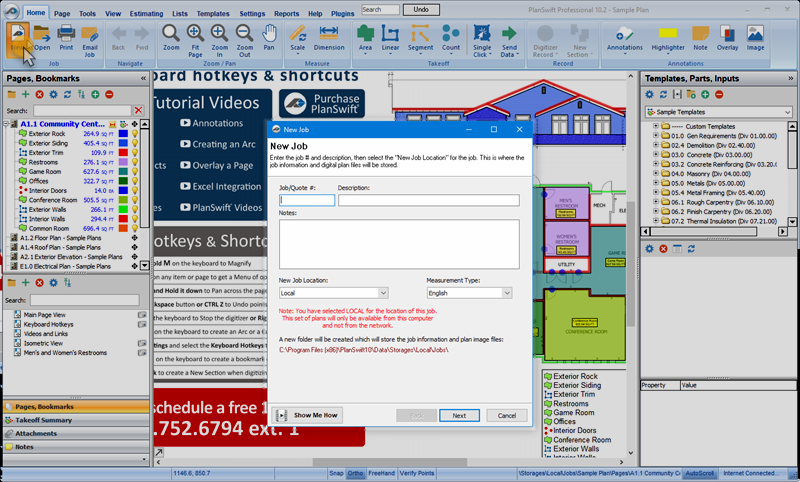
In the New Job dialog, fill in the Job number, description of the job, any notes about the job, the location where the job will be saved (the Data Store), and the measurement type (English or Metric).
...
**(The files used in this example were already TIF files, therefore no options for conversions are available.)
| Info | ||
|---|---|---|
| ||
If you use the Earthworks Pro Plugin, you must convert all pages to TIF - the Plugin only works with TIF files. |
Click Next after setting up your conversion options.
...
PlanSwift copies (and possibly converts, if you chose that option) all the image files to the project Data Store and adds them to this Job.
| Info |
|---|
A reminder: If you create a Job in your Local store, the image files are copied there. If you want to share this job over a network, be sure to create it in a network store and the images will be copied there. |
When finished, you'll see the first page of your project in PlanSwift.
...
Now that all of your pages have loaded for your new job, you may want to organize them into multiple folders.
See: How To: Create and Use Page Folders to Organize Your Plans.