...
If you want to change the order in the Spec, use  . This will eliminate extra clicking when you get to Takeoff.

- To add a particular hanger to the Spec, click on
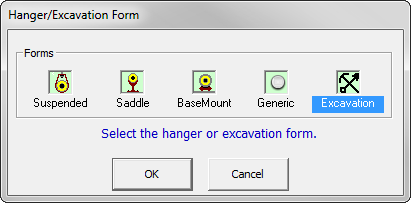
 > Hanger/Excav. A window appears where you can select which type of hanger you would like to add to the Spec.
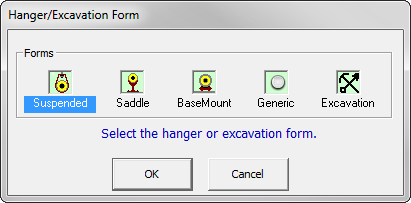
- Select the desired Hanger Form and click
 .
. - A screen appears for the Hanger Form you selected. The following screen is for the “Suspended” Hanger.
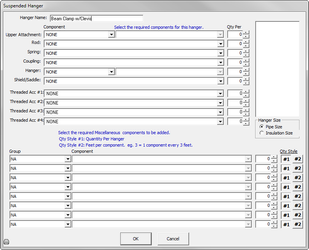
- Select the desired Components. Some components will require an extra selection if the Group has a Subclass in the Database. (If the Generic Hanger Form is selected, the Group must also be selected.)
- Enter the quantity of each Component, by clicking on the up/down arrow to the right of each component. (A quantity of 1 will automatically be entered for each component.)
- Once all of the Components have been selected, select the Hanger Size in the box at the lower right of the Hanger Form screen. If Pipe Size is selected, hangers and other components will be sized to fit the pipe, when selected during takeoff. If Insulation Size is selected, hangers and other components will be sized to fit outside the insulation, when selected during takeoff.
- When done, click . This selection appears under Item Description on the Spec screen. (At the bottom of the Hanger section.)
- Select the size range for this particular Hanger Form as explained above in Step 6 for Pipe.
...
Note that excavation is treated as a special case of a Hanger Form.
This is separate so you can automatically estimate excavation costs as you take off pipe.
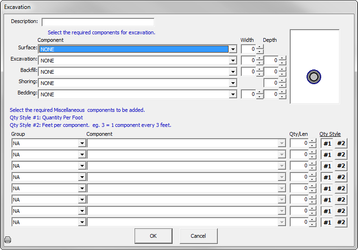
Excavation hanger forms are nearly identical to other hanger forms with the following exceptions:
...
- To define hanger spacing for the Spec, click on > Hanger Spacing.
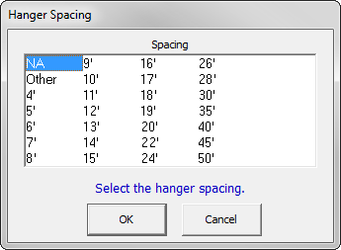
- Select the desired spacing from the Hanger Spacing window. When done, click . This selection appears under Item Description on the Spec screen. (At the bottom of the Hanger Spacing section.)
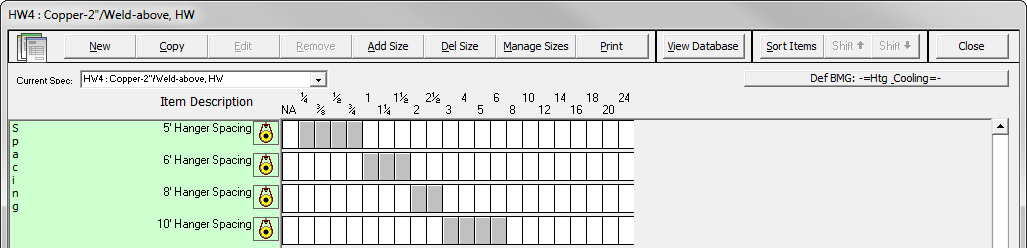
- Select the size range for this particular Hanger Spacing as explained in Step 6 for Pipe.
- Any number of Hanger Spacing selections can be made for a particular Spec, provided that their size ranges do not overlap. This allows your Spec to have varying spacing for different pipe sizes for a single piping system.
...
- To add a particular Class of specialties to the Spec, click on > Specialty.
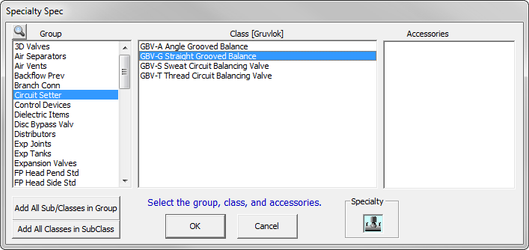
- Select the Group, the Subclass (if required), and then the Class to which the desired specialties belong.
- Select any available accessories, if desired, as required for this Spec. When done, click . This selection appears under Item Description on the Spec screen. (At the bottom of the Specialty section.)
- Select the size range for this particular Specialty Class as explained in Step 6 for Pipe.
- Up to 16 specialty selections can be made for a particular Spec, provided that the size ranges for each type of specialty do not overlap. This allows you to select many different types of specialties in a single piping system.
Once you have added all the items you wish to this Spec, click  at the top right of the screen. A window appears to confirm that you want to save any Spec changes. Do so by clicking
  .
.
Changing the Information in a Spec
...
- Highlight the spec and click
 .
. - Double click on the spec.
...
- Click on the component (Pipe, Fitting, Hanger, etc.) of the Spec you wish to change. Click
 at the top of the screen.
 - Re-select the item as was done when the Spec was created.
- Make as many component revisions, new selections, or size range changes as desired.
- When all desired changes have been made, click . Confirm saving changes by clicking .

...
- Highlight the Spec you would like to rename (or change description). Click
 Â on the left side of the screen. The Spec information screen appears.
 on the left side of the screen. The Spec information screen appears. - Make revisions to the Name or Description as desired, and click .
...
QuoteSoft Pipe allows you to copy a Spec from any existing job OR from the Global Spec list.
- Click
 on the left side of the screen. The Copy Spec screen appears.
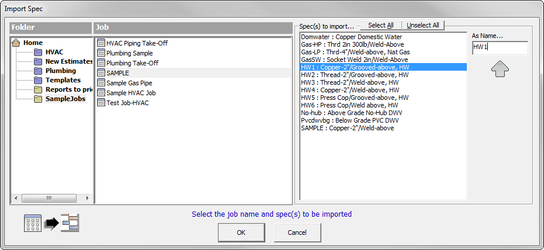
- To copy from an existing job, select the folder and job from which you would like to copy a Spec. Select the desired Spec. (Multiple Specs may be selected by holding down the control key). Note that ALL specs can be selected by clicking on
 .
. - To copy from the Global Specs, select the Home Folder (
 ). Select the desired Spec. (Multiple Specs may be selected by holding down the control key). Note that ALL specs can be selected by clicking on .
 - Edit the Spec Name (if desired) by clicking on the name shown under As Name… and type in the new name for the Spec.
- Click to save the Spec. It will now appear in the list alphabetically.
...
- Make sure you are in the Spec you would like to print. Click
 .
.