The Takeoff screen for a Zone is built using the Spec for this Zone, including sizes, types of pipe, fittings, valves, hangers, and specialties. The information in the Header of the Zone is in the upper left hand corner of the screen.
...
- Click on the size to be taken off and then click
 . Note that the Information Box contains Pipe Info from the Spec.
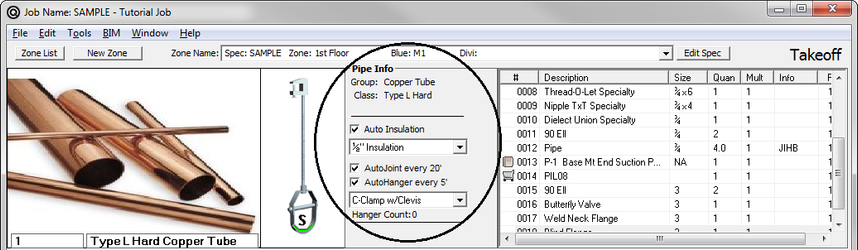
This information includes the Group and Class of the pipe. But the takeoff of pipe also has the following features:
AutoJoint – If this is selected, the system automatically includes the joint defined in the Spec at the spacing shown. AutoJoint will automatically be engaged when you click on pipe, but can be disabled by clicking on the check box on the screen. When activated, AutoJoint will provide for calculation as many joints required for the length of pipe taken off.
AutoHanger – If this is selected, the system automatically includes a hanger contained in the Spec at the spacing shown. The type of hanger is shown in the window below AutoHanger. If a Spec contains more than one type of hanger for a given size, you can choose the hanger you wish to have by clicking on the down arrow button and selecting from the list. AutoHanger will automatically be engaged when you click on pipe, but can be disabled by clicking on the check box. When activated, AutoHanger will provide for calculation as many hangers (rounded to the nearest hanger) required for the length of pipe taken off. - To continue with pipe takeoff, enter the desired length in feet.
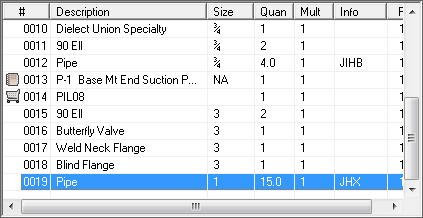
- Once a length of pipe is taken off, it will be logged into the Takeoff List in the upper right hand corner of the Takeoff screen.
A beep will sound to confirm that the previous item was inserted into the Takeoff List.
When AutoJoint is activated, a JX appears in the Takeoff List following the pipe taken off. When AutoHanger is activated, a JHX appears in the Takeoff List following the pipe taken off. (Do not be alarmed that the length is not long enough to require a hanger and/or joint; the calculation of this feature occurs later and will generate a joint quantity of 0.)
Fittings, Valves, Flanges, and Specialties Takeoff (Without Digitizer)
...
- Determine the scale of the drawing from which you are going to take off items.
- Using the mouse, select the desired size and click on Pipe.
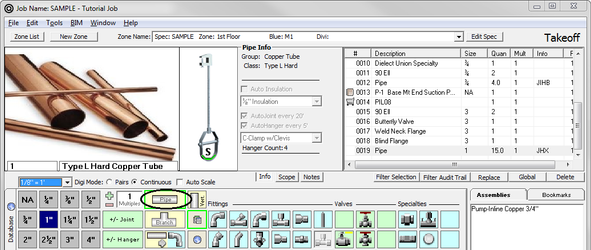
- Underneath the picture of pipe, click
 .
.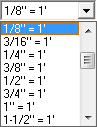
- A pulldown list of pre-loaded drawing scales appears. Select from the list.
...
NOTE: Multiples is a great feature; however, REMEMBER TO TURN IT OFF. When you take off multiples, you will hear a beeping sound. Those beeping sounds keep you aware that you are in “multiple mode.”
There are times when, after you finish your takeoff, changes occur that require you to take quantities OUT of your takeoff. Multiples can be toggled to negative to deduct those quantities. Turn your multiples to negative and it will turn red.
Making Changes to Your Takeoff List
...
- On the Main Menu, click
 . The Workstation configuration screen appears.
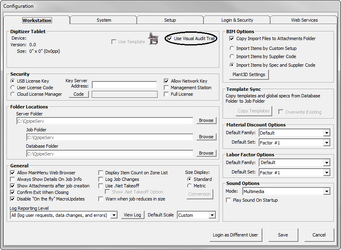
- Check the box next to Use Visual Audit Trail.
- Click
 .
. - Go to your takeoff.
- Press F2 on the top of your keyboard. A picture of your takeoff appears.
...
Like the Database, select the Family, Group, Class, etc. and then click  . The new item appears on the blank spot on the palette.
...
You can add a whole new palette of bookmarks.
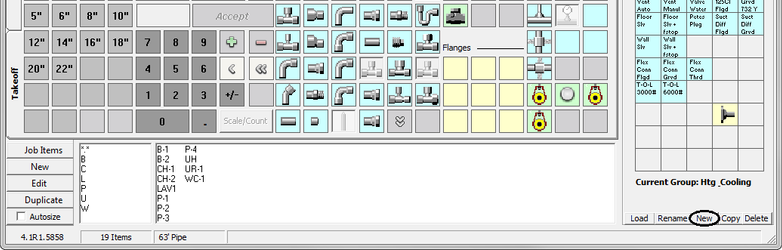
- Click
 at the bottom of the Bookmark palette.
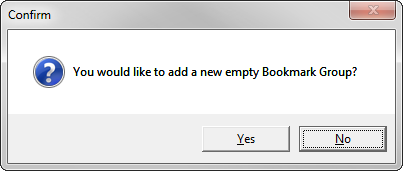
- Click Yes.
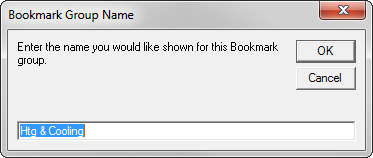
- Type the name of the bookmark palette, and then click OK. A blank palette appears. Now you can right mouse click on an empty space and create a new bookmark OR you can copy in an existing palette and modify that palette. See the next section on loading and copying bookmark palettes.
...