 | Before you begin: Pulse may not be enabled for your account. For more information about Pulse, contact your system administrator. |
About Pulse
Pulse provides in-depth analytics of the Insight activity for the Leads, Analyze and Forecast users in your company. Metrics reported include the number of logins; the number of projects and companies viewed and tracked; the searches run and saved, and the number of exported projects, companies and documents.
Note: Your account representative is responsible for creating individual user accounts for your company. If there are no user accounts present, or if you have questions about this procedure, contact Customer CareService.
This section contains the following topics:
| Table of Contents |
|---|
| Anchor | ||||
|---|---|---|---|---|
|
Accessing Pulse
To access Pulse,
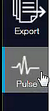
- click Pulse at the bottom of the side bar menu:
Result: The Pulse dashboard is displayed.
| Anchor | ||||
|---|---|---|---|---|
|
Selecting the Dashboard or the Usage Table
Pulse contains two main windows, the Dashboard and the Usage Table:
- The Dashboard provides summary information of the Insight user activity for your company, including aggregate trends, activity totals and team rankings.
- The Usage Table provides a breakdown of Insight activity for the users in your company, by teams, team members and by unassigned users.
For more information, see the following:
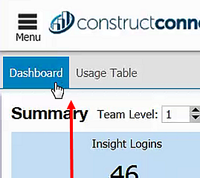
Note: To switch between the Dashboard and the Usage Table,
- from the top left of any Pulse window, click to select the feature you want:
Anchor PulseIncldeUnasign PulseIncldeUnasign
Including unassigned users
You can choose to include the activity of those users not yet assigned to a team in the statistics.
To include unassigned users,
- toggle the button to make the selection:
![]()
- Repeat to include only those users assigned to teams.
Anchor pulseselectdaterange pulseselectdaterange
Selecting the date range
The date range you select applies to any of the data displayed in Pulse. You can select either a custom date range or a preset range, and you can change the selected date range at any time.
Note: The default range is 30 days and is the value selected when you first access the menu, even if your account has been active for less time.
To select the date range,
1 | Click on the date field at the top of the window to display the date range menu:
| ||||||||||
2 | Choose from the following to select the date range.
| ||||||||||
3 | Click Apply to set the desired date range. Result: The menu refreshes with the new date range. |
