Opening paragraph
Accessing Under-The-Hood
Before working with the PlanSwift API, a good understanding of PlanSwift's internal structure is recommended. To review PlanSwift's structure, the under-the-hood (U-T-H) tab needs to be enabled.
Follow these steps to enable PlanSwift's under-the-hood U-T-H tab.
- Open PlanSwift.
- Click on Settings along the top ribbon bar (see #1 on Figure 1-1 below).
- Select Interface from the options on the left (see #2 on Figure 1-1 below).
- Click on Show Under the Hood Screen. (see #3 on Figure 1-1 below).

Figure 1-1 - For the password, please contact your PlanSwift representative–discuss with Mike Ramsey. Enter the password (see number #4 of Figure 1-1) and click on Ok. To obtain the password, send an email to devnetwork@planswift.com.
- An U-T-H (for "Under-the-Hood") now appears on the top ribbon bar (see the red arrow in Figure 1-2). Click on U-T-H.
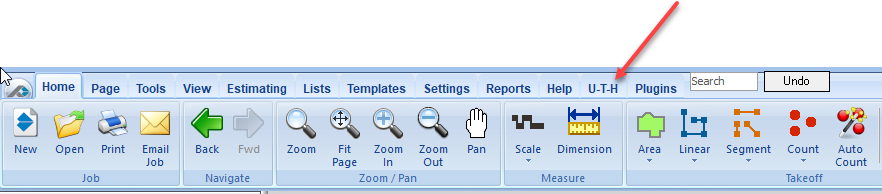
Figure 1-2
Understanding the Under-The-Hood hierarchy
Clicking on U-T-H tab displays the Under-The-Hood (U-T-H) hierarchy. PlanSwift (1.0) is the root, or the parent object. Each of the folders beneath PlanSwift is a child of PlanSwift.
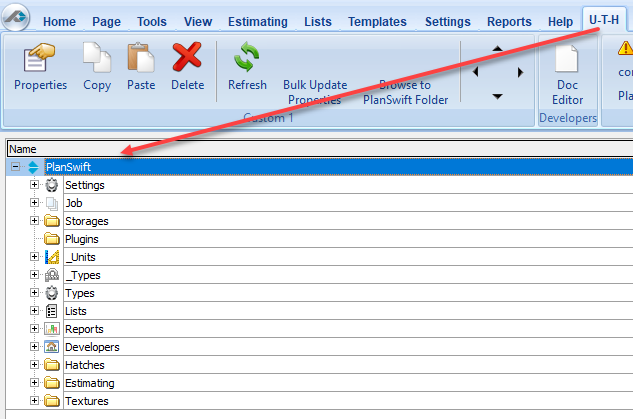
Figure 1-3
1.0 PlanSwift Root
Double-click on PlanSwift (see red arrow of Figure 1-4) to open the Advanced Properties window for the PlanSwift root object.
Simple Description
API Call:
planswift
planswift.root
Use "\" (without the quotes) to access the root object.

Figure 1-4
2.0 Settings
Accessing PlanSwift Settings
Settings are the root setting for PlanSwift. They are the default configuration settings for PlanSwift and can be written, read, and modified. Custom settings can also be added. To obtain the Advanced Properties of Settings, double click on Settings (red arrow in Figure 2-1).
API Calls:
private void Main()
{
	PlanSwift planswift = new PlanSwift();
	IItem settings = planswift.GetItem(@"\Settings");
}

Figure 2-1
See Figures 2-2, 2-3, and 2-4 for the Settings Advanced Properties window. All of the available Settings items are displayed in these three figures. API calls for each of these are covered below in the order of the red arrowed numbers.

Figure 2-2

Figure 2-3

Figure 2-4