PlanSwift versions 10.1 and older require manual activation and deactivation. After October 1, 2022, PlanSwift 10.1 and previous versions will be sunset and you will not be able to license them. The steps below allow you to activate PlanSwift manually until October 1.
At the bottom of this article is a video that walks you through manual activation.
Looking to avoid this process altogether? See Can I Avoid Manual Activation?
See PlanSwift Sunsetting Policy (Product End of Life) for more information.
Registering Your Email (if you haven’t already)
Before you can perform the manual activation steps below, you must register your email address with PlanSwift and create a password.
To register your email and password, click here. (or visit: https://myaccount.planswift.com/signup)
Passwords must contain at least 8 characters, must contain at least one upper-case letter, one lower-case letter, and one number. Special Characters (. ! % $ & #, etc.) are not allowed, only numbers and letters are allowed.
Each individual user needs to register his or her own email and password. Registering your email and password will not assign that user to a specific license. Seats can still be shared among users until licenses on the account are all in use. An account can have more registered users than licenses purchased. Licenses can be shared among registered users and can be managed in the My Account user portal.
See Registering for a MyAccount Profile for detailed instructions on registering your email.
Manual Activation Steps
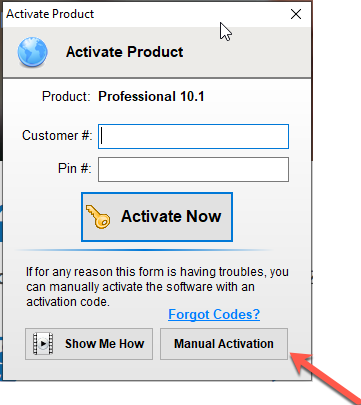
Step 1 - Open Manual Activaiton window
Click on Manual Activation inside the Activate Product window.
Step 2 - Copy the computer ID
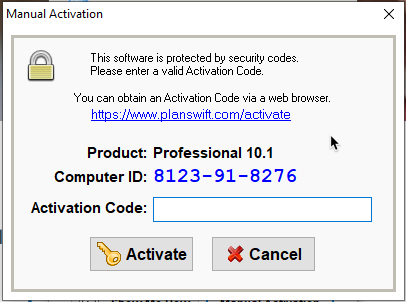
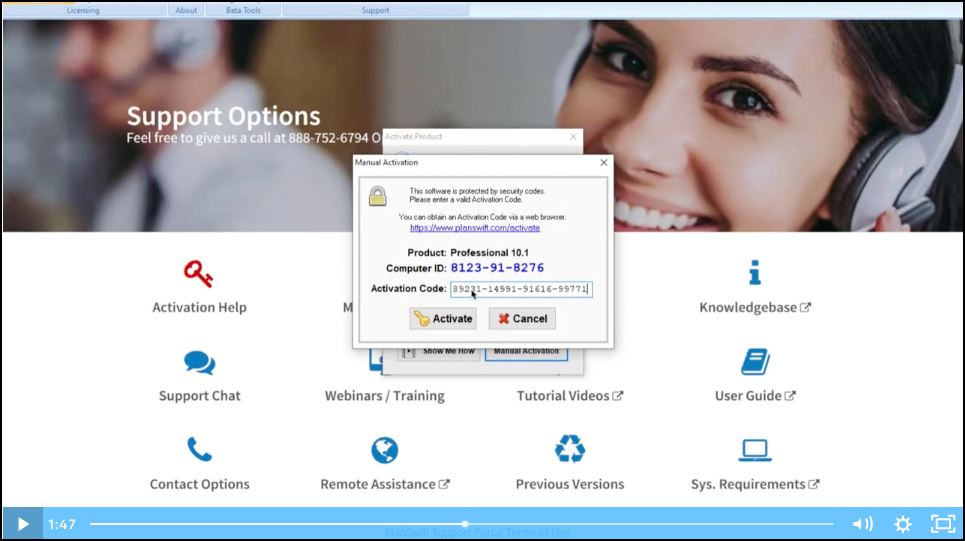
In the Manual Activation window, copy your “Computer ID”,
then click on the URL www.planswift.com/activate
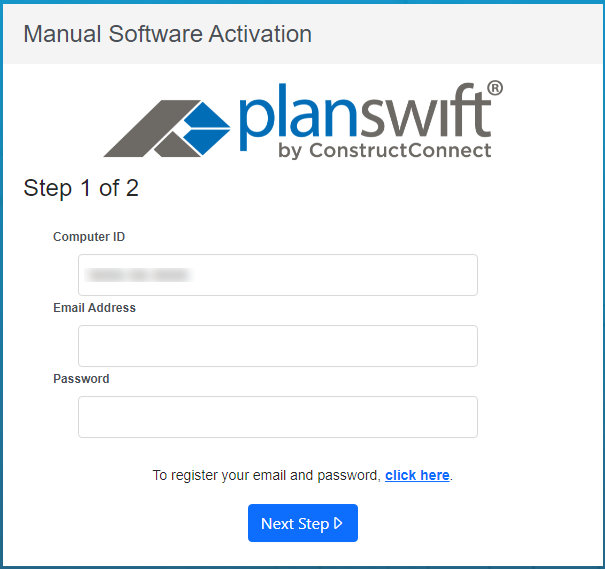
Step 3 - Fill out the Manual Software Activation form
In the Step 1 of 2 Screen, paste in (or type) your Computer ID , your registered email address, and password. (If you have not registered your email address you will need to do that before you can continue, see the link above.)
Step 4 - Select License & Version
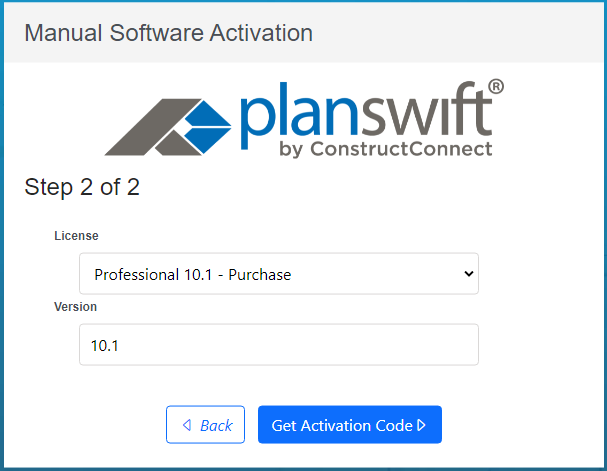
In the Step 2 of 2 screen, select your License type from the drop-down and type in the version of PlanSwift you are attempting to license (click Help > About PlanSwift to find your installed version).
Click “Get Activation Code”.
Step 5 - Retrieve Activation Code
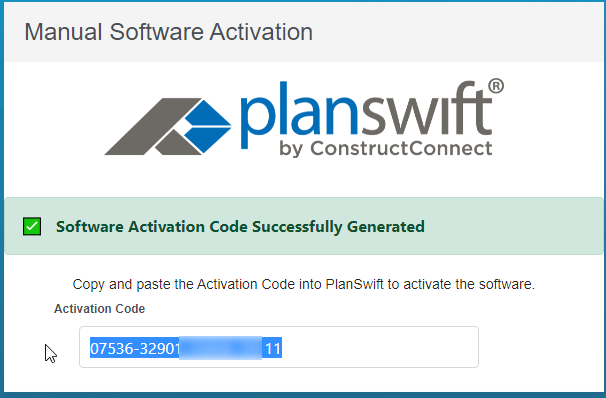
Your Activation Code is displayed in the text box, select it and press <Ctrl> + <C> on your keyboard to copy it.
Step 6 - Activate your Activation Code
In the Manual Activation window (where your Computer ID is shown), click in the Activation Code box and press <CTRL> + V to paste in your Activation Code.
Click “Activate”
When you see the “Successfully Activated” screen, you are good-to-go for 30 days. At the end of 30 days, you’ll need to repeat this Manual Activation process to get a new Activation Code.
Note For all versions 10.1 and older, you will receive a message that the program is not connecting to the internet, this is caused by updated security protocols. PlanSwift will still function, but will not connect to the internet. You will not be able to email plans from PlanSwift, although you can create a zip file, save it to your computer, and then email that zip file to another user.
