| Warning |
|---|
This Plugin is not compatible with PlanSwift 11. |
Overview
The PlanSwift Integration to QuickBooks Plugin allows you to export selected estimating items from PlanSwift to Intuit® QuickBooks™ Desktop Pro, Premier, or Enterprise.
PlanSwift Integration to Quick Books Plugin User Guide 06.26.2018 .pdfIntegration to QuickBooks adds an additional four icons to the PlanSwift Estimating tab ribbon-bar:
These four icons provide these functions: Invoice, Estimate, Purchase Order, and Item List.
How To Use the Integration to QuickBooks Plugin
| Info | ||
|---|---|---|
| ||
First, you'll need to download and install your Plugin, see: Downloading, Installing, and Uninstalling a Plugin or Starter Pack Once your new Plugin is installed, follow the steps below to use it. We encourage you to purchase a training package for accelerated learning and faster customization, see: https://www.planswift.com/support/personalized-training/ for details on scheduling training. |
| Table of Contents | ||||
|---|---|---|---|---|
|
How to Integrate PlanSwift items to Invoices
The purpose of the Invoices function is to create a QuickBooks invoice from PlanSwift data. Follow the procedure below to create an invoice in QuickBooks from PlanSwift.
- Open QuickBooks and select your company.
- From PlanSwift, open the project you want to create an invoice for.
- Open the Estimating tab in PlanSwift.
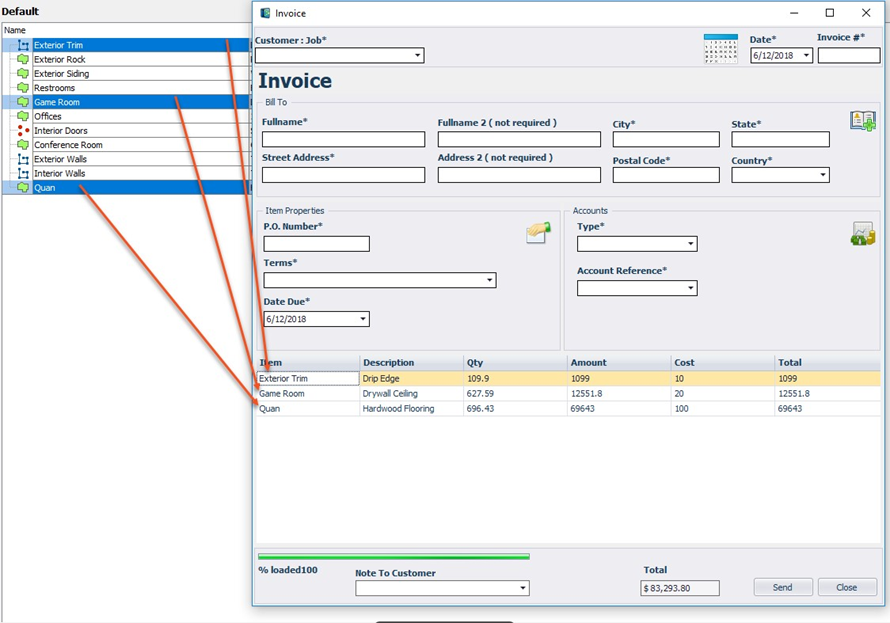
- Select the estimating items from PlanSwift that are to be included in the invoice (see the arrows at 1 of Figure 2).
- Click on the Invoice icon in the QuickBooks group of the Estimating tab ribbonbar (arrow 2 of Figure 2).
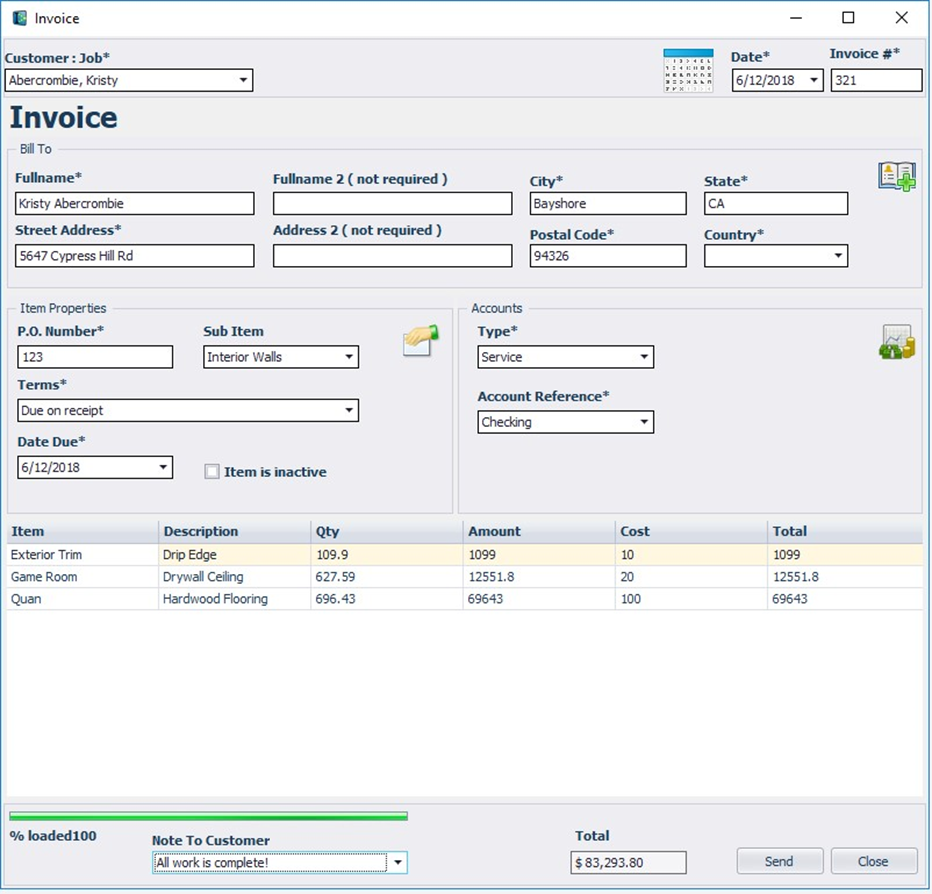
This opens the Invoice window, the arrows show the correlation between the Invoice window and the invoice items that were selected in the Estimating tab.
- Fill in the required fields (marked with asterisks):
- Customer: Job (the customer the invoice is to be sent to)
- Invoice #
- O. Number
- Terms
- Type
- Account Reference
- Due Date
- optionally, any desired Note To Customer
- Click on Send to create the invoice in QuickBooks.
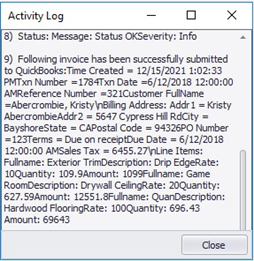
An Activity Log window indicates the transfer was successful.
- Click on Close to close the Activity Log - this also closes the Invoice window.
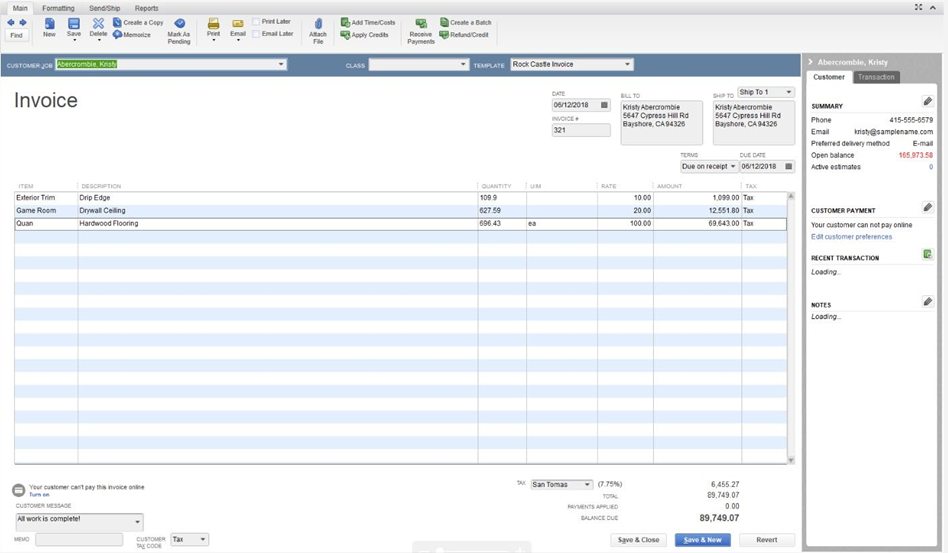
The invoice is now in QuickBooks.
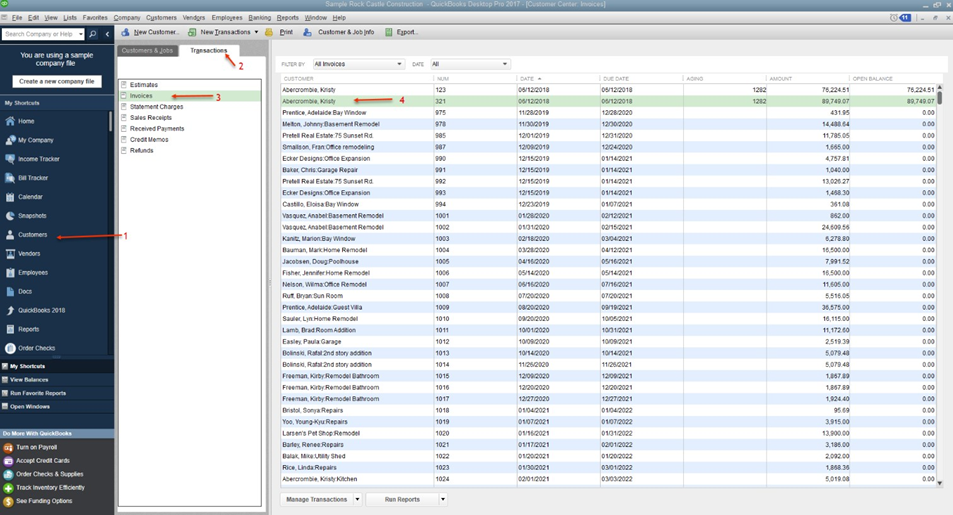
- Open QuickBooks and verify the invoice information was received.
In QuickBooks,
- Click on Customers (arrow 1), Transactions (arrow 2), Invoices (arrow 3), and then the customer (arrow 4). (This documentation was done using QuickBooks Desktop Pro 2017— your version of QuickBooks may differ.)
- Double-click on the customer (arrow 4) to opens the QuickBooks Invoice with the PlanSwift data in it.
How to Integrate PlanSwift Items to Estimates
The purpose of the Estimates function to create a QuickBooks estimate from estimating data in PlanSwift. Follow the procedure below to create an estimate in QuickBooks from PlanSwift.
- Open QuickBooks and select your company.
- From PlanSwift, open the project you want to create an Estimate for.
- Open the Estimating tab in PlanSwift.
- Select the estimating items from PlanSwift that are to be included in the estimate.
- Click on the Estimate button in the QuickBooks group of the Estimating tab ribbon bar.
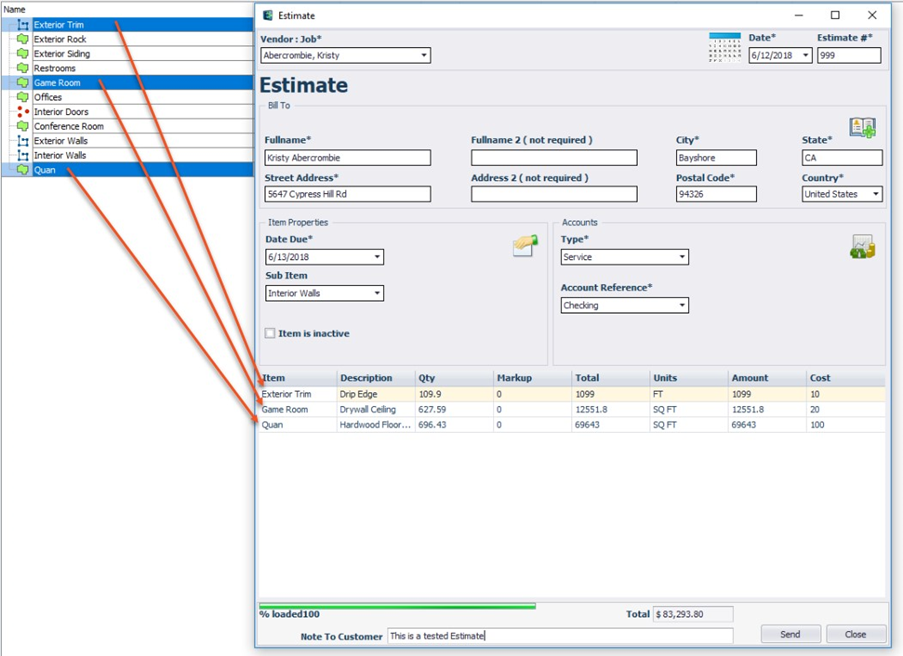
This opens the Estimate window, the arrows show the correlation between the Estimate window and the estimate items that were selected in the Estimating tab.
- Fill in the required fields (marked with asterisks):
- Customer: Job (the customer the estimate is to be sent to)
- Estimate #
- Type
- Account Reference
- Due Date
- optionally, any desired Note To Customer
- Click on Send to create the estimate in QuickBooks.
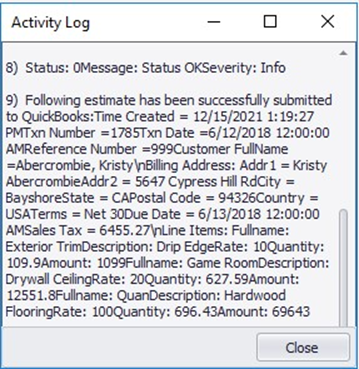
An Activity Log window indicates the transfer was successful (Figure 10).
- Click on Close to close the Activity Log window, this also closes the Estimate window.
The estimate is now in QuickBooks.
In QuickBooks,
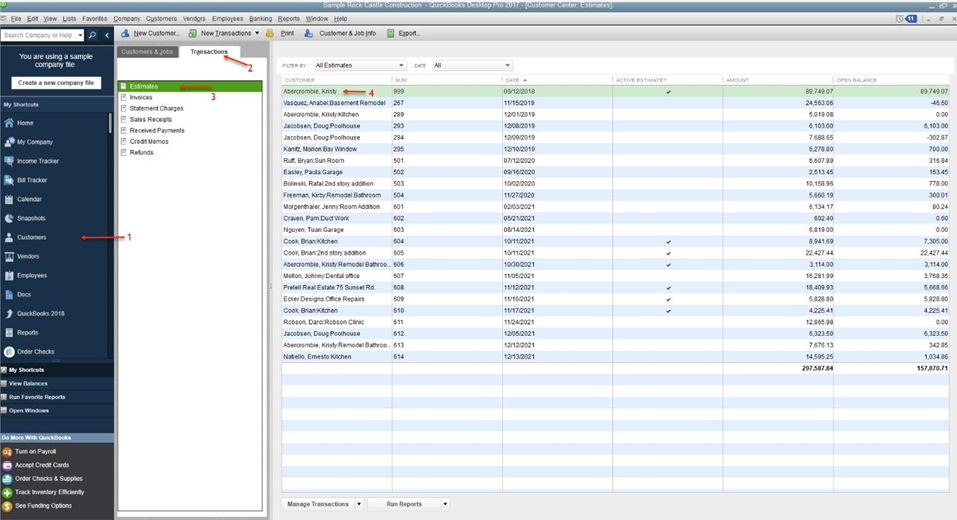
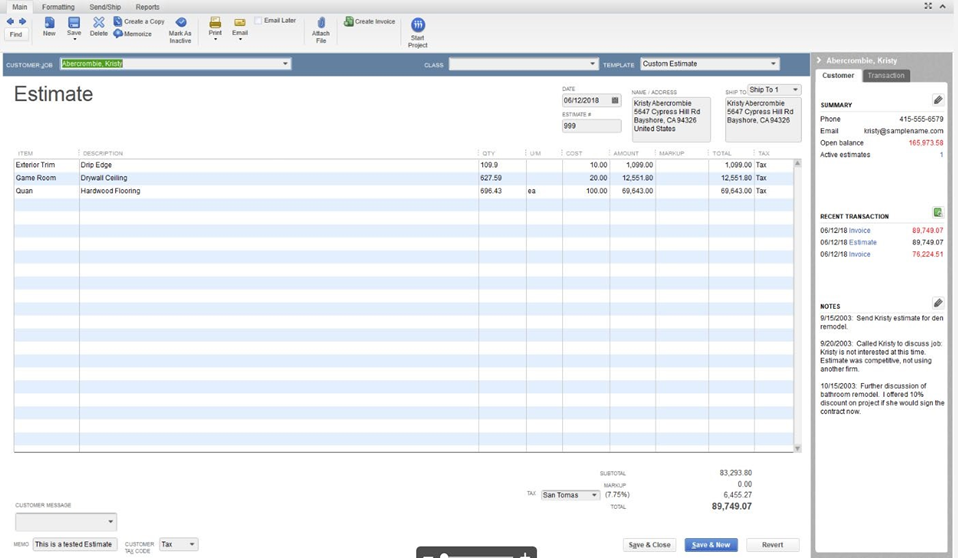
- Verify the estimate information was received.
- Click on Customers (arrow 1), Transactions (arrow 2), Estimates (arrow 3), and then the customer (arrow 4). (This documentation was done using QuickBooks Desktop Pro 2017—your version of QuickBooks may differ.)
- Double-click on the customer (arrow 4) to open the QuickBooks Invoice with the PlanSwift data in it.
How to Integrate PlanSwift Items to Purchase Orders
The purpose of the Purchase Orders function to create a QuickBooks purchase order from PlanSwift estimating data. Follow the procedure below to create a purchase order in QuickBooks from PlanSwift.
- Open QuickBooks and select your company.
- From PlanSwift, open the project you want to create a purchase order for.
- Open the Estimating tab in PlanSwift.
- Select the estimating items from PlanSwift that are to be included in the purchase order.
- Click on the Purchase Order icon in the QuickBooks group of the Estimating tab ribbon-bar.
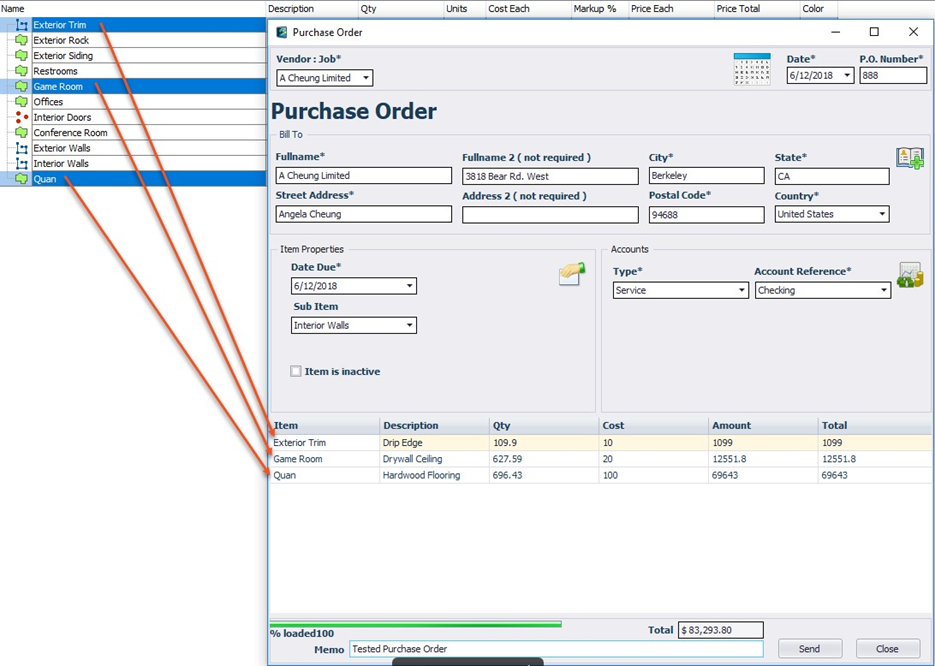
This opens the Purchase Order window, the arrows show the correlation between the Estimate window and the estimate items that were selected in the Estimating tab.
- Fill in the required fields (marked with asterisks):
- Vendor: Job (the vendor the estimate is to be sent to)
- Type
- Account Reference
- Due Date
- optionally, any desired Memo
- Click on Send to create the purchase order in QuickBooks.
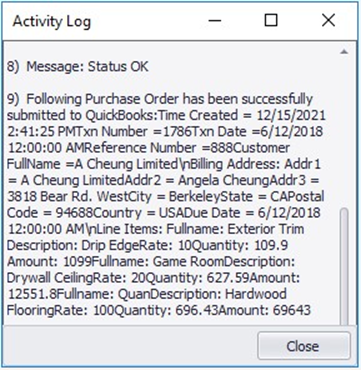
An Activity Log window indicates the transfer was successful.
- Click on Close to close the Activity Log, this also closes the Purchase Order window.
The purchase order information is now in QuickBooks.
In QuickBooks,
- Verify the estimate information was received.
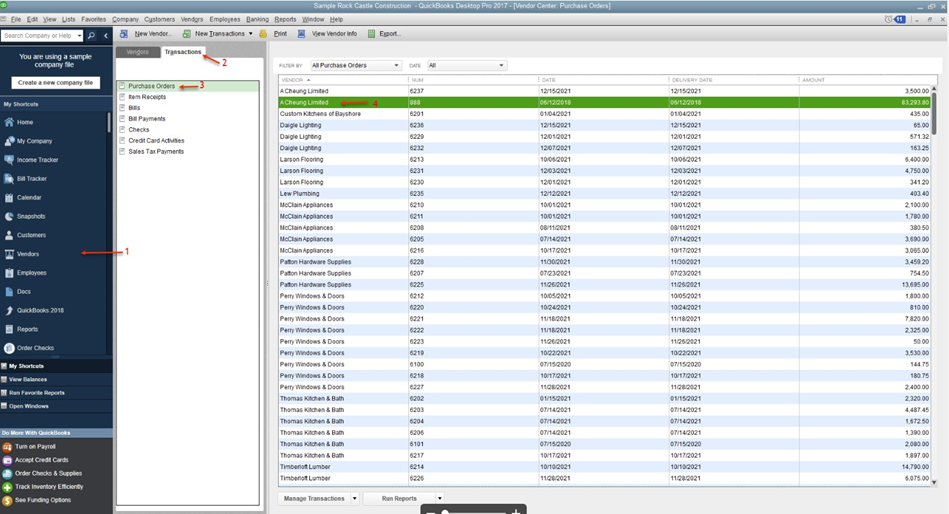
- Click on Vendors (arrow 1), Transactions (arrow 2), Purchase Orders (arrow 3), and then the customer (arrow 4). (This documentation was done using QuickBooks Desktop Pro 2017—your version of QuickBooks may differ.)
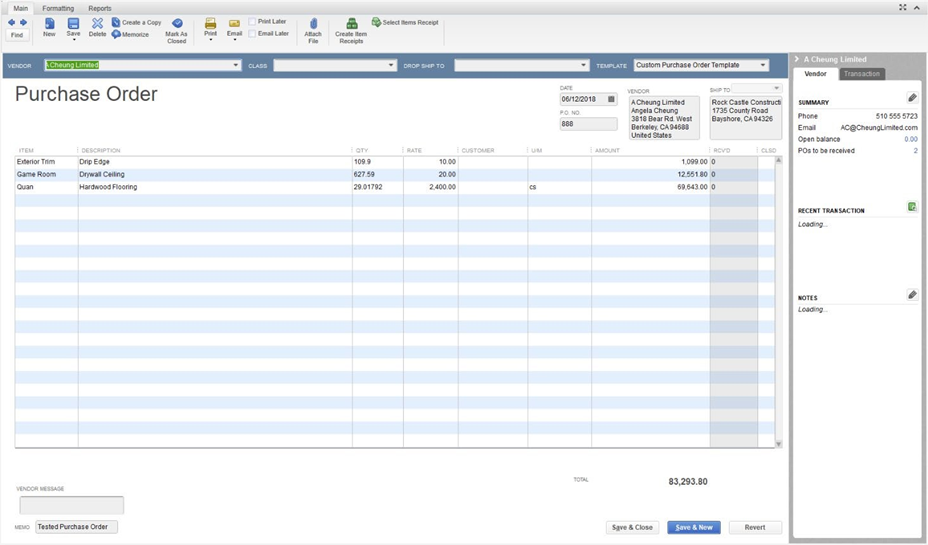
- Double-click on the customer to open the QuickBooks Purchase Order with the PlanSwift data in it (Figure 17).
How to Integrate PlanSwift Items to Generic Item Lists
The purpose of the Items function to add a list of items from a PlanSwift estimate to the QuickBooks Item List. Follow the procedure below to add a list of items from PlanSwift to QuickBooks.
- Open QuickBooks and select your company.
- From PlanSwift, open the project you want to create a list of items from.
- Open the Estimating tab on the PlanSwift home ribbon-bar tab.
- Select the items from PlanSwift that are to be included in the list of items.
- Click on the Items icon in the QuickBooks group of the Estimating tab ribbon-bar.
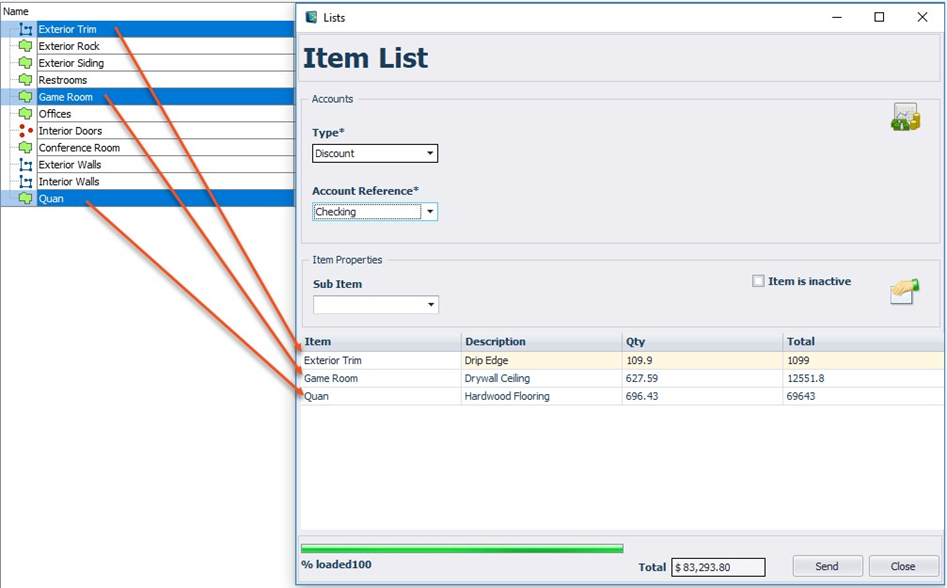
This opens the Item List window (Figure 19). The arrows show the correlation between the Estimate window and the items that were selected in the Estimating tab.
- Fill in the required fields (marked with asterisks):
- the account Type
- Account Reference.
- Click on Send to create the item list in QuickBooks.
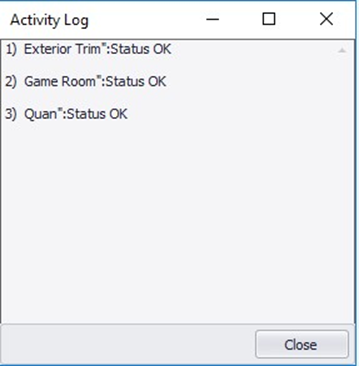
An Activity Log window indicates the transfer was successful.
- Click on Close to close the Activity Log, this also closes the Item List window.
The Item List information is now in QuickBooks.
In QuickBooks,
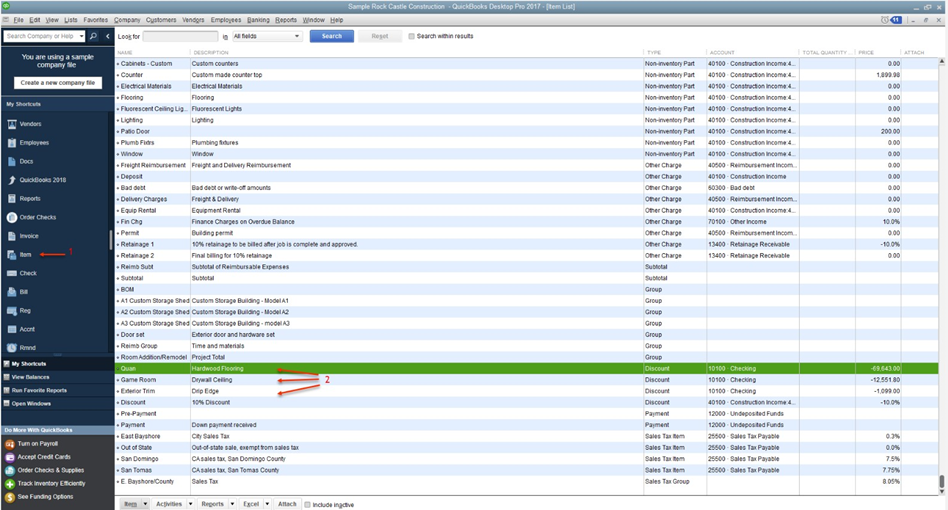
- Verify the list of items was received.
- Click on Item (arrow 1). The items that were transferred are visible at arrow 2. (This documentation was done using QuickBooks Desktop Pro 2017—your version of QuickBooks may differ.)
FAQ
Question: I’ve read this user guide, and I still have questions. What do I do?
Answer: PlanSwift recommends that you purchase a training package. We highly recommend new users purchase a training package, because training is customized to each user. We offer one-on-one training and classroom training. Contact PlanSwift® Training Department Training-ops@ConstructConnect.com.
Question: Will this work with the online version of QuickBooks?
Answer: No. PlanSwift only works with Intuit QuickBooks Desktop Pro, Premier, and Enterprise products.
More Plugins and Starter Packs
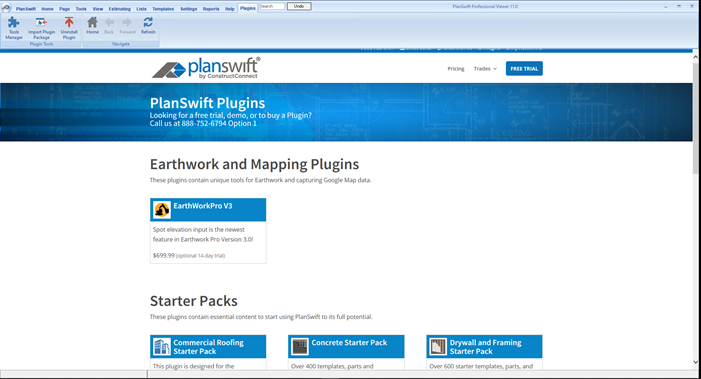
Information on Plugins and Starter Packs is available directly on the Plugins Tab in PlanSwift...
If you encounter technical difficulty, consult this guide (including the FAQ section of this user manual) or contact the technical support department at:
PlanSwift® Technical Support support@PlanSwift.com
1-888-752-6794 ext. 2
PlanSwift also offers additional training. For training options, contact the training department at:
PlanSwift® Training Department Training-ops@ConstructConnect.com


