The Trades & Coverage window lets you perform a variety of tasks relating to the bidders on the project.
Your trades and coverage information provides unmatched visibility into the health of your preconstruction project. You can see invited and accepted bidders, the CSI codes for bidders and the level of bidder response ranked by code. Adding bidders and trades lets you get the best coverage for your project:
This section contains the following topics:
Understanding the window
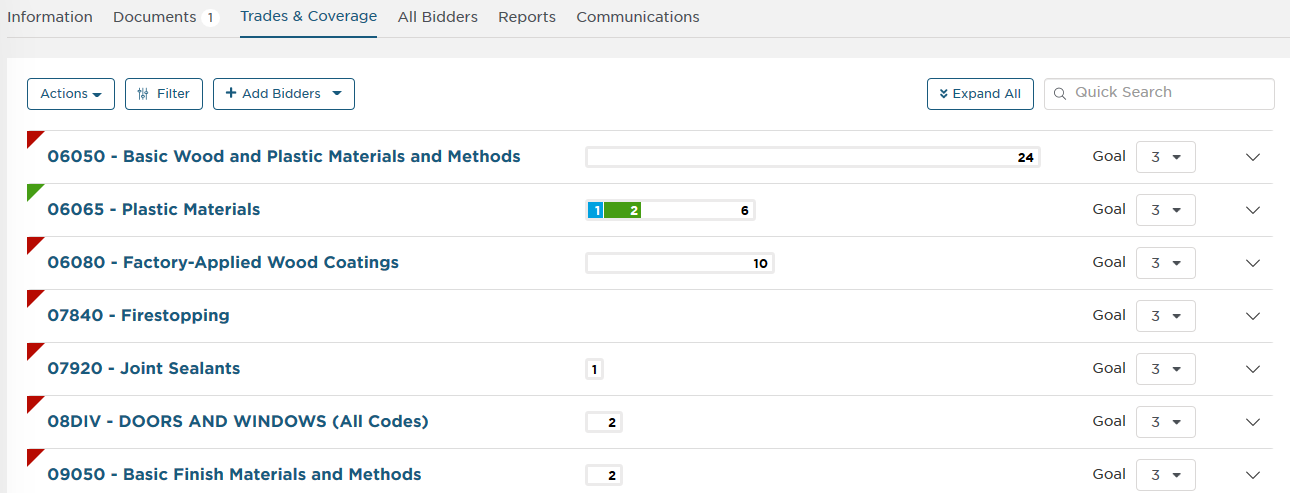
The window displays the CSI codes that are included in the project. Expanding the line for a code displays the invited and suggested bidders whose trades match the code.
The colored tab to the left of each code line indicates the level of bidder response for the code:
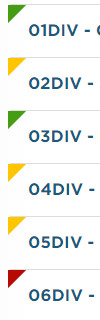 |
|
To expand the list and see the invited bidders for each code, click either
- the line for the code or
- Expand All at the top right of the section to expand all of the codes.
Result: The following is an example of an expanded code list:
Note: The suggested bidders for each code are displayed in a separate section below the invited bidders:
Viewing the bid intent summary
At the top of the list is a tab that displays a color-coded bar summarizing the bid responses from invited bidders:
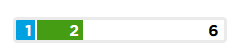
The color code for the responses are as follows:
- Blue - The number of bidders that have submitted a bid.
- Green - The number of bidders that have indicated an intent to bid.
- White - The number of bidders that have not responded to the invitation.
Understanding bidder response goals
The bid response goal indicates the number of bidders for the code needed to satisfy the project requirements:
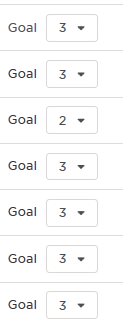
To set a bidder goal,
- click the arrow on the box and select the number of bidders for the goal. Your change is automatically saved.
Using the Actions menu
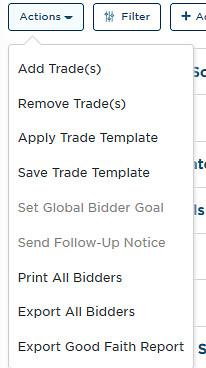
The trade Actions menu at the top left of the window lets you perform a variety of tasks with the trades in the list, as described in the following table.
| Option | Description |
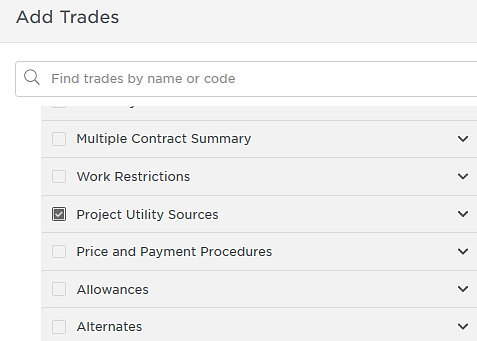
| Add Trade(s) | Use to add trades to the project: 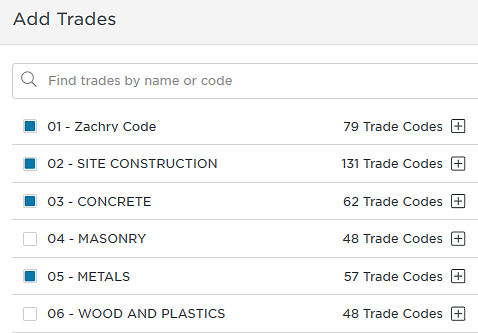 Note that trades already included in the project are marked blue. Expanding the trade displays the code included in the project:
|
| Remove Trade(s) | Use to remove trades from the project. Note that bidders only assigned to removed trades are moved to Unassigned. |
| Apply Trade Template | Use to apply one of your saved trade templates to the project. |
| Save Trade Template | Use to save the trades assigned to the project as a template for future use. |
| Print All Bidders | Use to print a list of bidders name and their response. |
| Export All Bidders | Use to export the bidders list in a formatted Excel spreadsheet. Information includes company name and contact information, trade, date invited and bid response. |
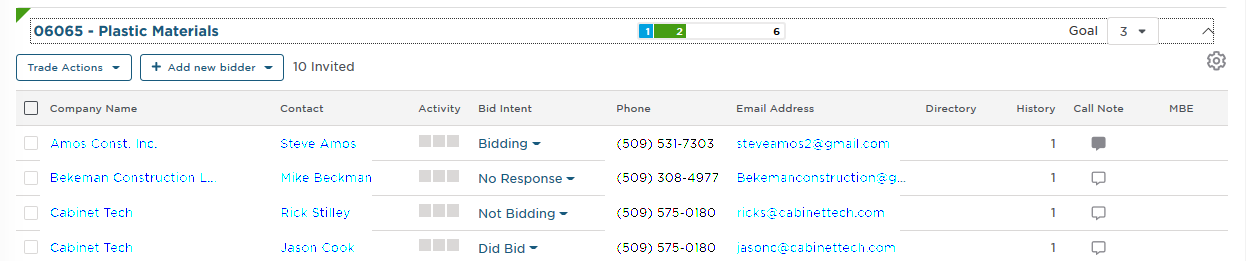
Understanding the trade bidders list
Below the entry for each trade are the bidders for that trade. The following table describes the information included in the entry for each bidder.
| Field | Description |
| Company Name | The name of the company and contact for the bid. |
| Contact | |
| Activity | The Bidder Activity menu displays the level of bidder activity on the project:
The three bars indicate the level of activity. On the line for each level is a description, count and date occurring for bidder for the corresponding level. Note that you can use the View drop-down menu to filter the list by specific actions. |
| Bid Intent | The bid intent for the company, which can be one of the following:
To change the bid intent, click the arrow and select from the following:
Note: You can apply the intent selection to all companies in the list by clicking Apply to All Invited Trades at the top of the selection list. |
| Phone | The phone and email address for the bidder. Note: Invalid email addresses are listed in red. |
| Email Address | |
| Directory | The company is in your Directory listing. |
| History | Indicates the bid history for the company. |
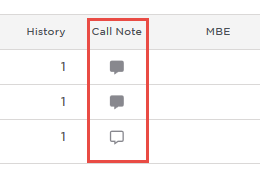
| Call Note | Click to access the Call Notes for the bidder. Tip: A dark Call Note icon indicates the presence of an existing note:
See Setting up Call Notes for more information. |
| MBE | Indicates that the company is a Minority Business Enterprise (MBE). Minority group members are United States citizens who are Asian, Black, Hispanic and Native American. Ownership by minority individuals means the business is at least 51% owned by such individuals or, in the case of a publicly-owned business, at least 51% of the stock is owned by one or more such individuals i.e. the management and daily operations are controlled by those minority group members. |

Filtering the bidders list
To filter the list,
- click Filters at the top of the page to display the Filters list.
- Select the filtering options from the list. Note that the list updates dynamically with each applied filter.
- Click the X at the top of the list to close the menu when you are done.
To reset the menu and clear all filters,
- click Clear All from the top of the Filters menu.
Adding bidders
You can add bidders to the list using a variety options.
To add bidders,
- from the top of the list, click + Add Bidders and select from the following.
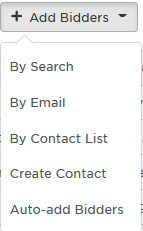
The following table describes the options you have for adding bidders to the project.
| Option | Description |
| By Search | Use to search for qualified bidders for the project. The search locates bidders with trades matching the project requirements and physical location near the project. To use this feature,
Result: The Add Bidders window is displayed with the list of bidders that qualified for the project. Understanding the list The bidders list includes the company name, contact person and contact information. Also included is the distance from the project and trades.
Note: You can sort the list by any of the fields in the list. Filtering the list The Filters menu lets you apply filters to refine the bidder candidates in the list. Note that any existing filters are related to the bidders in the list. To filter the list,
Adding a bidder When you are ready to add a bidder to the project,
Result: The bidder is added to the project and the main bidder window is displayed with the added bidder in the list. |
| By Email | Use to add bidders to the project using the company or contact email address. To use this feature,
Result: The Add Bidders menu is displayed.
|
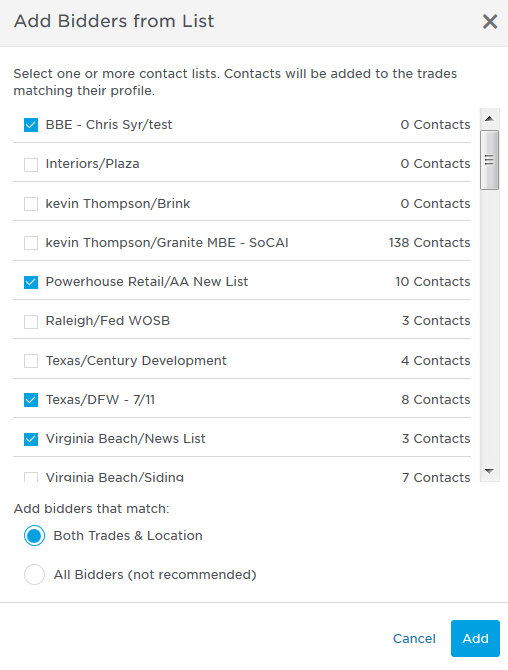
| By Contact List | Lets you add bidders using the companies contacts in your custom lists:
The menu lets you add bidders using two methods:
When you are done, click Add to add the selected contacts to the project bidders list. |
Create Contact | To create a contact, /wiki/spaces/BMOH/pages/30540055 |
| Auto-add Bidders | Use to have the system automatically select bidders based on their Bidder Score. To use this feature,
About Bidder Scores: Bidder Scores are a way to quickly identify the most likely respondents to your bids. These scores are calculated based on the bidder’s history with you, the bidder’s activity in ConstructConnect, and their profile completion and subscription level. We score bidders higher if they have high levels of activity on your previous invites. Next comes contacts that you haven’t invited yet but are highly engaged in the ConstructConnect platform and those that subscribe to ConstructConnect, since they are more likely to be responsive in the future. Contacts with low activity will be scored lower. Scores that vary by a few points are still close enough to consider and can help you identify responsive contacts faster. Bidders will be added to trades are a match between their profile and the project. |
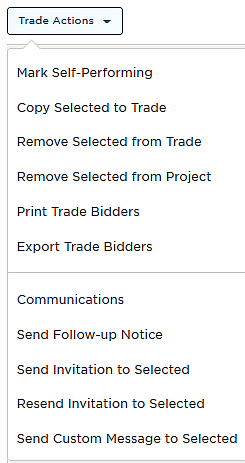
Using the Trade Actions menu
The Trade Actions menu lets you perform a variety of tasks with the bidders for each trade on the project:
To use the menu,
- select the bidders you want to work with and then select the option from the list.
Note: You must first select at least one bidder to activate all the options in the menu.
The following table describes the functions you can perform with the Trade Actions menu.
| Option | Description | |
| Trade | ||
| Mark Self-Performing | Indicates that the bidder can perform the task of a Self-Performing contractor. | |
| Copy Selected Trade | Use to copy the selected bidders to a trade or trades. Note that you can select to always use the selected bidders on the trade or trades. | |
| Remove Selected From Trade | Use to remove the selected bidders from the trade. Note that you can select to never use the bidder on the trade. | |
| Remove Selected From Project | Use to remove the selected bidders from the project. | |
| Print Trade Bidders | Use to print a list of the bidders | |
| Export Trade Bidders | Use to export a list of the bidders in a formatted spreadsheet. | |
| Communications | ||
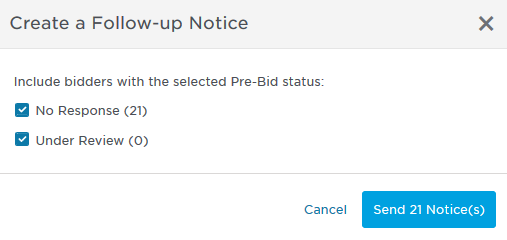
| Send Follow-Up Notice | Use to send a follow-up reminder notice about the invitation to bidders:
You can select to send the notice to bidders that fall into either or both of the following categories:
When you are ready to send the notice,
Note that the number of bidders in either category is displayed on the line for the response type. The total bidders included in the notice is displayed on the Send Notice button. | |
| Send Invitation to Selected | Use to send the current ITB to the selected bidder. See the Working with invitations for more information. | |
| Resend Invitation to Selected | Use to resend the most recent invitation to the selected bidders. | |
| Send Custom Message to Selected | Use to send a custom message to bidders. To use this feature,
Notes:
| |
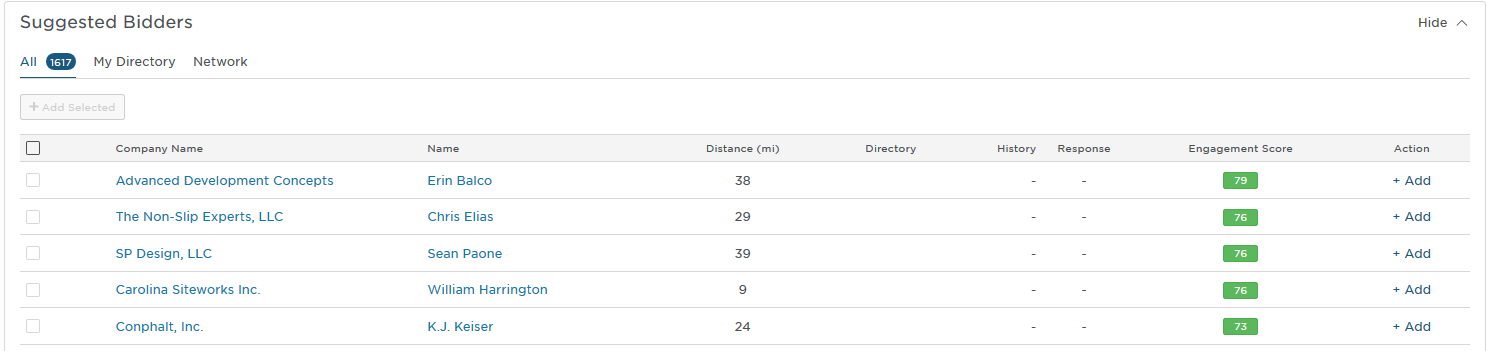
Understanding the suggested bidders list
The Suggested Bidders list is below the invited bidders list for each trade and displays bidders that may be a potential fit for the project's trade requirements. Suggested bidders can be viewed in three categories by clicking the tabs at the top of the list:
- All - These are a combination of bidders in your directory and those in the ConstructConnect network.
- My Directory - These are bidders in your network that may be a good fit with the project but have not been invited. For more information, see /wiki/spaces/BMOH/pages/30540055
- Network - Bidders that are part of the ConstructConnect network but are not in your directory.
The following is the information in the list for each potential bidder:
| Field | Description |
| Company Name | The company and contact name. Note: Clicking on the company or contact name opens the details page for the selected. |
| Name | |
| Distance | The company distance from the project. |
| Directory | The company is in your Directory listing. |
| History | Indicates the bid history for the company. |
| Response | The response history for the company. |
| Engagement Score | Indicates the level of activity the bidder has performed on the project. |
| Action | Click +Add to add the bidder to the bidder's list. |
Working with Call Notes
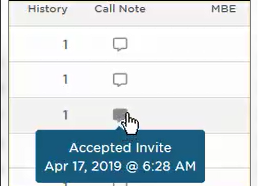
Call Notes are are used to indicate the communication status with the bidder and are displayed on the line for bidders in the matching trades list. A shaded Call Note icon indicates the presence of an existing note:

Note: Hovering over a note with existing content displays the note text:
To access Call Notes,
- from the Bidder's list, click on the Call Note icon on the line for the bidder.
Result: The Call Note menu for the bidder is displayed:
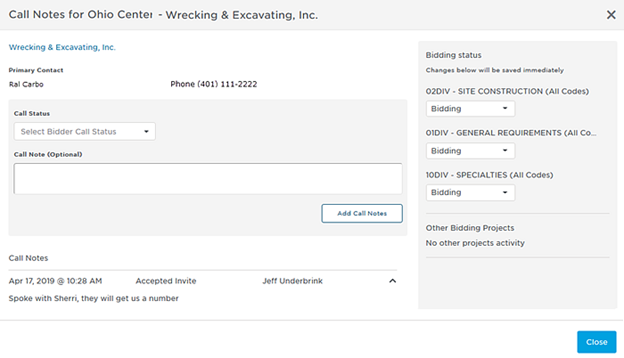
Note: The top section of the menu displays the name and contact information for the company.
Viewing and setting the bidder status
The Bidder status panel on the right of the menu displays the CSI codes that apply to the selected bidder and options for setting the bidder's status. You can change the response by clicking on the arrow and selecting a different response.
- The Bidder status can be set to one of the following:

Note: Changes to this setting are saved immediately.
Adding Call Note status
To add a call status,
- use the drop down Call Status menu to select the appropriate call status
- Optionally, you can enter a note.
- When you are done, click Add Call Note.
Result: The Call Note is added to the bidder's profile.