06. Takeoff
- April Friedman (Unlicensed)
Takeoff is an important part of QuoteSoft Rep, where you can view the plan file of a zone and place items directly to correspond with that plan file. It is these items that you place that QuoteSoft Rep will use in calculating reports and estimations.
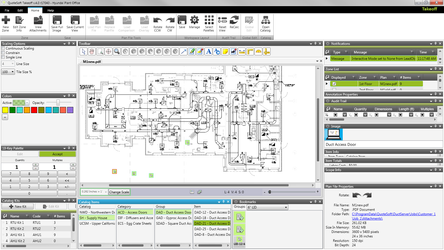
To access Takeoff, click the  button on the Main Menu or go to the Customer File and double-click on a zone in the Zone List palette.
Ribbon Menu
File

- Use this button to close Takeoff and return to the Customer File or Main Menu. Note that you do not need to save, because Takeoff saves your changes automatically.

- Use this button if you would like to directly exit QuoteSoft Rep from the Takeoff without having to return to the Customer File or Main Menu. Note that you do not need to save, because Takeoff saves your changes automatically.
Edit

- When an item or group of items on Takeoff is selected, click this button to copy the selected item(s)Â to the clipboard. You can use this to quickly copy an item or group of items and then paste it somewhere else on the plan file.

- You can click this button to paste an item or group of items you have copied to the clipboard.

- You can click this button to delete the selected item or group of items. You will be prompted on whether you are sure you would like to delete the selected item(s); click Yes to delete or No if you do not want to delete.

- You can click this button to delete the selected item or group of items. You will be prompted on whether you are sure you would like to delete the selected item(s); click Yes to delete or No if you do not want to delete.

- You can use this button to access the Configuration screen.
- You can use this button to access the Configuration screen.

- [Placeholder – what does this do?]

- This button allows you to export the audit trail as a CSV (Comma-Separated Values) file, so you can modify it in a text editor or Microsoft Excel. You will be prompted to select where on your computer you would like to save the exported file.
Home

- This button can be used to create a new zone directly from Takeoff. When clicked, it will bring up the New Zone screen.
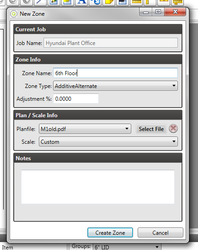
You must enter at least a Zone Name, but can also fill out the other fields, including a Planfile which you may select from the Attachments folder. Once you are finished filling out the attributes, click Create Zone to create the new zone, which will open in Takeoff.
- This button can be used to create a new zone directly from Takeoff. When clicked, it will bring up the New Zone screen.

- This button can be used to edit the information of the zone currently being viewed in Takeoff. When clicked, it will bring up the Edit Zone Info screen.
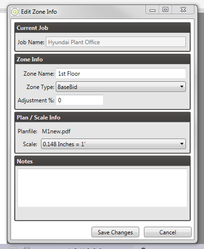
You may make whatever changes you wish, and then click Save Changes to save your changes or Cancel if you want to close the window without saving your changes.
- This button can be used to edit the information of the zone currently being viewed in Takeoff. When clicked, it will bring up the Edit Zone Info screen.

- Clicking this icon will open the Attachments folder on your computer, where you can add or remove plan files and other images you want to be associated with the zone.
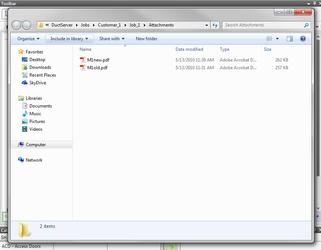
- Clicking this icon will open the Attachments folder on your computer, where you can add or remove plan files and other images you want to be associated with the zone.

- This will let you save the whole Takeoff image, items included [?], as a new image on your computer. You will be prompted to select where on your computer you would like to save the exported file.

- This will let you save the current view of the Takeoff image, items included [?], as a new image on your computer. You will be prompted to select where on your computer you would like to save the exported file.

- [not enabled?]

- [not enabled?]

- [not enabled?]

- [not enabled?]

- Use this to rotate the display of the plan file counterclockwise.

- Use this to rotate the display of the plan file clockwise.

- This button can be used to save the current workspace layout, allowing you to return to an old layout or to keep multiple different workspace layouts for different kinds of zones. You will be prompted to enter a name for the workspace.
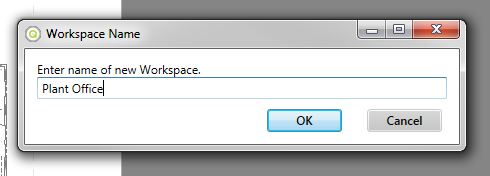
- This button can be used to save the current workspace layout, allowing you to return to an old layout or to keep multiple different workspace layouts for different kinds of zones. You will be prompted to enter a name for the workspace.

- This button will allow you to manage any workspaces you have saved or to add new ones using the Manage Workspaces screen.
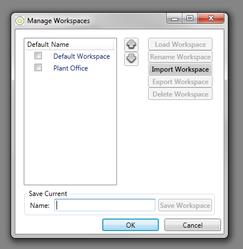
From here, you can load a workspace into use, rename an existing workspace, import workspaces from files on your computer, export workspaces so that they may be transferred to other computers, and delete a workspace. In addition, you can save the current screen layout as a new workspace, and give it a name. When you are done, click OK.
- This button will allow you to manage any workspaces you have saved or to add new ones using the Manage Workspaces screen.

- This button will open the Select Palettes screen, which allows you to select which palettes you want to have showing and re-open any palettes you may have closed.
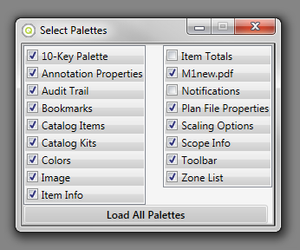
- This button will open the Select Palettes screen, which allows you to select which palettes you want to have showing and re-open any palettes you may have closed.

- This button will reset the Audit Trail to the default view.

- This button will [placeholder]
- This button will [placeholder]

- You can click this button to bring up the Global Editor.
- You can use the Global Editor to make changes to the item(s) selected, increasing the quantity or adding notes that apply to the whole group.
- You can click this button to bring up the Global Editor.

- This button will open the Catalog screen.
- To find out more about the Catalog screen and how to add or edit items in the Catalog, click here.
- To return to Takeoff, click the red X to close the Catalog screen.
- This button will open the Catalog screen.
Help

- Click here to view the About screen, with the QuoteSoft Rep version number, copyright agreement, and end user license agreement.
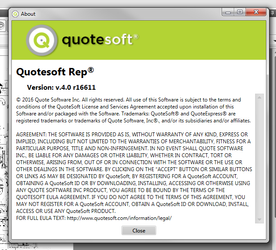
- Click here to view the About screen, with the QuoteSoft Rep version number, copyright agreement, and end user license agreement.

- Click here to view the technical log of the actions performed in QuoteSoft Rep.
- Click here to view the technical log of the actions performed in QuoteSoft Rep.


- You will be linked to the QuoteSoft Request Support form.

- You will be linked to the QuoteSoft Video Training site.

- You will be linked to the QuoteSoft Knowledge Base.

- You will be linked to the QuoteSoft Support Request site.
Palettes
10-Key Palette
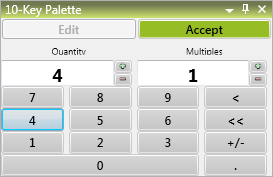
When an item is selected, either from Catalog Items, Bookmarks, or Catalog Kits, you can use the 10-Key Palette to determine how many of that item you would like to place. Once you have entered in how many of the item you would like to place, you may place the item on the plan file and it will be placed with that quantity.
You can also use the 10-Key Palette to modify the quantity or multiples of an item that has already been placed on the plan file. Once you have that item selected, go to the 10-Key Palette and click the  button. Then, you can press the buttons to modify the quantity and multiples. When you are done, click the
  button to save your changes, or simply select something else if you do not want to save your changes.
Annotation Properties
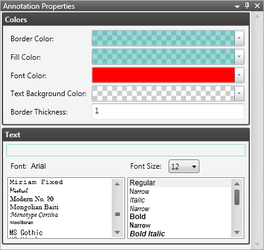
Colors
The colors section of the Annotation Properties palette will allow you to modify the colours of any annotations—lines, shapes, or text—that you have placed on the plan file. You can modify the border color, fill color, font color, and text background color, based on which apply for the item you have selected.
In addition, you can modify the border thickness of the selected item.
Text
The text section of the Annotation Properties palette will allow you to modify the font of the text in the selected item on the plan file, as well as to modify the font’s size and style (bold, italic, etc.) Note that not all items will have text for you to modify; on the contrary, most items such as lines, polygons, and curves will not.
Audit Trail
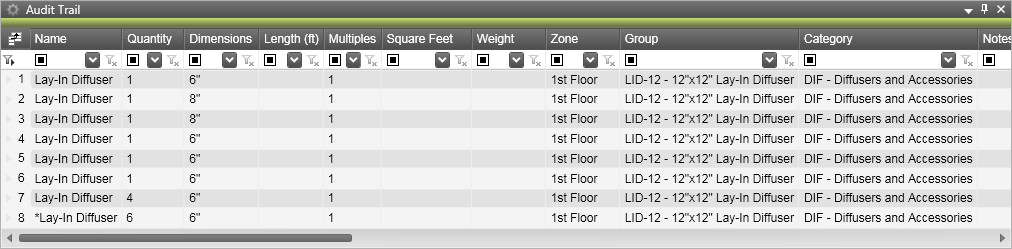
The Audit Trail palette will show a list of all of the items that have been placed onto the plan file in Takeoff, in the order in which they were placed. To view an item, select it on the Audit Trail palette and you will be zoomed to that item. You can also perform a variety of functions on the items in the Audit Trail, by right-clicking the item you would like to make changes to.
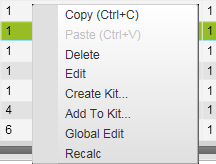
- Copy
- This will allow you to copy an item on the Audit Trail to your clipboard, if you want to duplicate it.
- Paste
- This will allow you to paste an item from your clipboard onto the Audit Trail, at the end.
- Delete
- This will prompt you on whether you would like to delete the selected item from the Audit Trail (and, as a result, from the plan file).
- Edit
- This will select the 10-Key Palette, allowing you to edit the quantity and multiples of the item. Click when you are finished.
- This will select the 10-Key Palette, allowing you to edit the quantity and multiples of the item. Click
- Create Kit…
- This will allow you to create a Catalog Kit from the item or items selected. For more information on Catalog Kits, see the Catalog Kits section of this page.
- Add To Kit…
- This will allow you to add the selected item or items to an existing kit.
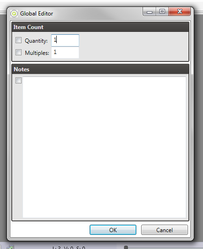
- Global Edit
- This will bring up the Global Editor, where you can set the quantity, multiples, and notes for multiple items at once, if you select multiple items.
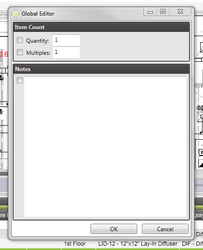
- This will bring up the Global Editor, where you can set the quantity, multiples, and notes for multiple items at once, if you select multiple items.
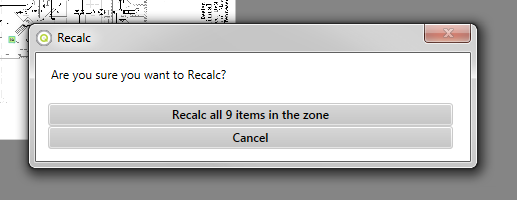
- Recalc
- [What does this do?]
Bookmarks
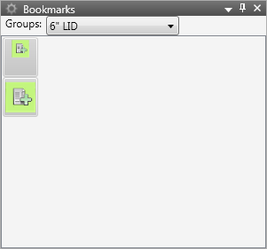
The Bookmarks palette allows you to create and use bookmarks to items, which are basically shortcuts you can create so you don’t have to look for an item each time in the Catalog Items palette. This can save a lot of time, especially if it’s an item that you use frequently.
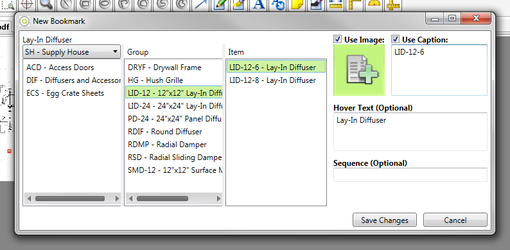
Adding a New Bookmark
To add a new bookmark, right-click the Bookmarks palette and select New Bookmark. You will be shown the New Bookmark screen, which bears resemblance to the Catalog Items palette.

From there, you can select a catalog, category, group, and then item within the group to add as the new bookmark. Additionally, you may give the bookmark a caption with the Use Caption field and text box below, as well as assign it hover text. When you are done, click Save Changes to save your changes and create the bookmark, or Cancel if you do not want to create the bookmark.
Editing a Bookmark
To edit a bookmark, right-click that bookmark on the Bookmarks palette and click Edit Bookmark. You will be presented with the Edit Bookmark screen.
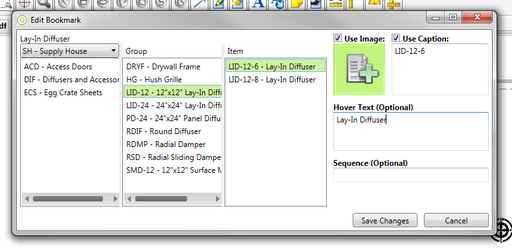
From there, you may modify any of the bookmark’s attributes, even down to which item the bookmark is for. When you are done, click Save Changes to save your changes, or Cancel if you do not want to save your changes to the bookmark.
Duplicating a Bookmark
To duplicate a bookmark, right-click that bookmark on the Bookmarks palette and click Duplicate Bookmark. You will be presented with the New Bookmark screen, except the fields will already be filled out to the same as the bookmark you are modifying.
From there, you may modify any of the new bookmark’s attributes, even down to which item the bookmark is for. When you are done, click Save Changes to create the new bookmark, or Cancel if you do not want to create the new bookmark.
Deleting a Bookmark
To delete a bookmark, right-click that bookmark on the Bookmarks palette and click Delete Bookmark. You will be presented with a prompt asking you if you would like to delete the bookmark.
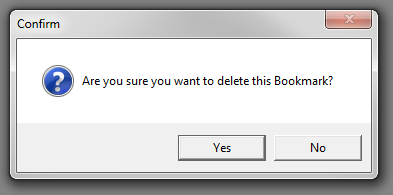
If you are sure you would like to delete the bookmark, click Yes. If you do not want to click the bookmark, click No.
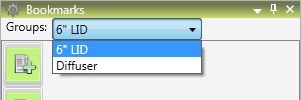
Bookmark Groups
Bookmark groups allow you to organize bookmarks so that bookmarks you use together often can be viewed at the same time, while other bookmarks you use at different times are hidden. These different groups can be accessed with the drop-down at the top of the Bookmarks palette.
To perform actions on the bookmark groups, click the small gear icon next to the name of the Bookmarks palette.
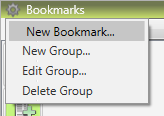
To create a new bookmark group, click New Group… and enter a name for the bookmark group and then press OK.
To edit a bookmark group, navigate to that bookmark group on the drop-down and then click Edit Group…, which will bring up a screen where you can change the name of the bookmark group. To save the new name, press OK.
To delete a bookmark group, navigate to that bookmark group on the drop-down and then click Delete Group. You will be prompted on whether you would like to delete that bookmark group. If you are sure, click Yes; otherwise, click No.
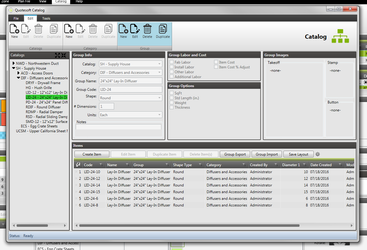
Catalog Items
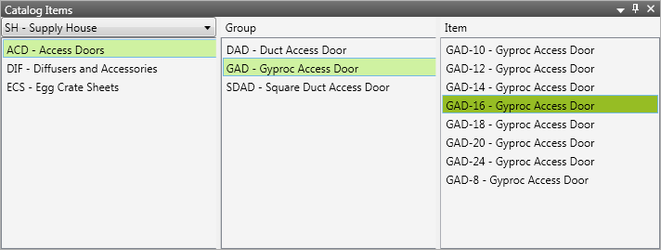
The Catalog Items palette allows you to navigate the Catalog in Takeoff, to find and select items to place which you have not bookmarked. The drop-down menu in the upper left allows you to switch catalogs; from there, once one is selected, you may successively select a category, group, and then item.
In addition, you can create a new bookmark by right-clicking any item and clicking the 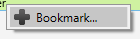 button. This will bring up the New Bookmark screen with the fields filled out to the item you have selected, similar to the Duplicate Bookmark function.
Catalog Kits
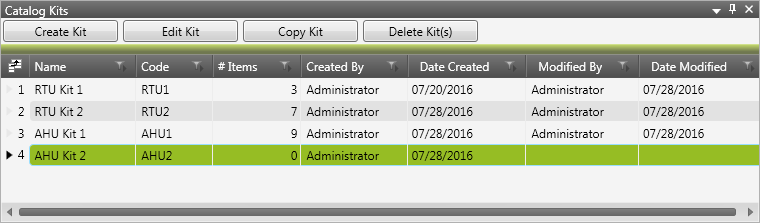
The Catalog Kits palette allows you to view any catalog kits you have created. Catalog Kits are basically [groups of catalog items that you can create to easily place a large grouping of items, like [example] all at once.]
Creating a Catalog Kit
To create a catalog kit, click the  button above the catalog kit list. You will be presented with the Catalog Kit screen.
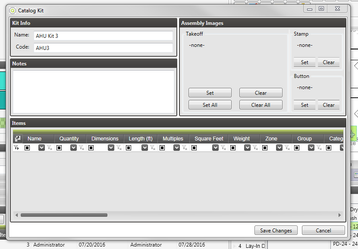
From here, you can fill out the name and code as well as set the images to be used on Takeoff. However, you cannot add items; instead, you must navigate to that item on Takeoff, right-click, and select Add To Kit…
When you are done, click Save Changes to create the new catalog kit, or Cancel if you do not want to create the new catalog kit.
Editing a Kit
To edit a kit, select the kit you would like to edit in the catalog kit list and then click the  button.
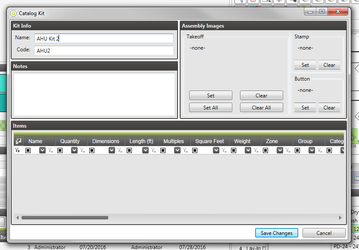
From here, you can edit the name and code as well as set the images to be used on Takeoff. However, you cannot add items; instead, you must navigate to that item on Takeoff, right-click, and select Add To Kit…
When you are done, click Save Changes to save the changes to the catalog kit, or Cancel if you do not want to save your changes.
Copying a Kit
To copy a kit, select the kit you would like to copy in the catalog kit list and click the  button.
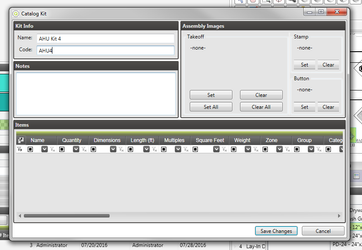
From here, you can edit the name and code as well as set the images to be used on Takeoff. However, you cannot add items; instead, you must navigate to that item on Takeoff, right-click, and select Add To Kit…
When you are done, click Save Changes to save the changes to the copied catalog kit, or Cancel if you do not want to save your changes.
Deleting a Kit
To delete a kit, select the kit(s) in the catalog kit list and click the  button. You will be prompted on whether you would like to delete the kit.
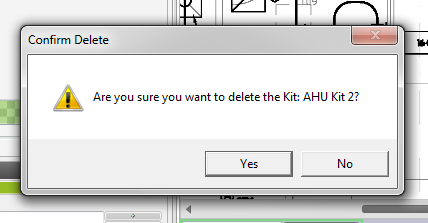
If you are sure you would like to delete the kit, click Yes. If you do not want to delete the kit, click No.
Colors
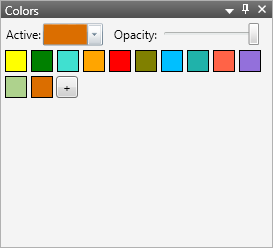
The Colors palette allows you to quickly and easily set the color of drawn items without having to use the Annotation Properties palette. The ten colors at the top are the default colors, though these can be changed by right-clicking them and editing them using the screen that pops up.
Beneath the default color palette, there is a display for the Active Color, coupled with a slider to change the transparency of the color.
Editing a Color
To edit a color, either right-click one of the default colors at the top or click on the drop-down on the side of the Active Color display.
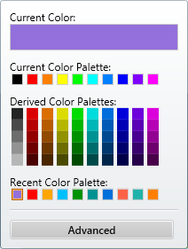
The color editing drop-down will show a few rows of default colors that you can choose from, as well as a row at the bottom that contains your most recently used colors, with the most recent on the left. However, if these color choices are still not sufficient, you can click the  button to more precisely select a color.
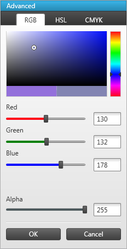
There are four different ways you can select colors on the Advanced Color screen. The first and easiest is with the graphical color selector at the top; simply drag the bar on the right up or down until you find the range you would like the color to be in, and then drag around the small circle until you have found the exact hue or shade you want. The two boxes below the gradient part of the color selector display the Active Color on the left and the new selected color on the right.
The other three methods are RGB, HSL, and CMYK. The first, RGB, allows you to precisely set the Red, Green, and Blue values with the associated sliders or, if you so wish, enter in a number value to the right between 0 and 255. The second, HSL, is similar except the values you can modify are Hue (0-360), Saturation (0-100), and Lightness (0-100). The third and final, CMYK, also has sliders and number inputs, each of which range from 0 to 100, and the values you can modify are Cyan, Magenta, Yellow, and Black—just like in print.
In addition, all four methods share the slider at the bottom, the alpha slider. “Alpha” is another word for “opaqueness,” and the less a color’s alpha value, the more transparent it will appear (signified by how much the grey-and-white squares are visible in the color preview above). This slider ranges from 0 to 255.
When you are done editing the color, click OK to save the color for use or click Cancel if you do not want to save the color.
Image
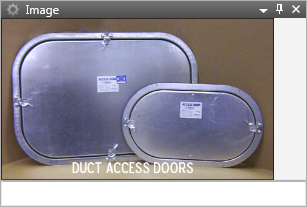
The Image palette displays the image, if set, for the currently selected item, whether it be on the plan file, on the Audit Trail, in the Catalog Items palette, or somewhere else. It can also show images for selected kits.
[Text box? Gear menu?]
Item Info
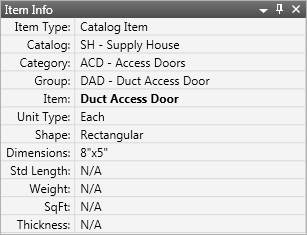
The Item Info palette displays information about the item that is currently selected, so that you can quickly see this information without having to pull up the Catalog. When a catalog kit is selected, this palette will become the Kit Info palette.
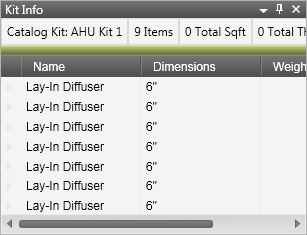
The Kit Info palette allows you to easily view the items that compose the selected catalog kit without having to edit it using the Catalog Kit palette.
Item Totals

The Item Totals palette will show you a preview of the cost of any item selected, calculating the labor and material cost you have inputted as well as factoring in the quantity inputted.
Notifications

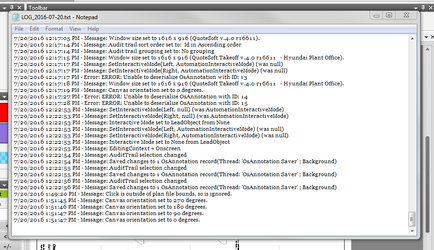
The Notifications palette displays notifications about the technical workings of the program. These are generally for providing information to QuoteSoft support representatives in the case of an issue.
The gear menu to the left of the palette title allows you to clear the displayed notifications, open the current log file in a text editor, or show the current log file in Windows Explorer. In addition, you can modify the program options of which notifications are displayed.
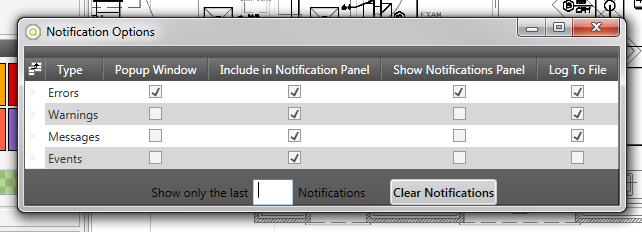
On this screen, you can choose which notifications you want to receive and in which ways. For example, if you do not want to see information about events and instead would rather only see errors and warnings in the Notifications palette, uncheck the associated boxes. You can also set the Notifications palette to only display a certain number of notifications. The settings will save automatically when you close the Notification Options screen.
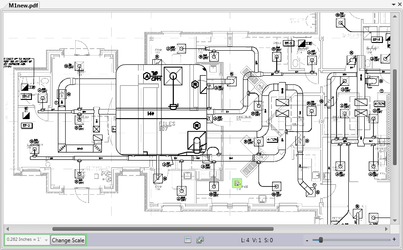
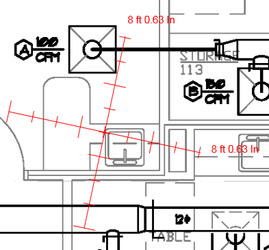
Plan File
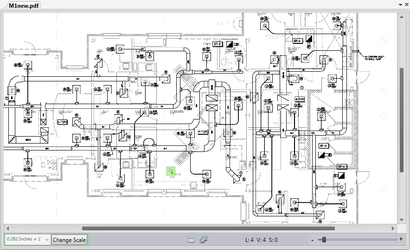
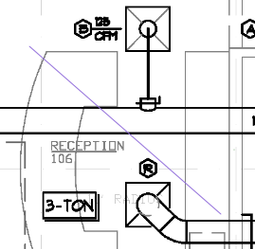
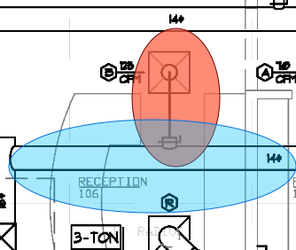
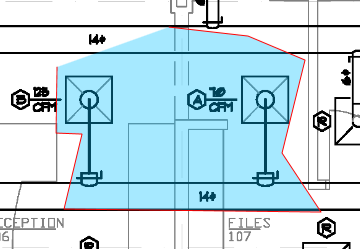
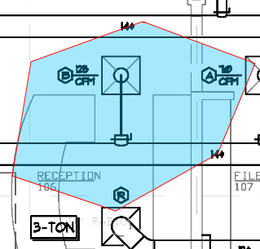
The Plan File palette is the center of Takeoff, where you can view the plan file assigned to the current Zone, as well as view and place items to be enumerated on the Audit Trail. The Plan File palette is also where you can use the tools from the Toolbar palette. Its name is determined by the currently active plan file.
Changing the Scale
To change the scale of the plan file, click on the  button beside the scale (or, Set Scale if you have not yet set the scale). Use the mouse pointer on the plan file to select a starting point and then select an ending point. You will be then asked to input the length of the distance you selected, with the choice of either standard or metric units.
Zoom Functions
The bottom of the Plan File has a few different functions related to zooming.

The first two buttons are Fit to Window, which zooms out the plan file until its entirety can be seen in the palette, and Fit 1:1, which zooms the plan file in to its original size.
In the middle, you can see how many [annotations you have selected.]
On the right, there is the Canvas Zoom Control slider which lets you quickly and easily alter the amount the plan file is zoomed by.
[plan file right click functions]
Plan File Properties
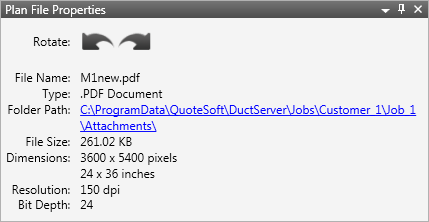
The Plan File Properties palette allows you to view information about the current plan file easily from Takeoff. It includes properties about the image, as well as a link to its location on your computer and two arrow buttons that allow you to rotate the plan file image. Any changes to the plan file’s orientation will be saved automatically, and the positions of the items relative to the plan file will be preserved after rotation.
Scaling Options
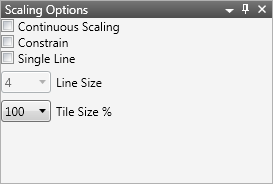
- Continuous Scaling
- []
- Constrain
- []
- Single Line
- []
- Line Size
- []
- Tile Size %
- []
Scope Info
Toolbar

- Select

- The Select tool allows you to select a placed item on the plan file, so you can perform other functions using the other palettes (e.g. changing the color, changing the quantity, etc.)
- You can also select multiple items by clicking down on the plan file and dragging the dashed rectangle over all the items you would like to select.
- Pan

- The Pan tool allows you to use your mouse to click and drag around the plan file, to view different sections. Alternately, you can use the middle button on your mouse, even if you have another tool selected.
- Zoom to Selected Region

- The Zoom to Selected Region tool allows you to select a rectangular region on the plan file display, and then that section highlighted will fill the screen.
- Center At Mouse Click

- The Center At Mouse Click tool allows you to center the plan file view around wherever you click while the tool is enabled. However, it will not zoom the plan file.
- Magnify

- The Magnify tool allows you to view a section of the plan file magnified; you can view this by selecting the tool and then clicking and holding down the mouse over the plan file.
- The Magnify tool allows you to view a section of the plan file magnified; you can view this by selecting the tool and then clicking and holding down the mouse over the plan file.
- Line

- The Line tool allows you to draw a straight line on the plan file.
- The Line tool allows you to draw a straight line on the plan file.
- Rectangle

- The Rectangle tool allows you to draw a rectangle on the plan file.

- The Rectangle tool allows you to draw a rectangle on the plan file.
- Ellipse

- The Ellipse tool allows you to draw an ellipse on the plan file.
- The Ellipse tool allows you to draw an ellipse on the plan file.
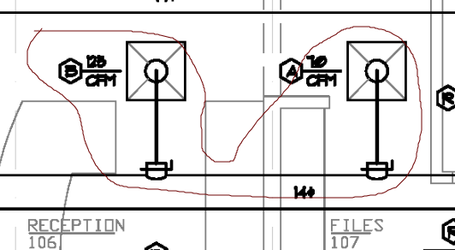
- Polyline

- The Polyline tool allows you to draw a polygon-like shape with lines that connect that will automatically be filled in. You can stop drawing the shape by right-clicking and then selecting the Select tool on the Toolbar.
- The Polyline tool allows you to draw a polygon-like shape with lines that connect that will automatically be filled in. You can stop drawing the shape by right-clicking and then selecting the Select tool on the Toolbar.
- Polygon

- The Polygon tool allows you to draw a polygon-like shape with lines that connect that will automatically be filled in. You can stop drawing the shape by right-clicking and then selecting the Select tool on the Toolbar.
- The Polygon tool allows you to draw a polygon-like shape with lines that connect that will automatically be filled in. You can stop drawing the shape by right-clicking and then selecting the Select tool on the Toolbar.
- Curve

- The Curve tool allows you to draw a curved line on the plan file.
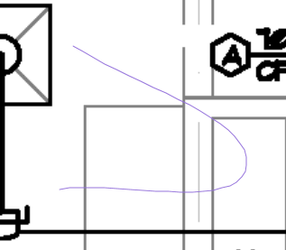
- The Curve tool allows you to draw a curved line on the plan file.
- Closed Curve

- The Closed Curve tool allows you to draw a curved line that is filled in on the plan file. You can stop drawing the shape by right-clicking and then selecting the Select tool on the Toolbar.
- The Closed Curve tool allows you to draw a curved line that is filled in on the plan file. You can stop drawing the shape by right-clicking and then selecting the Select tool on the Toolbar.
- Pointer

- The Pointer tool allows you to draw an arrow on the plan file, which you can use to point to important items or areas on the plan file.
- Freehand

- The Freehand tool allows you to draw on the plan file, unrestricted, in case you want to draw a shape that cannot be created with one of the above tools.
- The Freehand tool allows you to draw on the plan file, unrestricted, in case you want to draw a shape that cannot be created with one of the above tools.
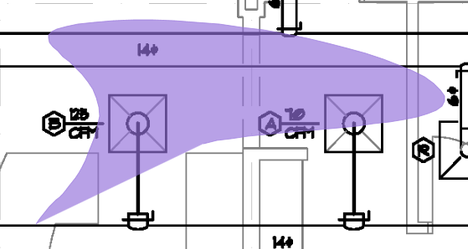
- Hilite

- The Hilite tool allows you to highlight a section of the plan file. This is similar to the rectangle tool, but you cannot change the color or opacity; in effect, it is a shortcut for creating semi-transparent yellow rectangles.
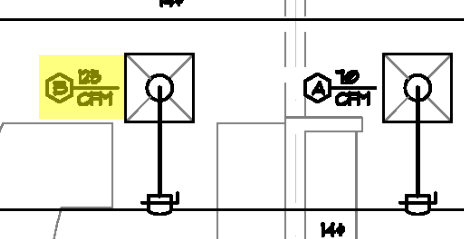
- The Hilite tool allows you to highlight a section of the plan file. This is similar to the rectangle tool, but you cannot change the color or opacity; in effect, it is a shortcut for creating semi-transparent yellow rectangles.
- Text

- The Text tool allows you to place a note with text on the plan file, either with a default size if the plan size is merely clicked, or you can click and drag to choose the size of the note. Upon releasing the mouse button, you will be presented with the Note Edit screen.
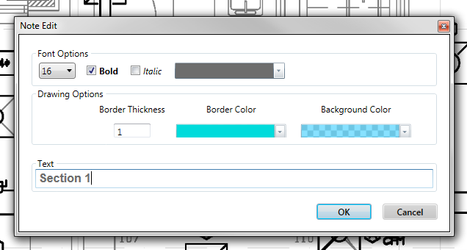
- From here, you can alter the size, style, and color of the font on the note in the Font Options. The Drawing Options will allow you to determine aspects of the note’s style: border thickness, border color, and background color. In addition, the text field at the bottom lets you enter (and preview the look of) the text that will appear on the note. When you are done filling out the form, click OK to save and create the note or Cancel if you do not want to create the note.
- The Text tool allows you to place a note with text on the plan file, either with a default size if the plan size is merely clicked, or you can click and drag to choose the size of the note. Upon releasing the mouse button, you will be presented with the Note Edit screen.
- Text Pointer

- The Text Pointer tool is similar in usage to the Text tool, except for after selecting the size of your note, you must also select a point on the plan file to tie the note to. Once you do that, you will be prompted with the Note Edit screen.
- From here, you can alter the size, style, and color of the font on the note in the Font Options. The Drawing Options will allow you to determine aspects of the note’s style: border thickness, border color, and background color. In addition, the text field at the bottom lets you enter (and preview the look of) the text that will appear on the note. When you are done filling out the form, click OK to save and create the note or Cancel if you do not want to create the note.
- The Text Pointer tool is similar in usage to the Text tool, except for after selecting the size of your note, you must also select a point on the plan file to tie the note to. Once you do that, you will be prompted with the Note Edit screen.
- Note

- The Note tool allows you to place a note with text on the plan file, either with a default size if the plan size is merely clicked, or you can click and drag to choose the size of the note. Upon releasing the mouse button, you will be presented with the Note Edit screen.
- From here, you can alter the size, style, and color of the font on the note in the Font Options. The Drawing Options will allow you to determine aspects of the note’s style: border thickness, border color, and background color. In addition, the text field at the bottom lets you enter (and preview the look of) the text that will appear on the note. When you are done filling out the form, click OK to save and create the note or Cancel if you do not want to create the note.
- Note: The Note tool is functionally identical to the Text tool.
- The Note tool allows you to place a note with text on the plan file, either with a default size if the plan size is merely clicked, or you can click and drag to choose the size of the note. Upon releasing the mouse button, you will be presented with the Note Edit screen.
- Redaction

- The Redaction tool allows you to quickly and easily hide information from the plan file by coloring over it with an opaque, solid rectangle. It is similar to the Rectangle tool except it will be white and not see-through by default.
- The Redaction tool allows you to quickly and easily hide information from the plan file by coloring over it with an opaque, solid rectangle. It is similar to the Rectangle tool except it will be white and not see-through by default.
- Ruler

- The Ruler tool allows you to create a ruler and place it on the plan file, showing you how big a distance is depending on the scale you have set for the plan file. Simply click and then drag the mouse to extend the ruler and pivot it to different directions, and then let go to place the ruler.
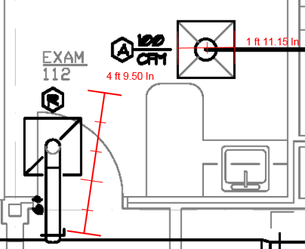
- The Ruler tool allows you to create a ruler and place it on the plan file, showing you how big a distance is depending on the scale you have set for the plan file. Simply click and then drag the mouse to extend the ruler and pivot it to different directions, and then let go to place the ruler.
- Continuous Ruler

- The Continuous Ruler tool allows you to create a series of rulers sequentially, each attached to the previous—much like the Polyline tool, but with rulers instead. Instead of each separate distance, the number displayed will be the total distance of all of the rulers combined. To stop placing rulers, right click.
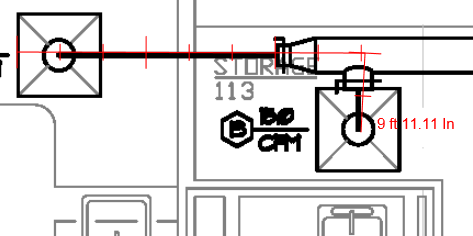
- The Continuous Ruler tool allows you to create a series of rulers sequentially, each attached to the previous—much like the Polyline tool, but with rulers instead. Instead of each separate distance, the number displayed will be the total distance of all of the rulers combined. To stop placing rulers, right click.
- Protractor

- The Protractor tool currently only works as a ruler.
- Cross Product

- The Cross Product tool works similarly to the Ruler tool in that you click and drag out to extend the ruler, but it displays two perpendicular rulers at once that are attached at the center.
- This can be used for [what?]
- The Cross Product tool works similarly to the Ruler tool in that you click and drag out to extend the ruler, but it displays two perpendicular rulers at once that are attached at the center.
Zone List
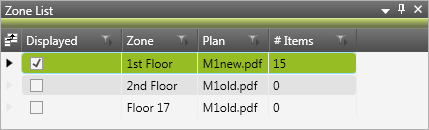
The Zone List palette allows you to view all of the zones that exist for the job that is being edited in Takeoff, and it allows you to switch between them easily. You can also see which one is currently being displayed. To switch zones, simply click the check box next to the zone you would like to switch to.
©2022 ConstructConnect, Inc. All rights reserved.