To open any link in a new tab, preserving your position in the current article, just hold down the <CTRL> key on your keyboard before clicking the link or click using your mouse wheel.
Creating Excel Templates, Pre-defining Linked Cells, and Exporting Templates to PlanSwift
Creating Excel Templates, Pre-defining Linked Cells, and Exporting Templates to PlanSwift
To create an Excel template, pre-define linked cells within the template, and export that template, follow the procedure below.
Open Excel to a new blank spreadsheet.
Figure 1
- Click on the File Ribbon Tab in Figure 1, click on Save As in the drop-down menu (Figure 2), then click on Browse (Figure 2).
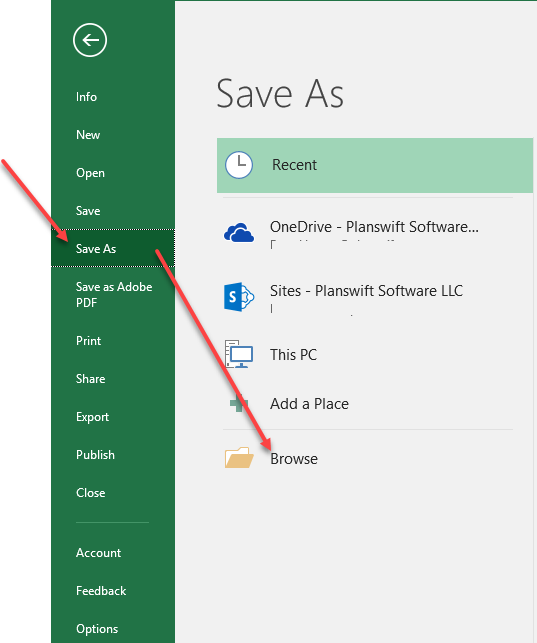
Figure 2 - This opens the Save As window (Figure 3). From this window, click on the Save As type drop-down menu, and select Excel Template (*xltx), which is the latest Excel template file format.
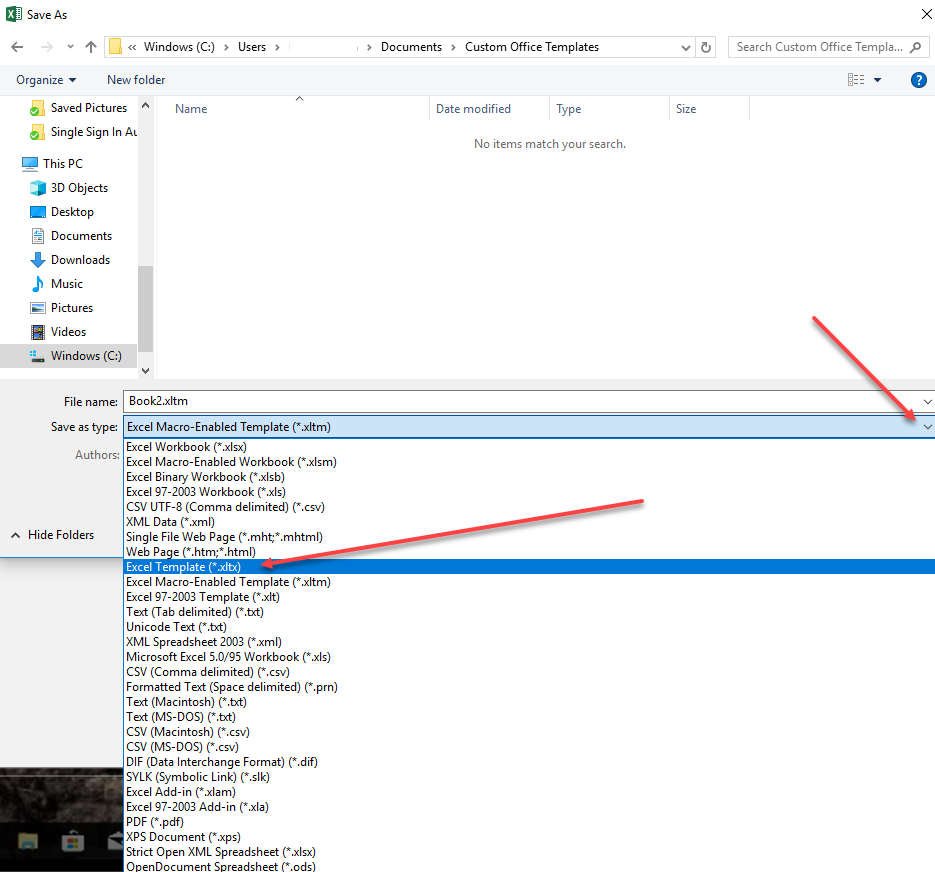
Figure 3 - Give this template a name, say "Rand Template.xltx" and click on Save (Figure 4). This template will be saved in the default template directory: c:\Users\username\Documents\Custom Office Templates. If you wish to save it elsewhere, the windows navigation controls may be used to select a different drive or directory.
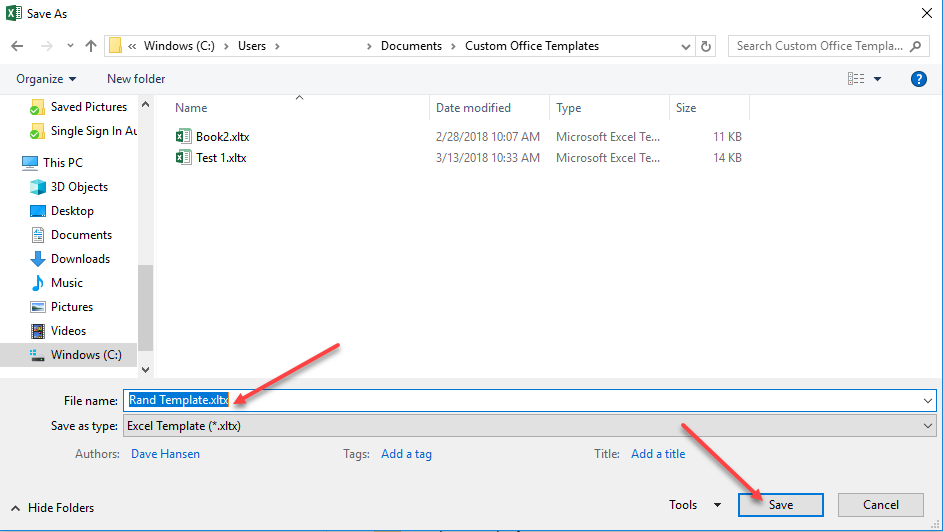
Figure 4 - The Excel spreadsheet is now a template, named Rand Template.xltx, which you can design into any format that you find useful (Figure 5).
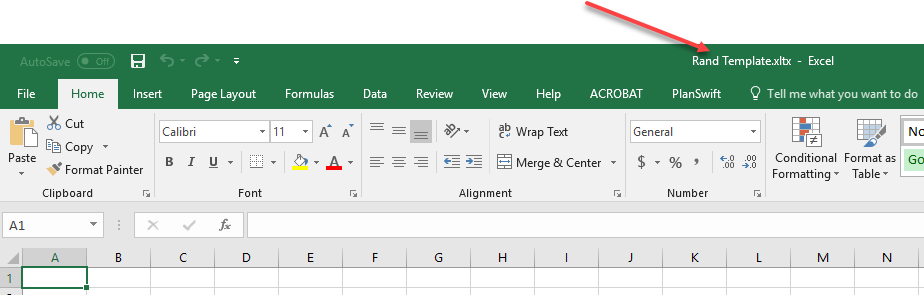
Figure 5 - Click on the PlanSwift Ribbon-bar Tab, then click on any cell (Figure 6).
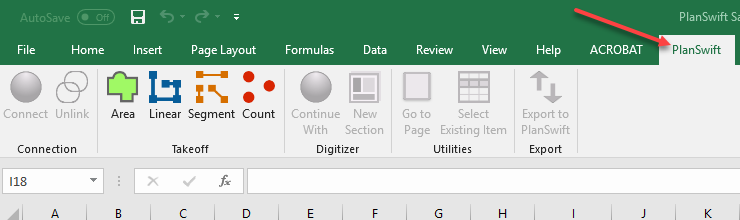
Figure 6 - The Takeoff Group icons will now appear highlighted (Figure 7), and the Area, Linear, Segment, and Count icons become the only active icons.
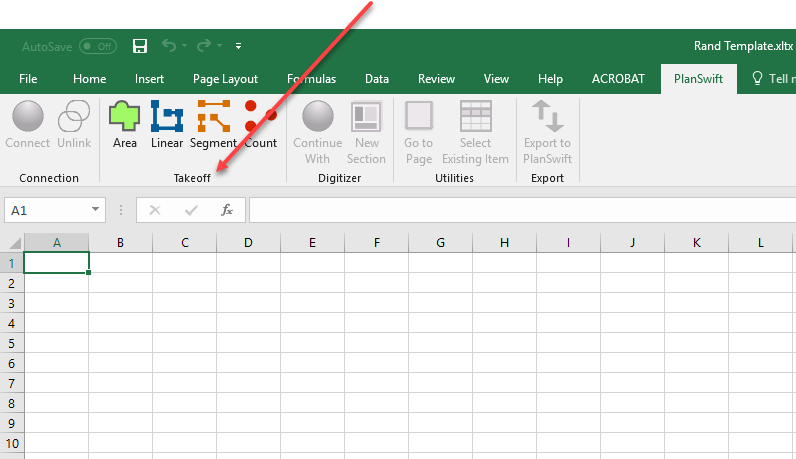
Figure 7 - As a practice, type in Area, Linear Segment, and Count into cells A2 to A5 (Figure 8), and click in cell B2.
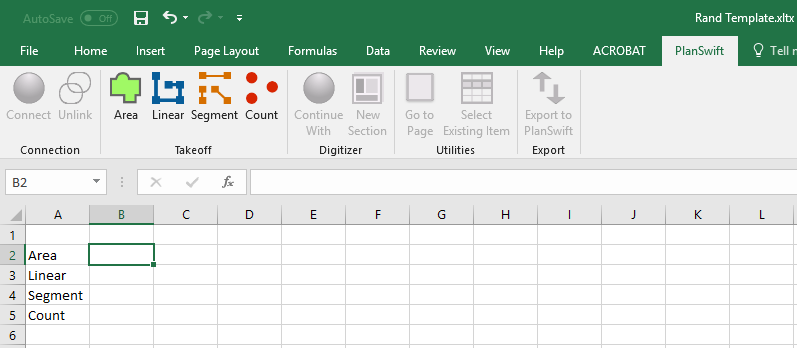
Figure 8 - Click on the Area icon to open the Define Template window (Figure 9).
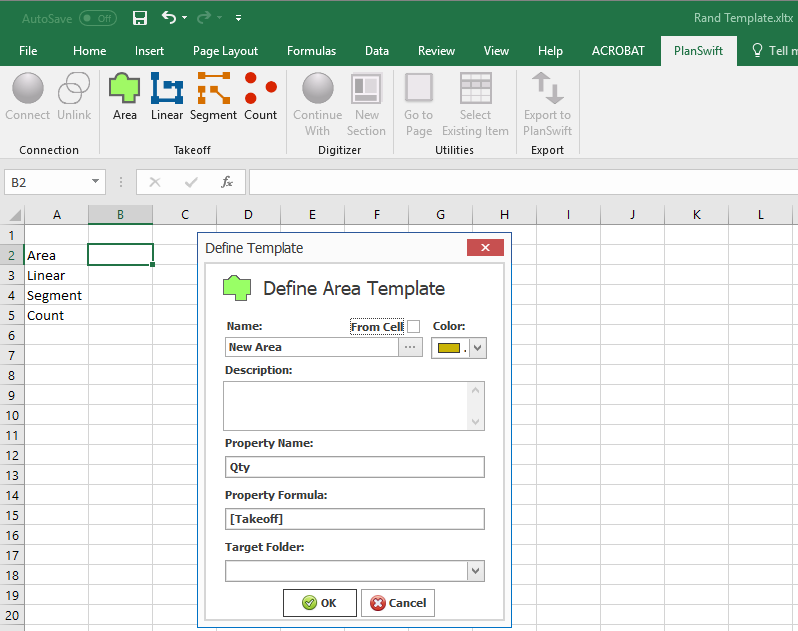
Figure 9 - In the Define Area Template window, enter in "Concrete" for the Name, "Front Sidewalk" for the Description, and "Miscellaneous" for the Target Folder (see arrows in Figure 10), If you click on the From Cell box and click the ellipsis (...) below the box, then a Range Picker box (Figure 11) will appear allowing you to enter the cell to be used for the Name. Enter the cell number. for instance, "A2", and click on OK, and the contents of cell A2 will be used in the template. Clicking on the Color drop-down menu provides a selection of colors to choose from. The Property Name and the Property Formula may also be edited here if desired. Click on OK. A small red triangle will appear in the top-right corner of the cell when the template properties have been defined.
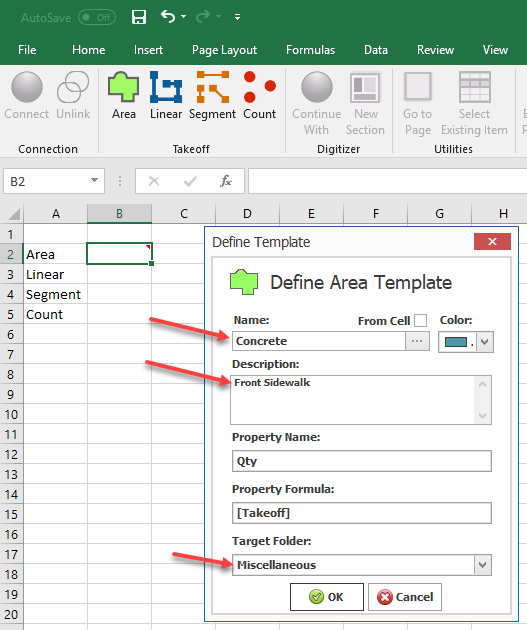
Figure 10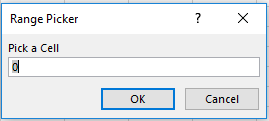
Figure 11 - Click on cell B3, and this time right-click on the cell, hover over PlanSwift - Define Template, and click on Linear Designer.
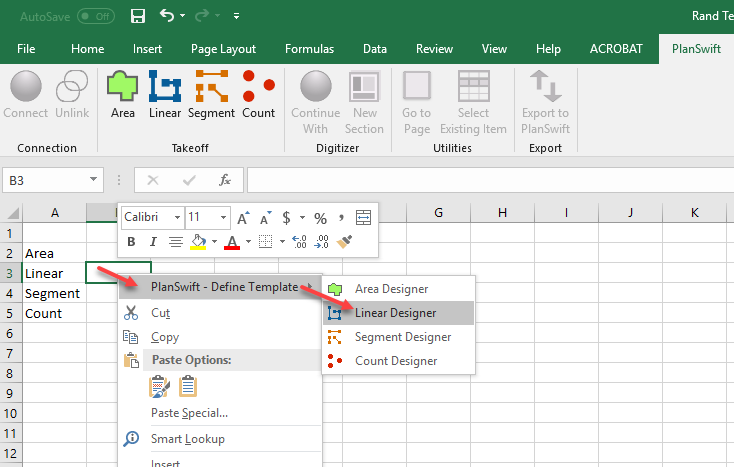
Figure 12 - This opens the Define Linear Template window (Figure 13), which works similarly to the Define Area Template window. Enter whatever data you would like for this linear value, and click on OK.
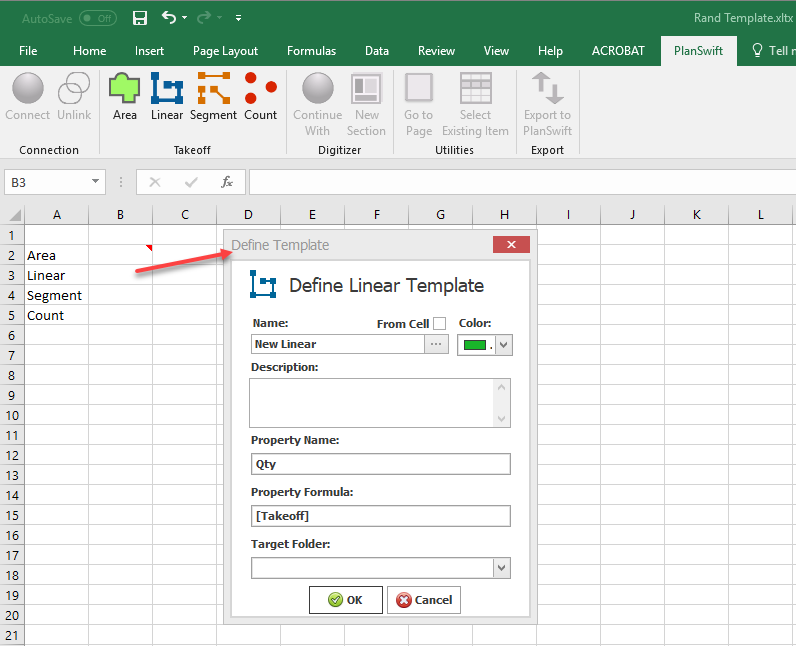
Figure 13 - The Segment and Count windows work similarly. They are shown in Figures 14 and 15. Fill them out as you wish.
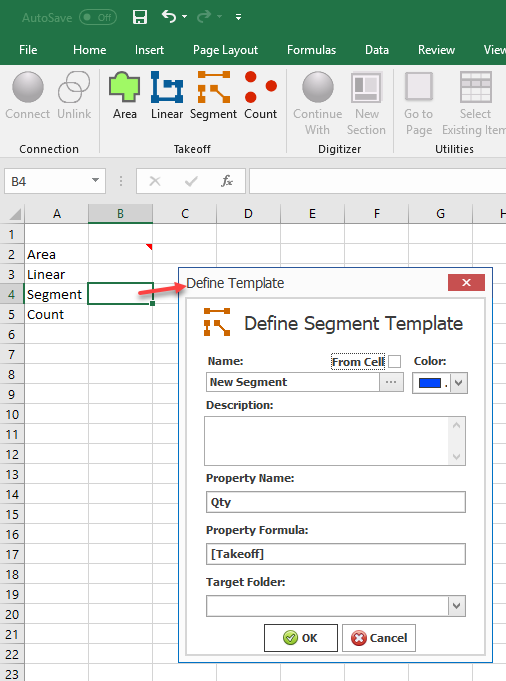
Figure 14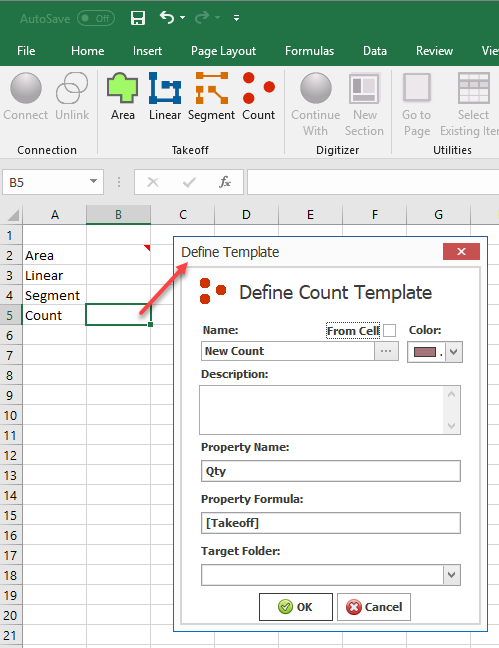
Figure 15 - Once all of the fields are filled in the way you want, click on the File Tab and select Save (Figure 16).
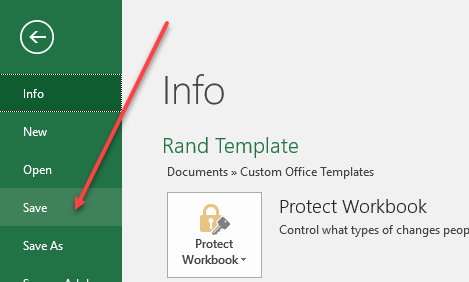
Figure 16 - Now open PlanSwift and start a new job (Figure 17). Enter a Job/Quote # or name and a Description, then click on Next.
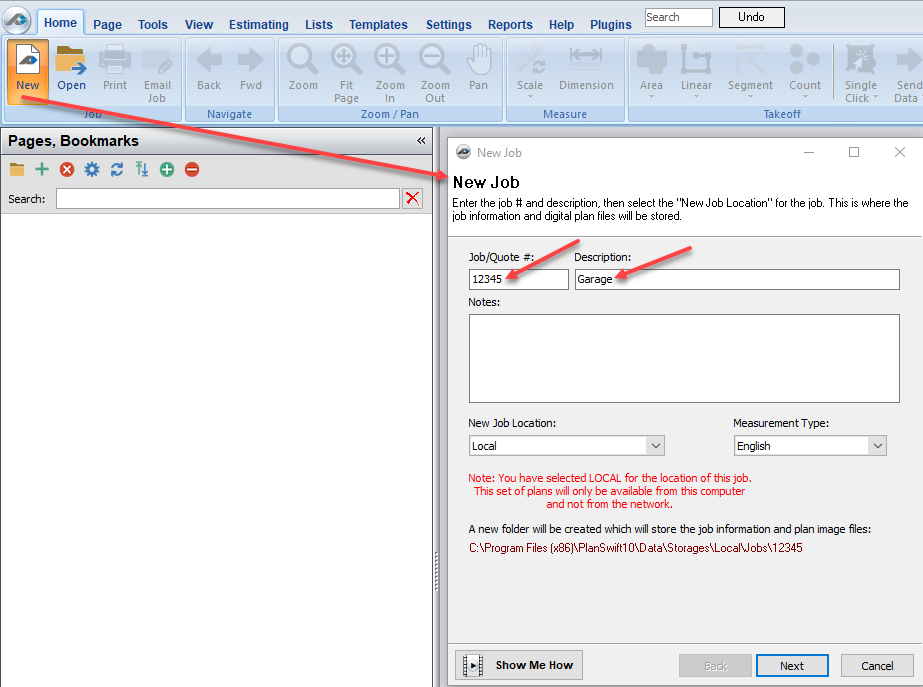
Figure 17 - In the Image Files window (Figure 18), click Next to skip it. Click Yes when you're asked if you want to continue without adding any images. Pages may be added now or later.
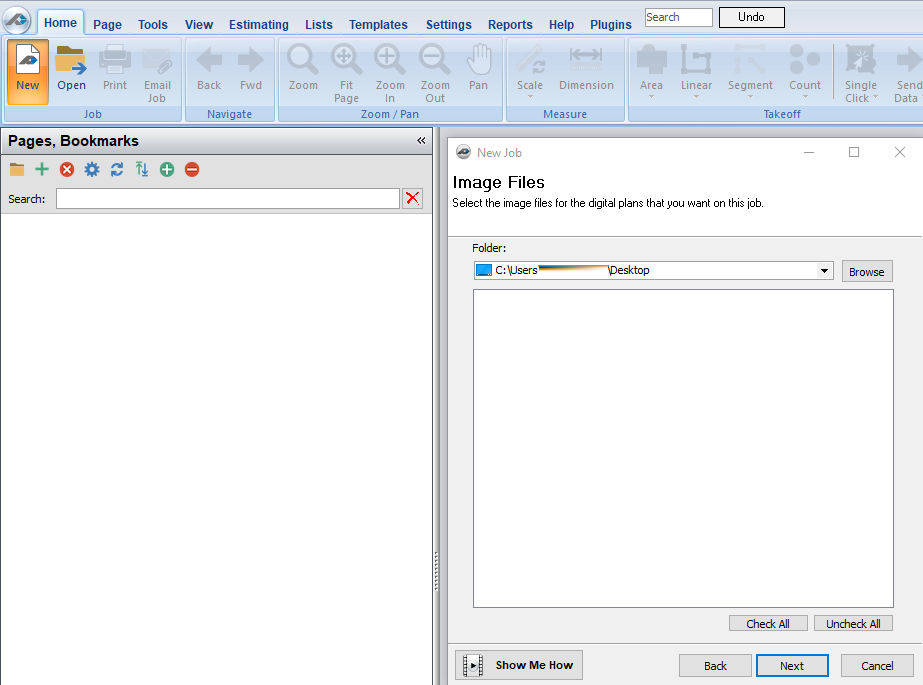
Figure 18 - Click Next on the Convert Settings window (Figure 19).
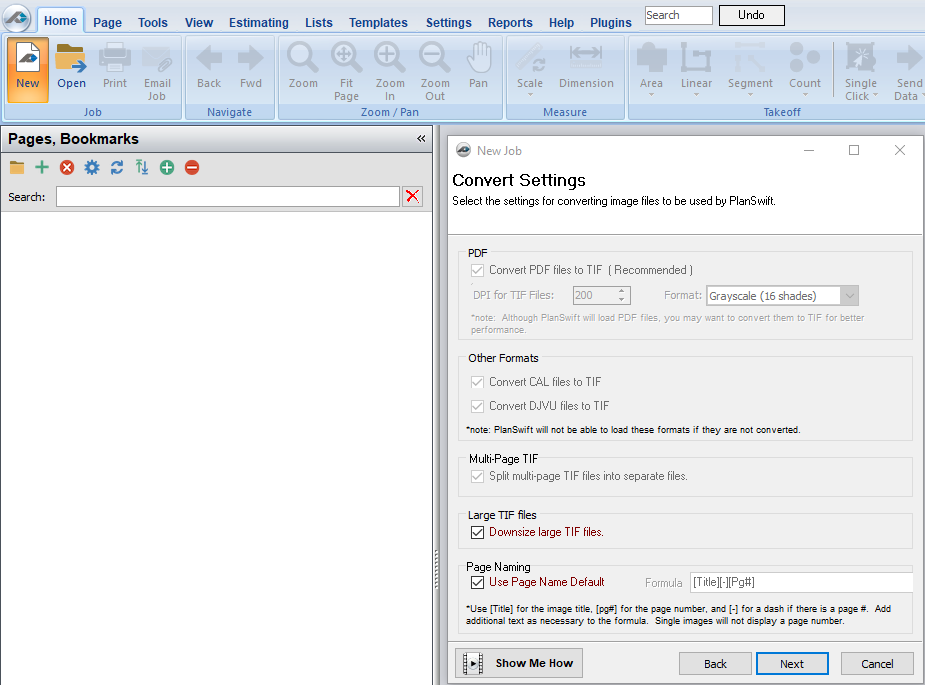
Figure 19 - Click on Finish in the Ready to Create Job window (Figure 20).
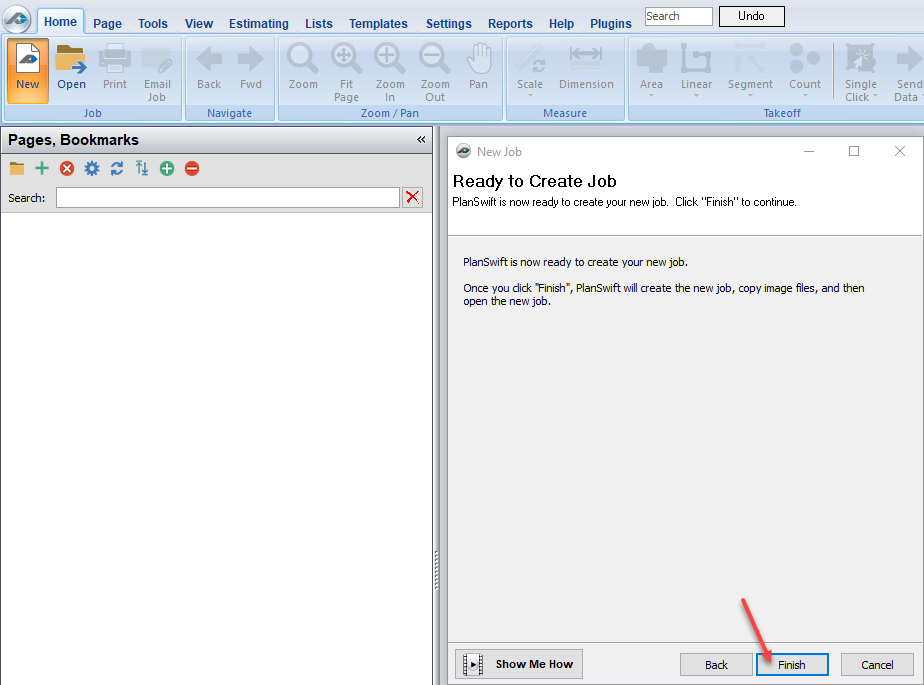
Figure 20 - Click on the green Plus (+) under Pages,Bookmarks (Figure 21), click on Blank Page, and then click on Next.
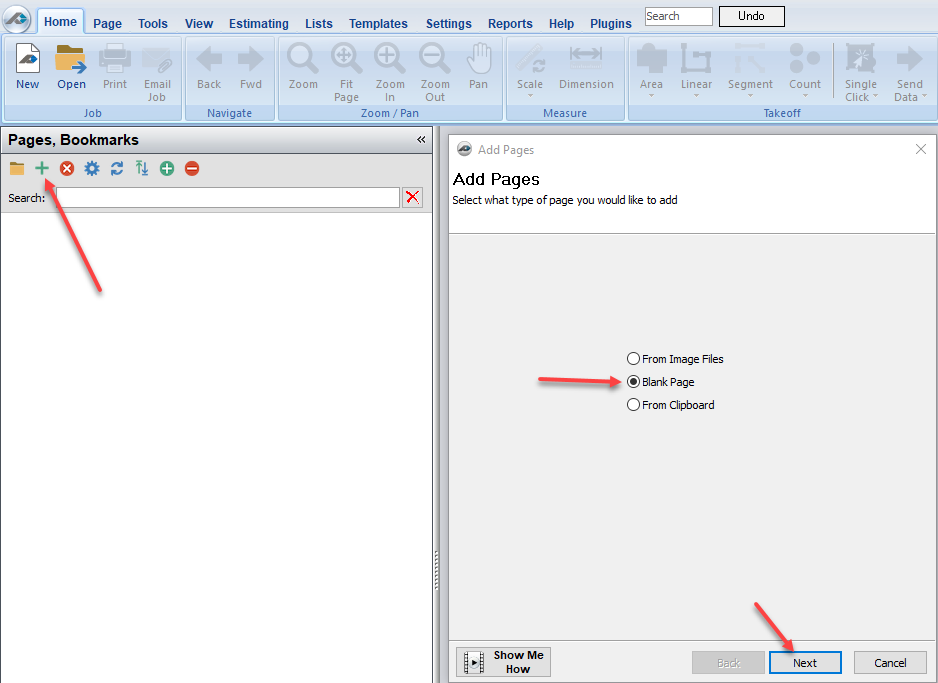
Figure 21 - In Figure 22, give this page a new name, "Our New Page", and click on Finish.

Figure 22 - The "Our New Page" job is now open and set up (Figure 23).
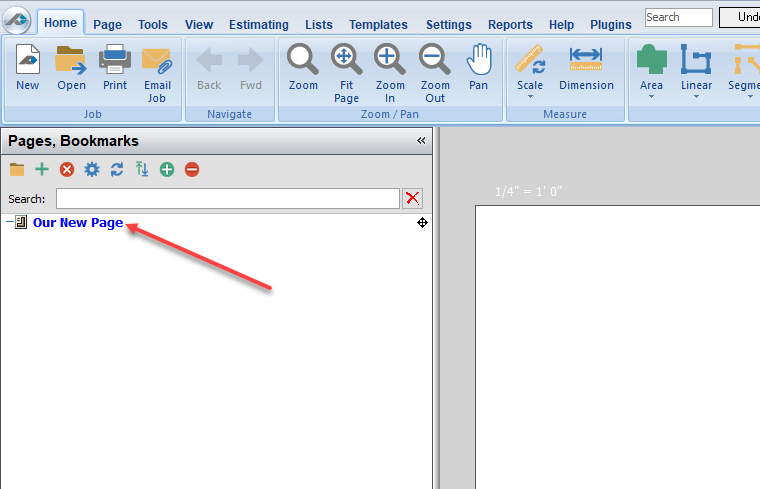
Figure 23 - Click on the Tools Ribbon-bar Tab; click on Attach Excel File to Job; navigate to the template (Rand Template.xltx); select the Rand Template.xltx; and click on Open (Figure 24).

Figure 24 - Select Attachments (arrow 1 in Figure 25) to open the Attachments window (arrow 2 in Figure 25), and double-click on the Rand Template.xlsx workbook (arrow 3 in Figure 25). Notice that the file suffix for Rand Template is no longer .xltx but is now .xlsx, indicating that you are no longer working in a template, but rather a WorkBook of the same name.
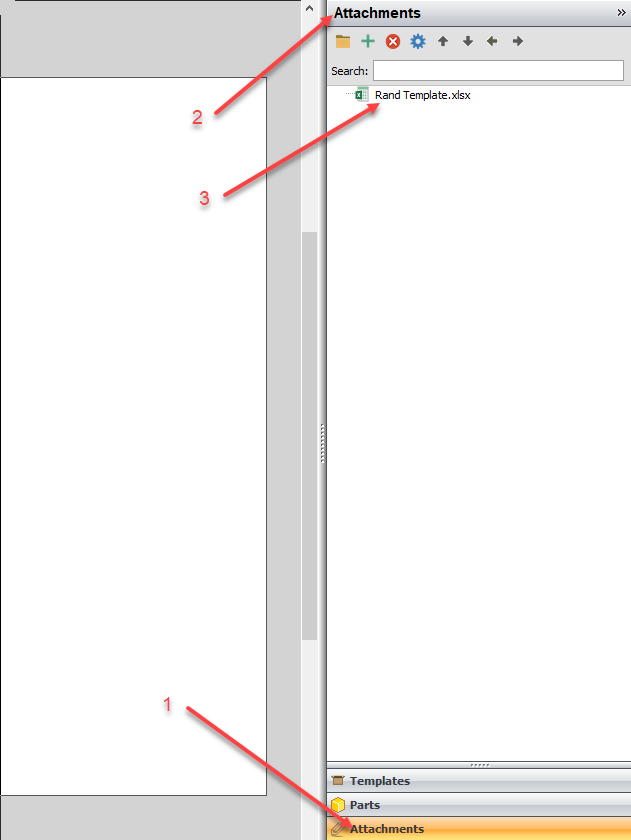
Figure 25 - The opens an Excel window (Figure 26) where you'll see the Rand Template.xlsx name at the top. You can also see the Area, Linear, Segment, and Count labels in cells A2 to A5.
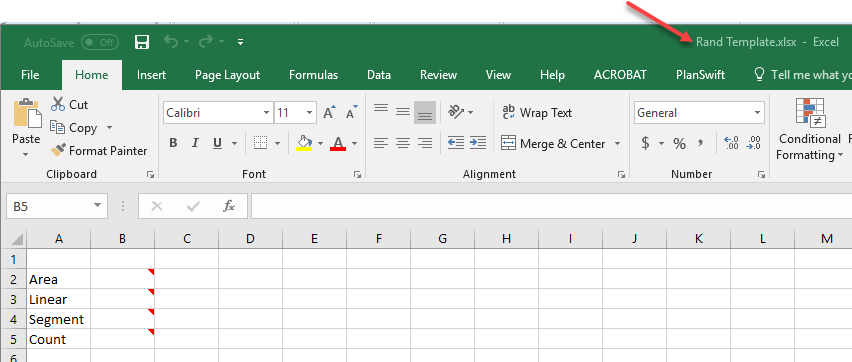
Figure 26 - Click on the PlanSwift Tab, then click on Connect (Figure 27).
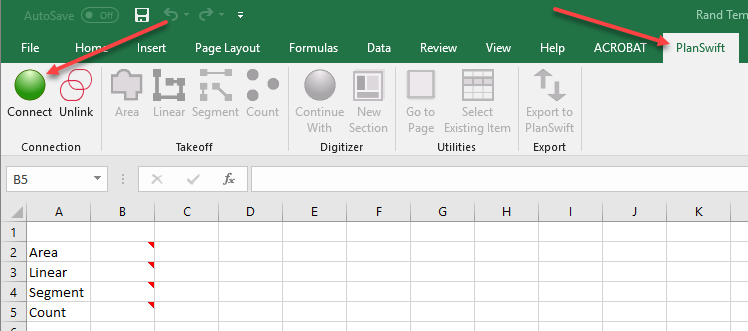
Figure 27 - Once connected, the Takeoff Group icons on the PlanSwift Ribbon-bar Tab are available to initiate takeoffs and perform other actions (Figure 28).
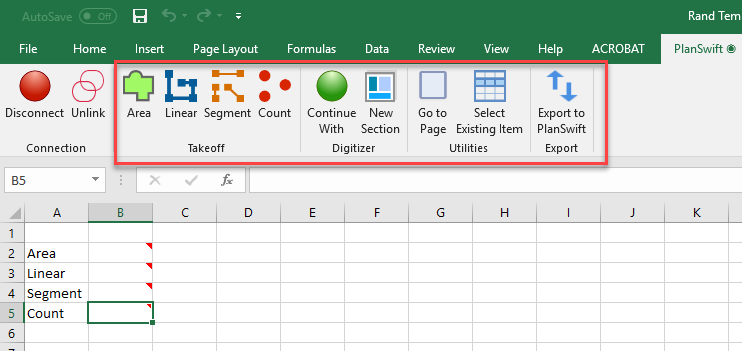
Figure 28 - At this point, you now have two options. You can either export the Rand Template items into PlanSwift, or you can simply perform takeoffs, initiating them from Excel. Click on the Export to PlanSwift in the PlanSwift Ribbon-bar Tab and perform some takeoffs. Figure 29 shows an example of the values both in PlanSwift and in Excel after some takeoffs have been completed.
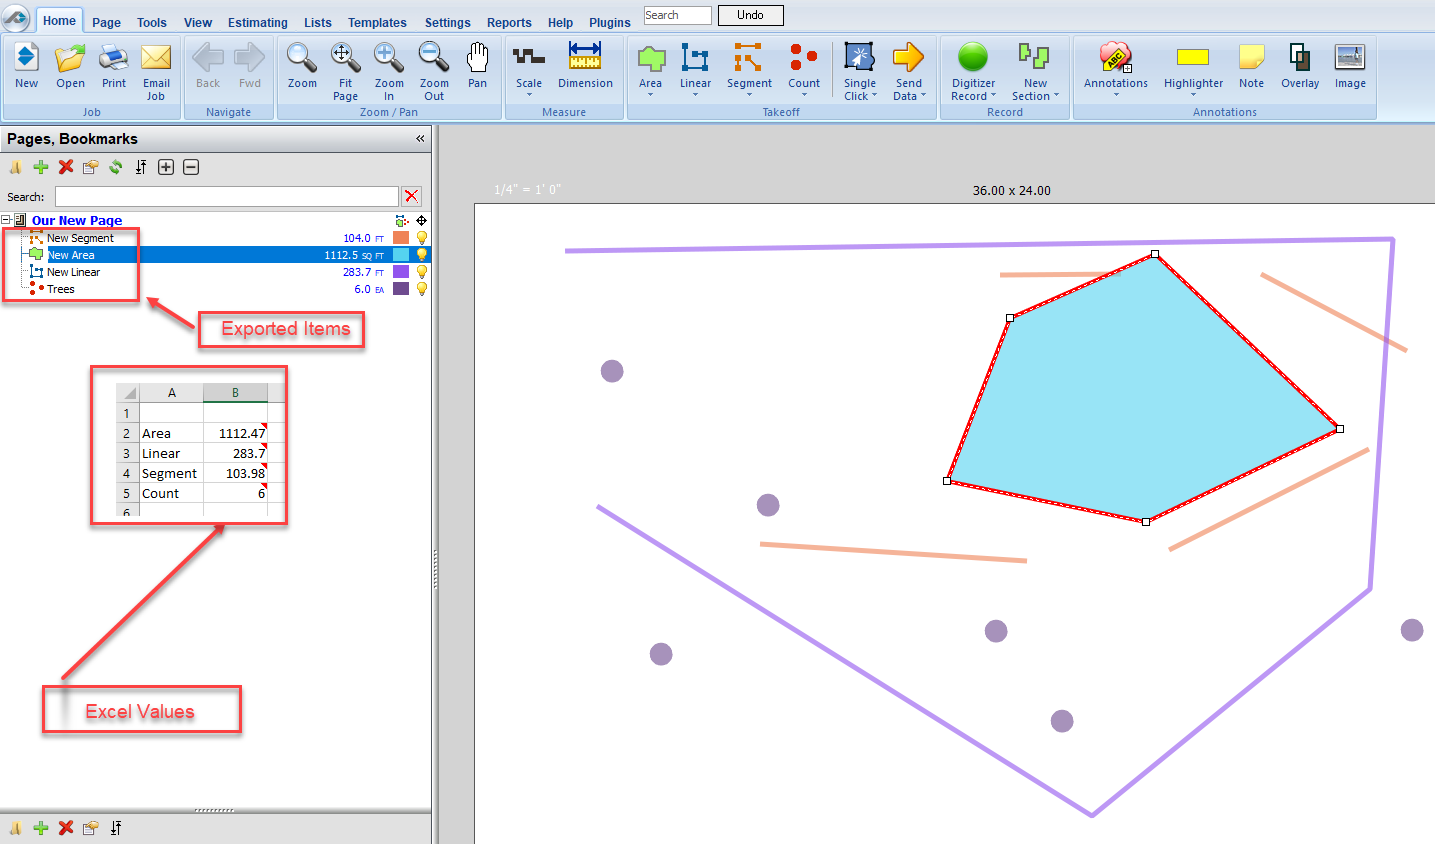
Figure 30
Copyright 2023 ConstructConnect