To open any link in a new tab, preserving your position in the current article, just hold down the <CTRL> key on your keyboard before clicking the link or click using your mouse wheel.
Import from Excel Plugin FAQ
- Jacob Oveson-Davis (Deactivated)
- Daniel Wal
- Kristi Larson (Deactivated)
The PlanSwift Import from Excel tool is a plugin that was designed to allow users to create PlanSwift parts from their own Excel spreadsheets. This article will describe in detail how to use this tool.
There are several things to consider in preparing an Excel spreadsheet for importing into PlanSwift. Keep in mind that this is a basic example and you are not limited to the properties listed.
1. Plan out what properties you want to add and populate for each item.
2. Try to be as global as you can with your properties, because each column you create will be added as a property on each item you are importing whether it is used by the item or not.
3. To simplify the cleanup work after the import, you can also import the calculations for any given property. Note that the formula needs to be written in the same manner as it is in PlanSwift and NOT Excel.
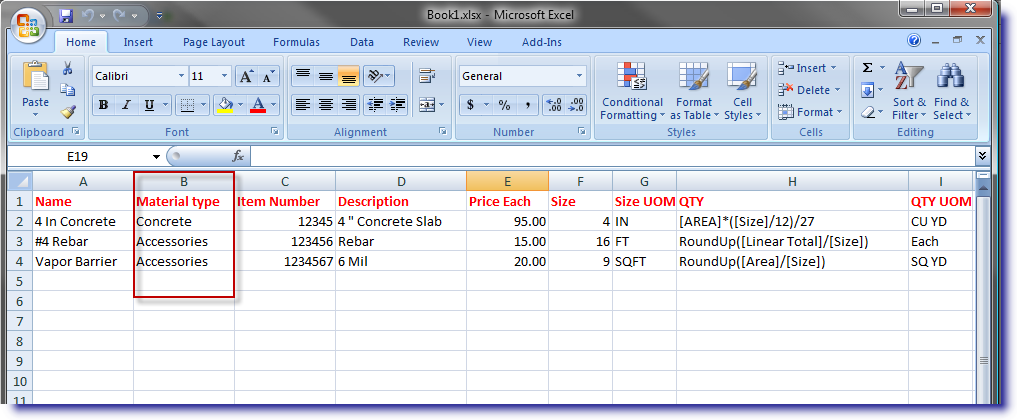
The first row of your spreadsheet should contain the "Property Headings". You will have the opportunity to edit the names that appear in PlanSwift when you run the import tool.

This next image shows what is labeled as "Material Type". The name itself really is not important here, but what you want to create with this column is a folder structure for the Tab in PlanSwift. This will keep all of you items sorted into tidy categories. Note that you must sort your spreadsheet by this column before importing; otherwise, you will end up with a duplicate folder.
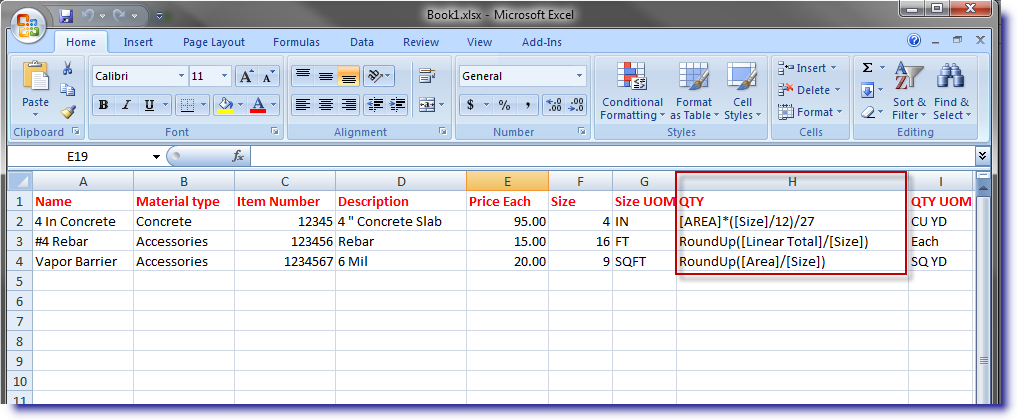
In the "QTY property", the PlanSwift formula has been added to perform the calculations needed to get the result for the part being counted. You are not limited to the "QTY property"for this. You may add other calculations in the properties you are creating. Entering formulas here is optional, but it can save a great deal of time if you have a lot of items.
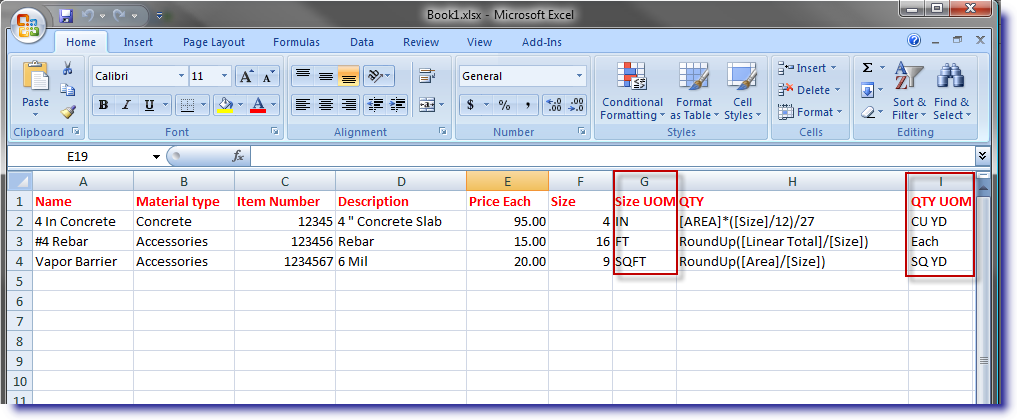
A column for the unit of measure can also be added. During the import process, you can specify which fields are Units.
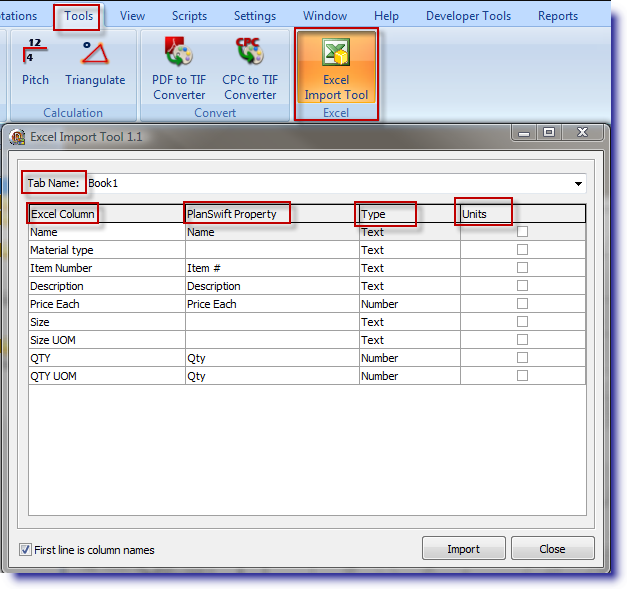
Once the spreadsheet is formatted and the data complete, you can start the import process. With the Excel spreadsheet open and PlanSwift open, click on the Tools tab in PlanSwift, then click on the Excel Import Tool button.
This launches the tool and opens a new window. The Excel spreadsheet data will load the column headers automatically. PlanSwift automatically associates column names with default PlanSwift properties as long as the names are the same. About the form:
- Tab Name - By default, the Tab name is set to the name of the Excel file. You can change this here if you like.
- Excel Column - These are your headings from your Excel sheet.
- PlanSwift Property - These are the properties' names that are matched to or created in PlanSwift.
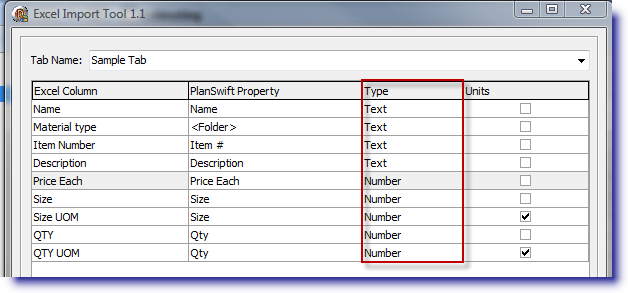
- Type - This is where you select whether it is a text or number result type.
- Units - This is where you specify whether a column is a unit of measure.
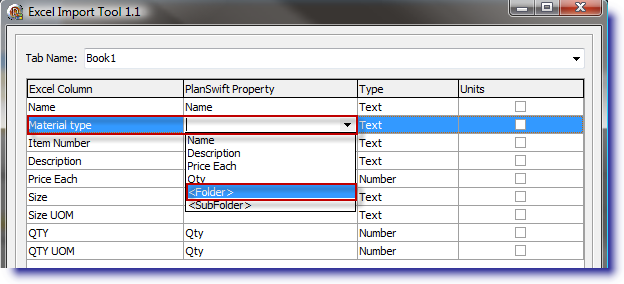
Start by editing the PlanSwift property names. The first property is "Name" which matches to the name property in PlanSwift. The second property is "Material Type"; since there is not a property in PlanSwift, that does not match, and you need to select one from the list or create one by typing the name you want to use.
To create an organized structure for the imported parts using the "Material Type" as the group, select the <Folder> option from the drop-down menu. This tells PlanSwift that you want a folder created for this name in the spreadsheet.
Continue this process for all of the PlanSwift Property Names.
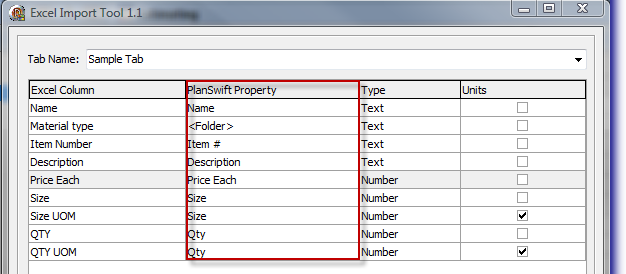
Note that when you get to the "Size" and "QTY properties", multiple Excel columns have been assigned to a single PlanSwift property.
You now specify a "UOM" for a specific property. In the example below, note that "Size and Size UOM" is matched to the same "Size property" in PlanSwift. The difference is that you check the Units check box. This designates that the Excel Column contains the "UOM" for the given property.

Ensure that you adjust your property Type to reflect the desired result in PlanSwift.
Once everything is set the way you want it, click on the Import button in the lower right corner.
Once the import tool has finished, you should see the tab showing in the PlanSwift estimating window. Notice how the folder structure worked here.
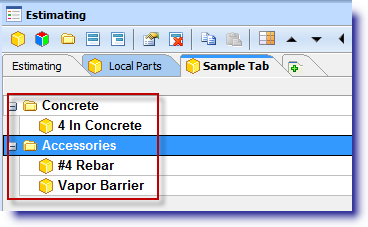
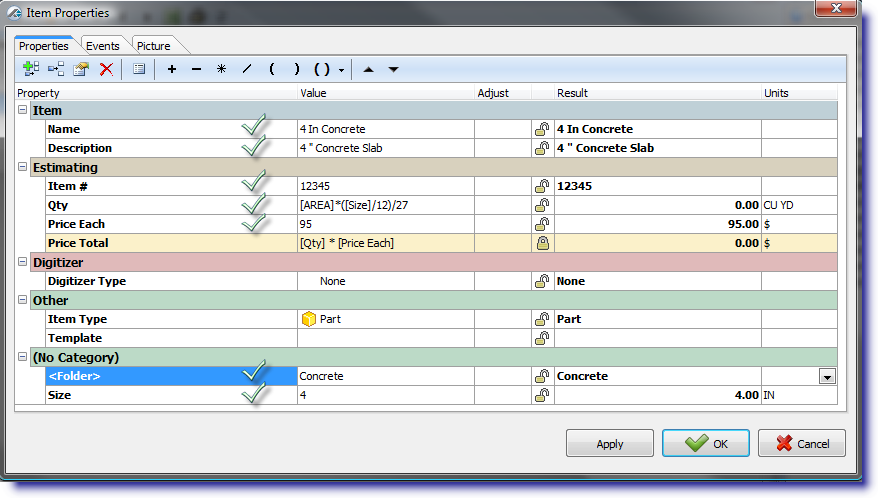
It's recommended that you verify at least one of the items to make sure the information loaded properly. Here you can see the Name, Description, Item Number, the Formula in QTY, the Price, Size and Folder, all populated as they were laid out in the Excel spreadsheet.
Related content
Copyright 2023 ConstructConnect