06. Appendix
- April Friedman (Unlicensed)
Building Assemblies
What is an Assembly?
An Assembly is a collection of items that are a fixed size and saved under one name. For example; if you wanted to be able to quickly add with one click and one icon placement a Rooftop Unit, Curb, Flex Connector and Duct Drops this would be and Assembly.
What items can be in an Assembly?
An Assembly can be made up of any items you choose; it can include Catalog items, Rectangular Duct and Fittings, Spiral Pipe and Fittings, Oval Pipe and Fittings and Accessory Items.
Where and when can I use an Assembly?
An Assembly file is Global, meaning that after they are created they can be used in any Job at any time in QuoteSoft Duct.
How do I build an Assembly?
For this example we will be building a 7.5 ton Roof Top Assembly. The Assembly will include the following items.
- 7.5 Ton Roof Top Unit
- S/A- 20×16 Canvas Connector
- S/A- 20×16 St. Duct 6ft Long
- S/A- 20×16 End Cap
- R/A- 36×12 Canvas Connector
- R/A- 36×12 St. Duct 6ft Long
- R/A- 36×12 End Cap
To build the Assembly we need to accept the needed items needed for the Assembly. Follow these steps:
- Creating the Takeoff Items for the Assembly
- Create a zone and load the pressure classes you wish to have used within the Assembly.
- Click the Catalog Button to open the Catalog, select the Roof Top category, select the complete Package (unit, curb, and economizer) and then click the 7.5 ton Package. Accept this item into the zone.
- Click the Canvas Connector icon on the Takeoff Palette, input the 20×16 dimensions needed and before clicking Accept, be sure to change the System to Supply.
- Select the Straight Duct icon from the palette. The dimensions will be carried from the canvas connection; you will only have to modify the desired feet and inches. Using the entry palette or your keyboard, put in the length of 6 feet and click Accept.
- Click the End cap icon and then click Accept. The dimensions will be correct from the previously selected and accepted ductwork.
- Next select the Canvas Connection again, modify the dimensions to 36×12 and before clicking Accept, change the System to Return.
- Repeat steps 4 and 5 to Accept the duct drop and end cap.
- Building the Assembly
- Click the Assembly drop down menu at the top of the Takeoff window, and click Create Assembly File.
- Enter the name you wish to give the Assembly File. For this example, we’ll use “RTU 7.5 Ton”.
- Input any option notes you wish to store with the Assembly File and click OK.
- Enter the first item on the Audit Trail that you wish to have saved in the assembly. For our example, it is item 1. Click OK.
- Enter the last item on the Audit Trail to close the Assembly. For our example, it is item 7. Click OK.
How do I used the Assembly File?
- Click the Assembly drop down menu at the top of the Takeoff window and click on Assembly Files.
- When the Assembly Panel comes up, click the + symbol next to the Base directory on the left hand panel.
- Click the RTU 7.5 Ton Assembly, and you will see all the included items listed to the right.
- Change the quantity needed on the far right and click OK. The items will all be added.
For an advanced walkthrough of using Assemblies, please call and schedule a training session or visit training.quotesoft.com to register and watch the training videos.
Creating and Using Fitting Chains
What is a Fitting Chain?
A Fitting Chain is a list of items linked to an item within the Accessories Palette that will all be Accepted automatically after the first link.
For example, a commonly created Fitting Chain is for diffuser hookups. You can link a spin-in tap, damper, insulated flex duct and diffuser all to the spin-in. If you use the first link (spin-in) the other items will automatically be Accepted at the same diameter and quantity.
What items can be in a Fitting Chain?
Unlike an Assembly, which can be items of any type, Fitting Chains are made up of Accessory Items only.
Where and when can Fitting Chains be used?
A Fitting Chain is created within the Setup Files, therefore allowing you to use it globally within any job at any time.
Creating a Fitting Chain
- Edit your Accessories File by selecting it on the list and then clicking Edit at the bottom of the screen.
For this example, we will chain together a list of items used in a flex run-out, starting with a conical spin-in, adjustable elbow, flex duct, and a lay-in diffuser.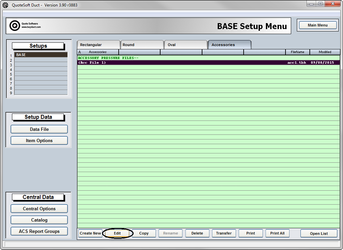
- To start the Chain, select the starting item from the palette with a left click to go to the items set up page.
For our example, click on the conical spin-in.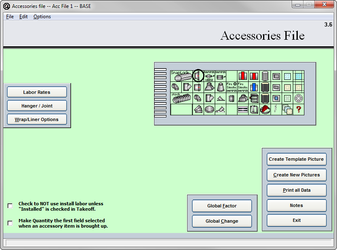
- Click the button to “Create Fitting Chain”.

- Click on each item you wish to add to the fittings chain in the order that is needed. As you select items, you will see a number appear on them stating their order. The items button code will also appear in the list. To remove items from the list, simply click it again.
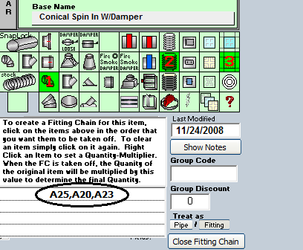
- Lastly, click the Close Fitting Chain button to have your chain saved and ready for use in Takeoff.
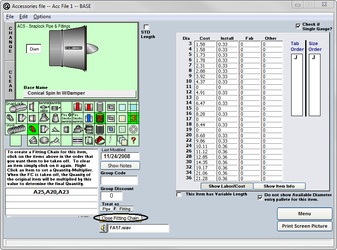
- Click Menu and then Exit to save your changes.
Using a Fitting Chain
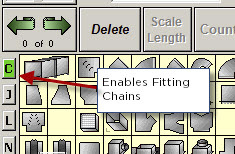
- In Takeoff, you will have to enable Fitting Chains. Click the C to the right of the duct icon to allow the program to use the Fitting Chain feature. Without this clicked, the program will only use the item alone and will not automatically Accept the chain of items after the first link.
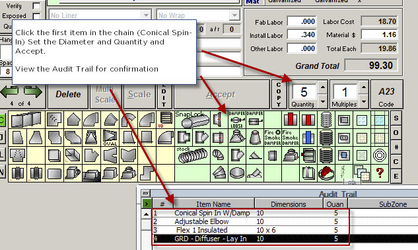
- Select the item that is the first link of the chain, input the proper diameter and quantity desired, and click Accept or place the icon on the plan file.
- View the Audit Trail and you will see all four items listed of the same diameter and with the quantity you entered.
©2022 ConstructConnect, Inc. All rights reserved.