Working with saved company searches
- Zach Johnson (Unlicensed)
- Daniel Wal
- Deirdre Pearson
You can save any of your company searches for future use. Your saved searches run automatically each day and the results are posted on the Snapshot window. You can add email alerts to your searches and have the search results delivered to your inbox at regular intervals. You can also modify the criteria of any of your saved searches at any time.
Notes:
- You can only modify searches that are assigned just to you. You cannot modify a search that is assigned jointly to you and another user.
- For information about the available search options, see Searching for companies.
This section contains the following topics:
Saving a company search
You can save the current filter set as a new search, change the name of an existing search, and save any modifications to an existing search with either the same name or a new name.
Notes:
See the topic Using the Manage Searches menu for the following:
- Modifying existing searches
- Assigning company searches to another user
To save a company search,
1 | Once a search runs, click one of the following from the top of the company list:
Result: The Save Search menu is displayed:
| ||||
| 2 | Click Display on Snapshot if you want the summary results for this search to be listed on the Snapshot menu. Note that there is a maximum of ten saved searches that can be listed on this menu. | ||||
| 3 | The Search Tags feature lets you add a color-coded tag to any of your saved searches to identify projects and companies that match exact criteria. The tag identifies that the projects or companies have matching criteria to the saved search. Search tags are displayed on the list and details page for projects and companies (for list pages, the Search Tag column must be set to show). Search tags can be edited in the project Manages Searches menu and the company Manage Searches menu. Note:The Tag feature may not be available for your account. For more information, contact your account representative. To set up search tags,
For more information about using tags in your search, click here to see the Search Tags video. | ||||
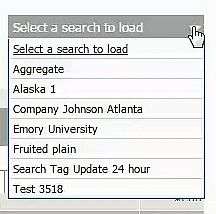
| 4 | In the Name your search box, enter the
| ||||
| 5 | You can have email alerts sent to you each time there is a significant change to the projects associated with the companies in the search results. To set email alerts for a search,
| ||||
6 | Click CRM Export to have the search results exported in XML or CSV format to your CRM system every 24 hours. These results are the projects associated with the companies in the search results. For more information about this feature, contact your sales representative or Customer Service. Note: For an overview and documentation of this feature, see CRM Information and Guides. | ||||
| 7 | To view the current filter set for the search, click Click here to expand filters. You can keep these settings or close the menu and revise the filter settings. Note: You can also edit existing searches using the techniques described in Using the Manage Searches menu in the following section. Do you want to save the search with the current filters?
| ||||
| 8 | Click Save. Result: Your search is saved and is listed in the following locations:
Tip: Hovering over a search name displays the full name for the search.
|


Using the Manage Searches menu
You can use the Manage Searches to export, rename, delete your searches. You can also use the menu to set up email alerts and CRM exports for your saved searches.
Note: You can only modify searches assigned just to you. You cannot modify a search that is assigned jointly to you and another user.
Accessing the Manage Searches menu
To access the Manage Searches menu,
- From the Welcome menu on any page, click your name and then click Manage Searches:

Result: The Manage Searches menu is displayed:
- Click the arrow for Leads Saved Searches to display all of your Leads saved searches:

Understanding the Manage Searches menu
The following table describes the options in the Manage Searches menu. .
| Option | Description | ||||||||
Export
| You can export any of your saved searches as a formatted Excel spreadsheet. The exported data includes the search name, the assigned users, if the search appears on the Snapshot, and if the search is setup for email alerts and CRM export. To export a list of your searches,
Result: The export runs and you are alerted when the export is ready to download. Note: In the spreadsheet, the status of email alerts and CRM export selections is shown as either True or False, depending on the source: For email alerts
For CRM Export
| ||||||||
| Assign Search | For administrators, use to assign searches to yourself and to other users. To assign searches,
Note: For information about assigning searches to all users, see Assigning searches to users. | ||||||||
| Delete | Use to delete searches from your account. Note that you cannot delete shared searches. Caution! Deleting searches is permanent. You cannot recover deleted searches.
| ||||||||
| Filtering by search and user name | You can filter the list by both the Search Name and by Assigned Users values.
| ||||||||
| Search Name | This is the name of the search. You can save the search with a different name using the Rename feature, as described below. Note: Clicking on the search name runs the search. You can use this feature change the criteria of the search, including the name. | ||||||||
| Assigned Users | These are the account names of the users assigned to the search. | ||||||||
| Display on Snapshot | When checked, indicates that the search name and key totals are displayed on the Search Summary tile. Note: You can have a total of ten search summaries on the Search Summary tile. Remove the check from a search if you want to add a search and have reached the ten search limit. | ||||||||
| Search Tags | Use to edit the tags for a search. You can change the color or remove the tag:
| ||||||||
| Email Alerts | These are the email alert settings for the search. You can only add or edit email alert settings for searches assigned to you. Note: The email icon is
To add or modify email alerts,
| ||||||||
| Rename | To rename a search,
| ||||||||
| CRM Export | You can add or remove CRM export to any search. Note that the folder icon is green when CRM is assigned to a search. For more information, see CRM Information and Guides. To use this feature,
Result: The menu refreshes and your changes are displayed in the CRM Export column. |
Modifying searches from the search summary tile
The search summary tile on the Snapshot lists the names and the key totals of up to ten of your saved searches:

You can run and modify any of the searches listed in the menu. Clicking on the search name runs the search.
Note: You cannot modify searches assigned jointly to you and other users.
To rename a search,
- Run the search.
- From the top menu bar on the results page, click Save As.
- In the Save Search menu, enter the new name in the Name your search box and then click Save.
To change search criteria,
- Run the search.
- From the results page, use the Filters menu to make modifications to the search criteria.
- When you are done, click Save.
Related content
© ConstructConnect All rights reserved.