To open any link in a new tab, preserving your position in the current article, just hold down the <CTRL> key on your keyboard before clicking the link or click using your mouse wheel.
Moving Your PlanSwift Data Files from One Computer to Another
To move PlanSwift data files to a different computer, there's a few step, nothing too scary. We'll cover each step in detail after we explain the process.
Step 1: You will uninstall the program to remove its system files from your computer.
Step 2: You'll to navigate to where PlanSwift was install and copy the PlanSwift folder onto a thumb drive or even a Cloud drive such as OneDrive or Google Drive or DropBox.
Step 3: You'll install PlanSwift on your shiny, new computer
Step 4: You'll copy the files from the thumb-drive or Cloud drive into your PlanSwift installation folder to restore your existing projects
Step 5: Launch PlanSwift on your new machine, activate your license, and start estimating!
Step 1 - Uninstalling
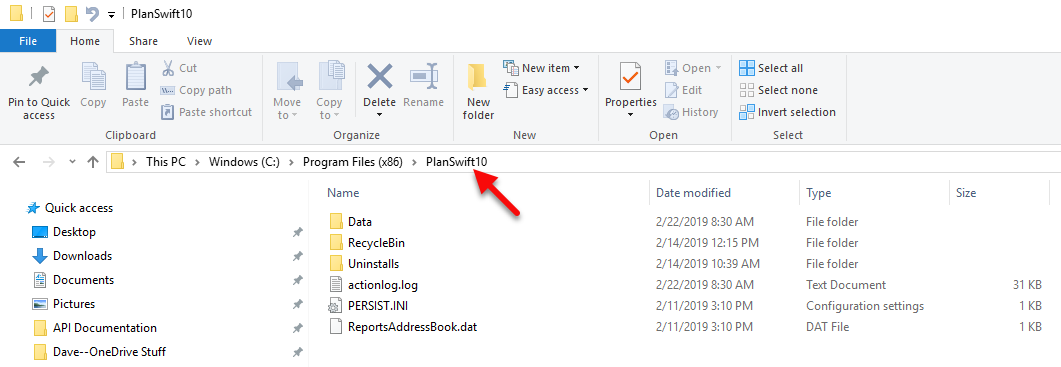
See this article for instructions on uninstalling PlanSwift. Uninstalling PlanSwift does not remove the PlanSwift directory, and it also does not delete your data, templates, and other files. An example of the files and directories remaining in the PlanSwift directory after an uninstall is shown in the figure below.
Step 2 - Copy Data Files - pt 1
Open Windows File Explorer,
Navigate to the folder where your data files were stored (typically, that's going to be C:\Program Files (x86)\PlanSwift10, but if you've set up different data stores on your local machine, be sure you grab those, too).
Right-click on the PlanSwift10 folder, copy it, and then paste it to your thumb drive or a network drive that you can retrieve it from.
REPEAT for any other data stores you've set up on your local machine - this is vital if you want to copy over all your projects. If your data stores are on a network drive, you'll simply re-configure them on your new computer, you don't have to copy/paste them.
Step 3 - Install PlanSwift
On your new computer, download and install PlanSwift, see Downloading and Installing PlanSwift for instructions.
Do not open PlanSwift yet!
Step 4 - Copy Data Files - pt 2
On your new computer, navigate to where you placed the copy of your PlanSwift10 folder, and any other data stores.
Copy that folder, and paste it into the Program Files (x86) directory on your new computer. (You should get a warning about existing folder or admin privileges, whatever you need to do, get that folder copied into the Program Files (x86)\ folder.)
Step 5 - Open and License PlanSwift
Once your files are copied over, it's time to launch PlanSwift and let it recognize your existing project files.
Launch and License PlanSwift, see Licensing PlanSwift (Activation) for details.
If you use network drives for your data stores, open them once PlanSwift is open, see: Storing Your Jobs on a Network Drive (Setting up a Network Data Storage Location)
Miscellaneous
Below is a general description of the directory structure of PlanSwift after an uninstall.
Inside the Data directory are the Plugins, Settings, and Storages folders. If you want to backup just your PlanSwift data, you would right-click on the data folder, and then paste it to the location where you want to store the backup file.
Inside the Storages/Local directory are the directories where the Jobs and Templates are stored by default.
Each job is stored in an individual folder, and there are sub-folders inside of each job folder where page and takeoff data is stored. If you want to move a single job or multiple jobs to another computer, select the jobs you want to move, right-click to copy them, and paste them to the location they are to be moved to. Another way of moving jobs is with the Zip SwiftJob and Unzip SwiftJob buttons on the PlanSwift Tools ribbon bar menu.
If you want to remove all PlanSwift data from your old computer, click on the PlanSwift10 directory inside of the Program Files (x86) directory and delete the directory.
Related content
Copyright 2023 ConstructConnect
.png?version=1&modificationDate=1569433317596&cacheVersion=1&api=v2)


