To open any link in a new tab, preserving your position in the current article, just hold down the <CTRL> key on your keyboard before clicking the link or click using your mouse wheel.
Configure PlanSwift to Connect to a Network Data Storage Location
The process of setting up a network storage for PlanSwift is pretty simple. This guide will only help you once you have set up a network, server, or cloud-storage based system (for example: OneDrive, Google Drive, etc. - as a reminder, we do not provide technical support for any 3rd party applications/solutions).
We do not recommend/support using a cloud-based storage for storing working copies of your jobs. This is doable but the storage location needs to be fully-synced and available offline (on your computer) in order for it to work in PlanSwift. Opening a job that has not fully synced yet can result in data loss.
If you create a data storage in a network location, you must ensure that no other PlanSwift user on the same network opens a job when you are working on it. PlanSwift does not support multiple users in the same job.
Also, other users with access to your network location could accidentally or intentionally move, delete, or otherwise alter your data which could corrupt your job.
Configure PlanSwift to Use a Network Data Storage Location
To point PlanSwift to an existing Network Storage Location,
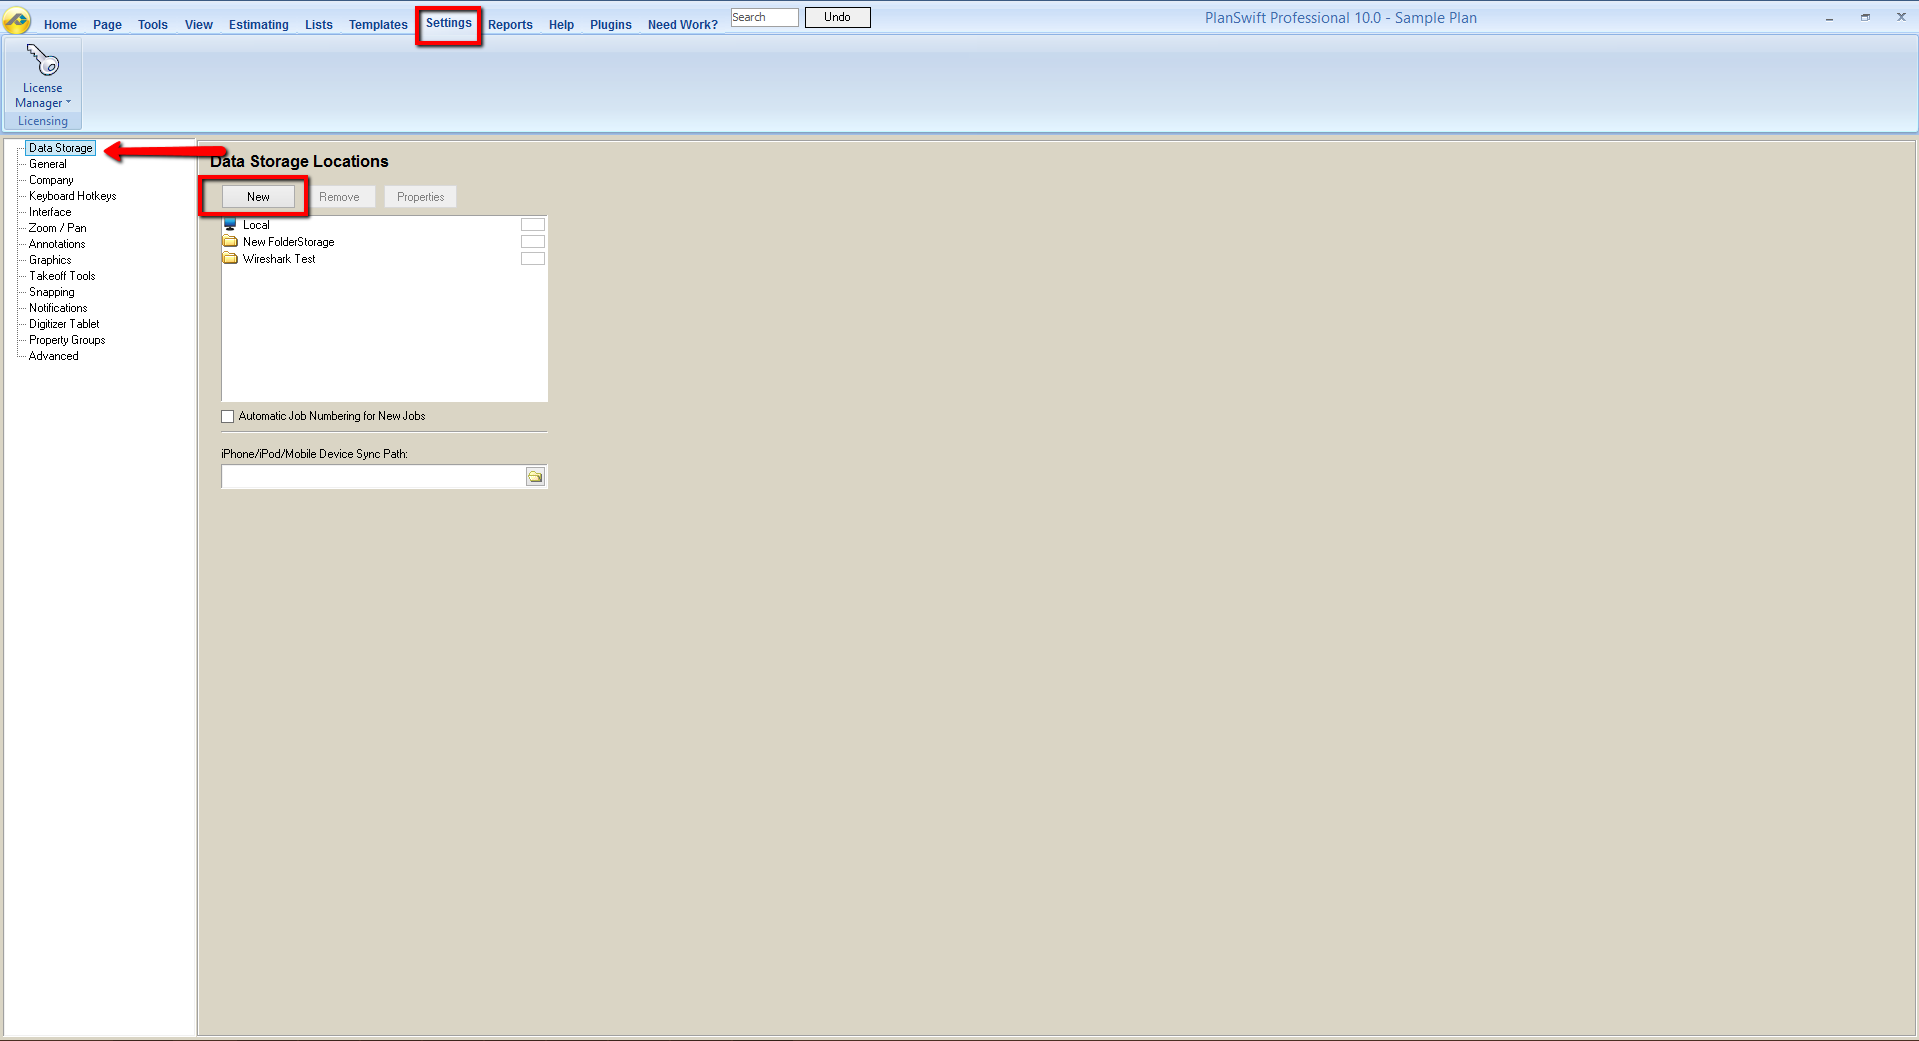
1. Click on the Settings tab
2. Select Data Storage
3. Click New
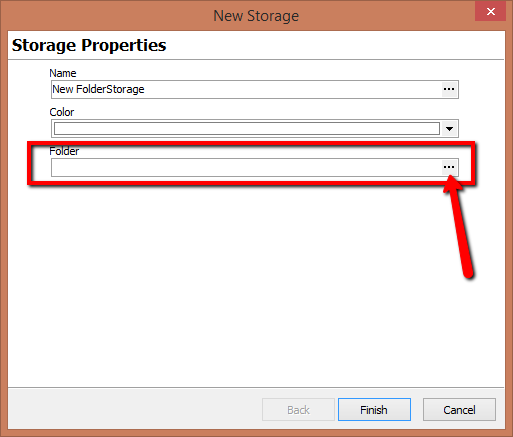
4. Type in a name for the new storage (this only affects your installation of PlanSwift, think of it as a nickname)
5. Set a color of your choice
6. Click on the ellipse (3 dots) in the Folder field
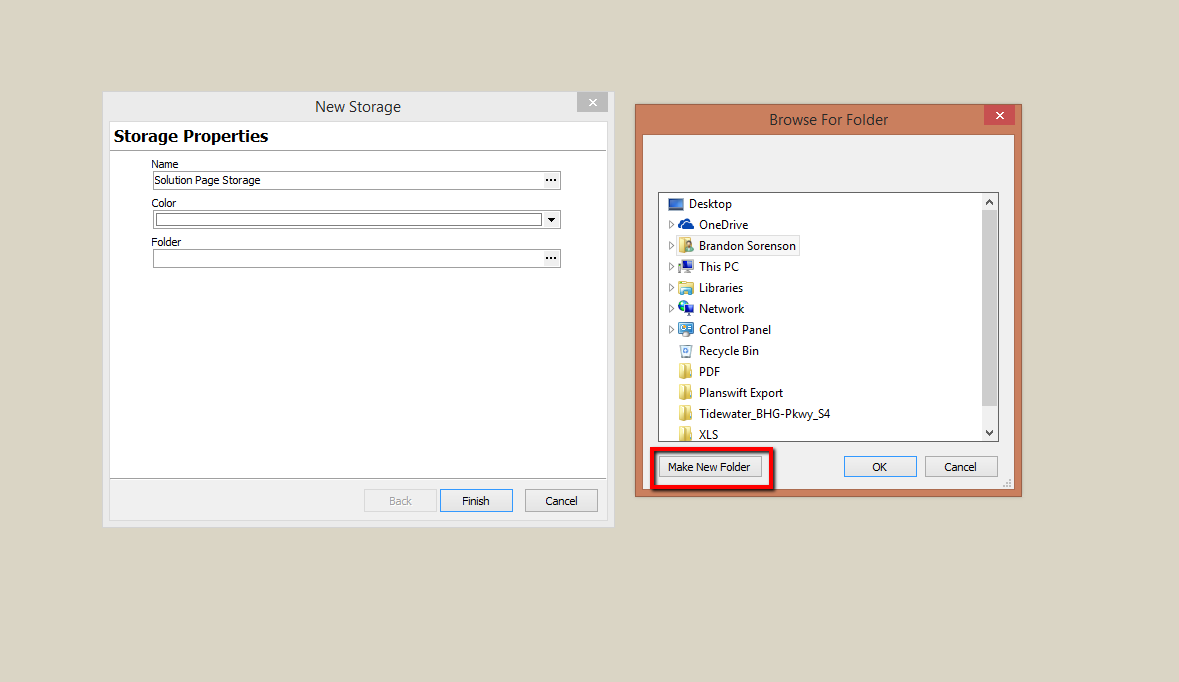
7. Browse to the folder you created in the first section (if you haven't created the Network Storage Location, you can click the Make New Folder button and name the folder).
This folder must be used exclusively by PlanSwift - do not store other documents or folders in this storage, as it may result in missing data errors from PlanSwift.
You do not need to store the PDFs or other plan files you wish to use in this location to be able to store jobs here.
8. Select the folder and click OK
8.) Click Finish
PlanSwift creates the Jobs and Templates folders required to store your data.
To move your jobs from one Storage to another, see: Moving Your PlanSwift Data Files from One Computer to Another
Copyright 2023 ConstructConnect


