04. Setting Up a New Job
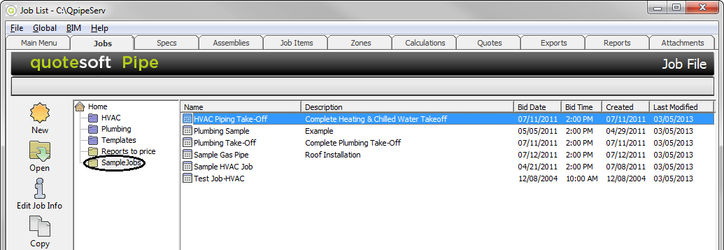
When you create a new job, you have a choice of where you store it. On the left side of the Job File screen, notice the Folder Lists: HVAC, Plumbing, Templates, and Sample Jobs.
NOTE: You can add Folders by selecting New Folder under the File pull-down menu. This is also where you delete and rename folders.
When you add a new job, make sure the folder you want to store the job under is selected.
- For this tutorial, you want to save the new job in Sample Jobs. Make sure it is highlighted. If it is not, click on it to highlight Sample Jobs.
- Click
 on the top left corner of the Job File screen. A dialog box appears.
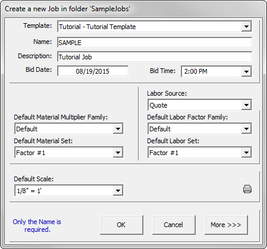
- At the top of the screen, select a template to use in your job. To see a list of existing templates, click the down arrow on the right side of the box next to Template. For our example, select Tutorial.
NOTE: A template is pre-loaded with Specs, Assemblies, and Job Items to minimize the setup time for estimating a job. For more information on templates, see the Reference Manual. - Type in a name for this job. For this tutorial, type in SAMPLE.
- Move your cursor to the Description field. For this tutorial, type in Tutorial Job.
- Click
 . The Spec List screen appears.
, multiple selections available,
©2022 ConstructConnect, Inc. All rights reserved.