09. Job File
- April Friedman (Unlicensed)
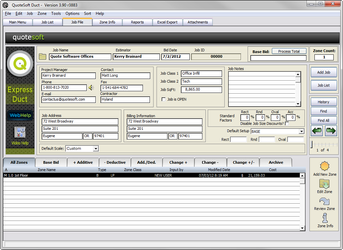
The Job File is designed to store data such as job name, estimator name, bid date, address, phone numbers, and much more. All of this data can be exported to your Excel spreadsheet or skipped in the set up process if this information is not needed.
You also have two text fields for Job Class to describe what type of job it is you are inputting. These fields can be helpful in the organizing of like jobs in the future.
Setup Tip! Mouse over the Email address after typing it in and you can click the link to have an email to that address created for you.
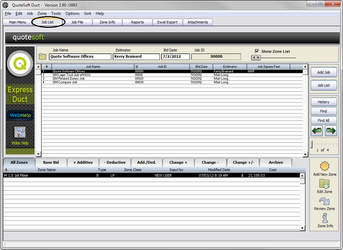
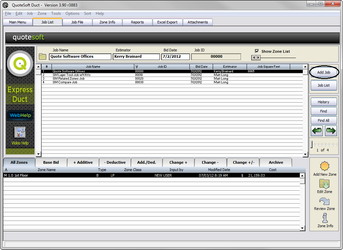
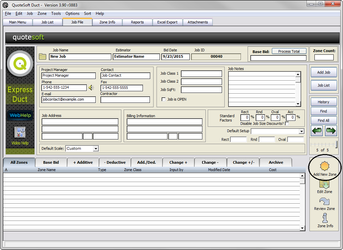
The Job List is available either by the Tab at the top of the screen or the button on the right. The Job List will enable you to find a specific job using the sort feature by clicking on the column headings for job name, estimator, bid date, city/state, or any other field filled out at job creation.
Once you find the job you wish to work on, simply double click the job on the list and the program will bring up that selected Job File and close the list for you.
Setup Tip! You can sort your Zones by name, date, or even dollar amount by clicking on the column headers.
Find Job
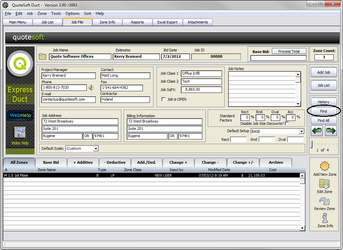
Finding a specific job is done with the Find button on the right. This feature will allow you to type in all or part of a job name and have the program search for everything containing those letters in that order.
The Job List will then show only the Jobs that met the search criteria. This can be useful if you are looking for all the jobs done at an University or office complex for example. You can then narrow your findings down to one particular project.
Setup Tip! After you have found your Job, be sure to hit the Find All button to return to the Job List and see all of the Jobs in your Job File.
Zone Info
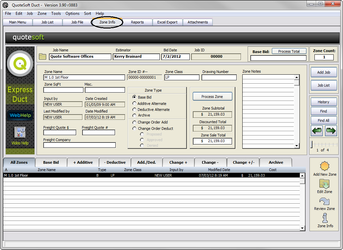
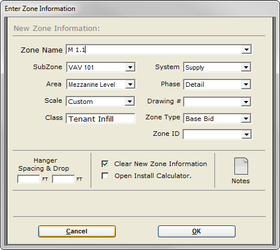
Selecting the Zone Info tab will make available the data entered at Zone creation. This information is what you typed in on the Input Zone Info screen. At this time, you can change the name, update the notes, and input the square footage of conditioned space.
Selecting the proper Zone Type such as Base Bid, Additive Alternate, Deductive Alternate, Change Order Add or Deduct is important for the proper exporting of your job information to your Excel Final Estimate Summary.
Reports
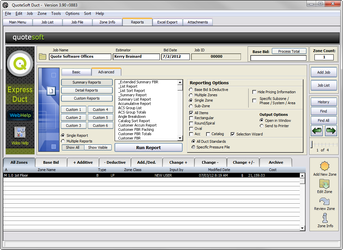
There are two types of reports in the QuoteSoft Duct system: Crystal (quick) Reports and Excel Exports.
Crystal Reports are designed to give quick information on the Job, Zone or Subzone level. This option allows you to be very specific about the data you wish to view.
Excel Exports are used to create your Final Estimate Summaries. You can choose to modify one of our default templates or have the system export directly to one you have already created. You can select the exact information you wish to have exported and then create formulas in your spreadsheet to compile and display your data in any manner necessary.
Setup Exercises: Job File
As an exercise we will create a Job with a Zone and choose the proper pressure class file, as well as set the system for using Subzones.
Exercise 12: Creating a Job with Zones & Subzones
- On the Job File screen click the Add Job button. At this point you will be prompted to enter in the Job Name you wish to use, use the keyboard and click OK.
- Next click into the Estimator box and type in your name how you'd like it displayed on reports.
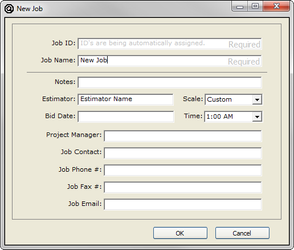
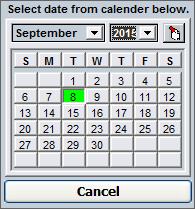
- Click the Bid Date box and select the appropriate date from the calendar and you will see the date listed for you.
- Continue to fill out the required information in the owner, address, phone, and email boxes until you have all the data you wish input for the Job. Remember, this data can be exported to Excel if you choose.
- Click the Add New Zone button to begin your Zone Takeoff. Fill out the Zone Name and the rest of the information that you choose. Most users choose to use the Drawing Number (M1.1, M2.1, etc.) as the Zone Name.
- Input a Subzone for more detailed reporting. The Subzone, Cost Code, System, and Area fields can be used to break out very specific data if needed. Typically the unit id/tag/number (RTU, VAV, AHU1, etc.) is used as the Subzone Name.
- Select the blueprint scale and click OK.
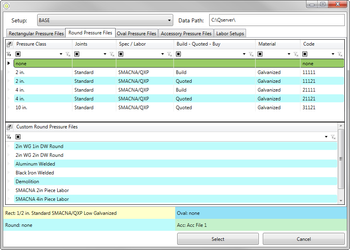
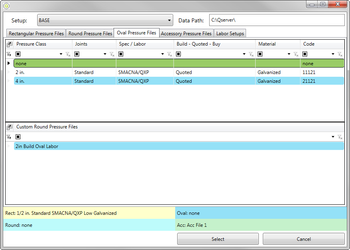
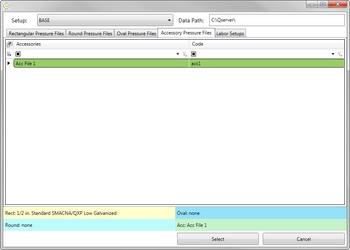
- Next you’ll be prompted to choose the Pressure File you wish to have initially loaded for the start of your Zone takeoff.
- Click the Rectangular Pressure File you wish to have selected.
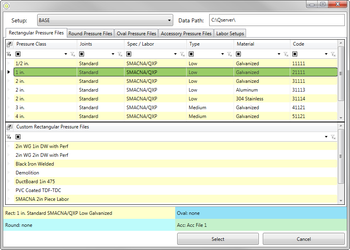
- Click the Round Tab and choose the file to load.
- Click the Oval Tab and choose the file to load. If you do not wish to have an Oval file loaded, simply select No Oval Pressure File.
- Click the Accessories tab and verify that your file is selected.
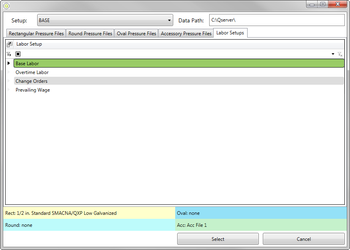
- Then click the Labor tab and select the labor rate you wish to have used for this Zone.
- Click the OK button and your selected files will load and you can begin your item Takeoff.
©2022 ConstructConnect, Inc. All rights reserved.