04. Round Pressure File
- April Friedman (Unlicensed)
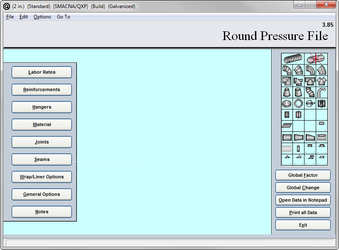
Each Pressure Class will have its own Pressure File as well as the different material types.
All Round Pressure Files have the same setup principles so creating a new file on demand is a simple process.
There is no limit to the number of files the system can store and use. Each file is linked back to the Data File for the component information to ensure that the setup of the Data File has been completed prior to constructing Pressure Files.
Labor Rates
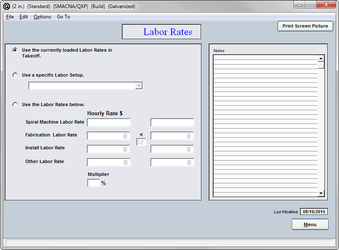
You will need to select which Labor Rates to be used with this Pressure File when performing the takeoff calculations.
Typically you would select "Use the currently loaded Labor Rates in Takeoff" and the program will use the rates you selected for the job. If you want this pressure file to always use a specific Labor Rate, select “Use a Specific Labor Rate” and choose which of the available you would like to use or “Use the Labor Rates Below” and type in the rates needed.
Setup Tip! For a Change Order Pressure File, it is possible to use a multiplier on your labor rates here.
Reinforcements
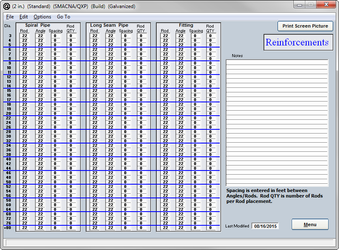
Reinforcements are a critical part of any job. The labor to fabricate and install the reinforcement angle rings as well as their material costs will be set up in the Data File.
The type, quantity, and location to be used are specific to the pressure class you are building. Please consult your shop standards for specific instructions on the use of the reinforcements and set this page up accordingly.
Setup Tip! Be sure to consult your Shop Standards. Including extra reinforcements can be costly!
Hangers
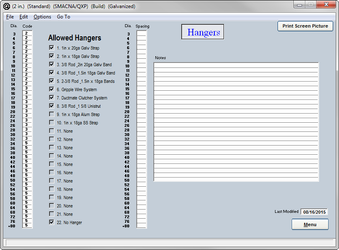
QuoteSoft Duct will use the diameter of the item to determine the Hanger setup to use. Simply input the default code your construction standards have listed.
Be sure and check the Allowed Hangers to give options for the Hanger. For example, if your default hanger is strap and you wish to override to an all-thread and band, then that hanger setup will need to be checked as an alternate.
Setup Tip! Do you have multiple lines getting the same codes? Use the Fill Down option available under the Edit Menu.
Materials
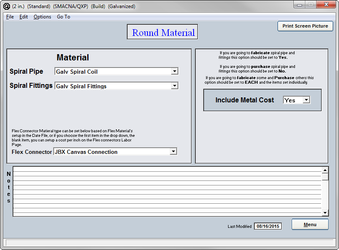
The material type of the pressure file must be the same as the material in the name of the pressure file. In order for you to ensure that you load the proper file, make sure that the correct metal is chosen on this page.
The program comes preloaded with two type of pressure files: fabricated and quoted. Fabricated pressure files will include labor and setup for manufacturing you own spiral pipe and fittings.
The Quoted pressure files will have no labor and no cost for the items as you’ll be typing in a quote from a supplier onto a spreadsheet in the Final Estimate Summary phase of your bid.
Setup Tip! Verify the material used to ensure a correct pressure file construction.
Joints
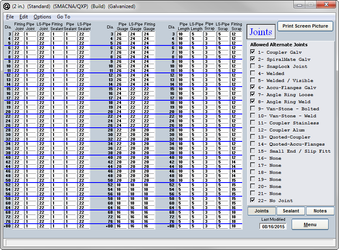
The program will use the diameter of the item to select the proper Joint Connector. By checking the default Connector, the system will follow your standards.
Much like the Hanger page, you'll want to select the Alternate Joints to be used to save yourself time in Takeoff.
You can view the codes for the Joints and the Sealants by using the button at the bottom.
Setup Tip! Use code 22 for no connector. If you use 22 for “None” throughout the program, then you won’t need to see the codes to verify and a quick glance will let you know you did it correctly.
Seams
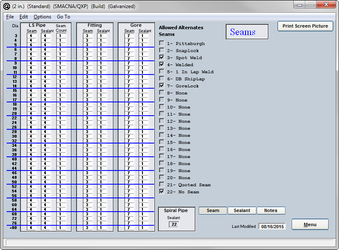
Specify the Seam type you want to use on your fitting and long seam pipe for the manufacturing process. Be sure to select the alternates as well.
Remember to match the Seam and Sealant to verify that the correct manufacturing process is used on the items estimated.
Setup Tip! Use Windows Copy and Paste functions to speed up the setup. Just modify after Pasting.
Wrap/Liner Options and General Options
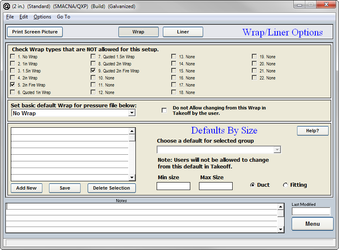
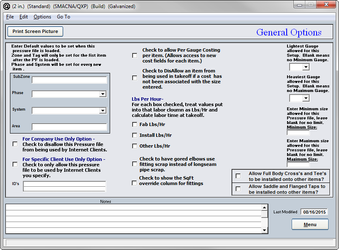
The Wrap/Liner Options page will allow you to specify which of your wraps and liners you want to disallow for this pressure class by checking the appropriate boxes.
The General Options setup allows options such as minimum and maximum gauges, aspect ratio overrides, and many more features. Each of these settings is to be used for this pressure file only, and changes here will not affect the other files.
Item Labor Tables
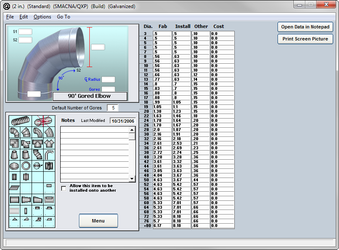
The labor for fabricating and installing an Item is stored in the pressure file.
The labor hours are entered in a decimal format, e.g. .25 for 15 minutes.
This is the labor for this item only; no component labor is stored in the pressure file. All components such as Mig Welding, Angle Rings, Hangers, and Sealers will be pulled from the data file.
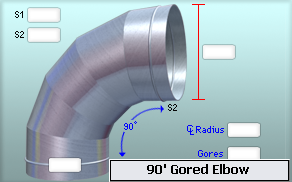
An example of Item Labor and Component Labor using the installation of a 22″ 90 degree radius elbow is broken down below.
Total Labor Breakdown:
Item Labor:
- Jobsite Layout
- Material Handling (the time required to locate the item and prep for install)
- Raising the item into place (by hand, scissor lift, etc.)
Component Labor:
- Hanger Layout, Install, and Attach
- Joint Makeup & Sealing
- Insulation
The pressure file stores the Item Install and Fabrication Labor Hours. This labor factor will not change when you modify which components are being used.
For example, if you override the default joint connector from Slip to Angle rings, the program will remove the cost and labor associated with  a Slip connection and add in the information for the Angle Rings, but the Item labor will not be modified at all. Total labor can go up or down depending on the change made but the Item labor is a constant, no matter which components are used.
Setup Exercises: Round Pressure File
As an Exercise, you will be shown how to copy a Round Pressure File and change its Material Type. Next we will explain how to remove a specific round tap from a pressure file.
Exercise 5: Copying a Round Pressure File
- Select the Round Pressure File that you wish to copy. The closer the file you are copying is to the file you are creating, the fewer changes you’ll have to make. For example, you can make a PVS Coated file by copying a Galvanized file.
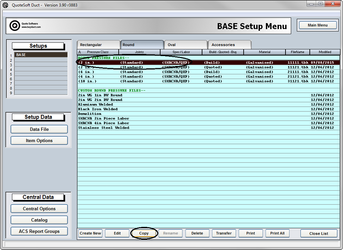
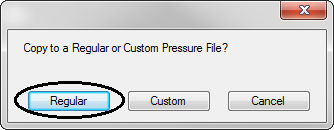
- You have the option of choosing a Regular or Custom Pressure File. Choose Regular. You would use the Custom option only if you were creating a Pressure File that didn’t fall under a specific classification, such as Black Iron Welded.
- Set the classifications using the drop down menus to your NEW Pressure File. For our exercise, select only a new Material of PVS Coated. Verify that all other classifications remain the same.

- Click the OK button and your new pressure file will appear in the list. Highlight the file, click Edit, and make the necessary changes to update this file to your new classifications.
- Go to Materials and select the PVS Coated Material Type. Make any other changes to Joints, Hangers, Sealers, etc. that are needed to make this file accurate for the new material type chosen
Exercise 6: Removing Round Taps from a Round Pressure File
- Select the Pressure file you wish to make the change in and click the Edit button at the bottom of the page.

- Mouse over the tap you wish to disable for this Pressure File and RIGHT click the icon.


This will put a red X over the item visually, showing you it is disabled. To enable, right click again.
When the Takeoff program is loaded, the Mitered Tap will not be available on the round palette as a single tap or in the tap options for the Tees and Crosses. - Click Exit to save your changes

©2022 ConstructConnect, Inc. All rights reserved.