04. Specification
Specifications consist of database items which define which type of pipe, fittings, valves, hangers, etc., will be used in a piping system.
The Specification section will take approximately 2 hours.
Exercise 14: Copying Specs
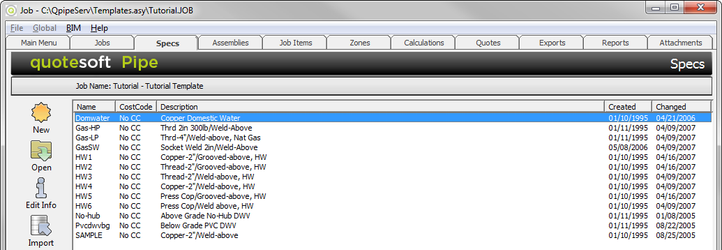
- Go to the Job where you want the new Spec copied to and click on the Specs tab.
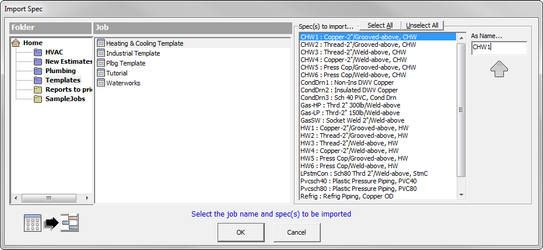
- Click .
- Select the Templates Folder, the Heating & Cooling Job, and then the Spec you want to copy into your current Job. When you select , the spec is copied into your current job.
Next, you will manipulate the specification to use the exact specifications your company will use on a daily basis. This includes setting up the type of Pipe, Fittings, Joints, Valves, Flanges, Hanger Types, Hanger Spacing, Insulation Thickness, Specialties Items and Bookmarks.
Exercise 15: Change the Size Ranges to Be Used in a Spec
- Click on the white box in a row. The box changes from white to gray.
- To select multiple sizes, click and hold your mouse down on the white box and drag the cursor to the right. Release the mouse button and the sizes will be selected.
Exercise 16: Edit the Material Type in a Spec
The dots only appear on single items: pipe, valves, etc. On fittings, there are many items represented and they may have different sizes possible.
- To open and change a spec, highlight and double click on the spec.
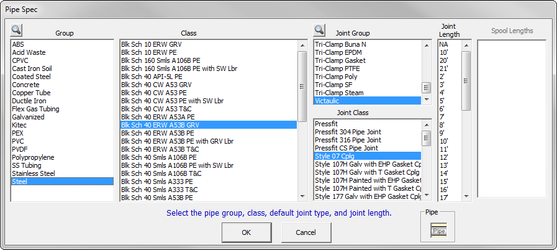
- The Spec screen lets you select the Group, Class, Joint Group, Joint Class, and Joint Length. This breakdown is important for rapid lookup.
Group: Type of material.
Class: Weight or number of how it is broken down.
Joint Group and Joint Class: Select the Joint Group and Joint Class for automatic generation of joint quantities. Note that you should always select a coupling for types of pipe that require couplings. Any solder or other pipe joint material will be added automatically with the coupling. In some classes of pipe, Joint Groups, Classes or both may be automatically selected by default.
Joint Length: Tells the system how often the joints for the pipe will be automatically counted. - Ones you have the selection, click . The main spec screen reappears
Exercise 17: Edit the Fittings in a Spec
Change the fittings so they are accurate for our Job.
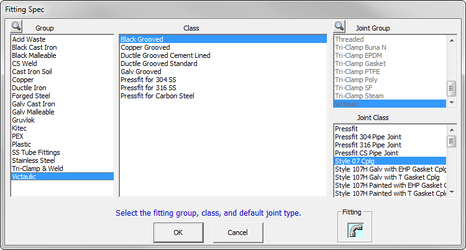
- Double click on a Fitting.
- The Fitting Spec screen appears. You can now verify that the selection is correct.
- Click to return to the Spec screen.
Exercise 18: Edit the Valves in a Spec
Change the Valves so they are accurate for our Job.
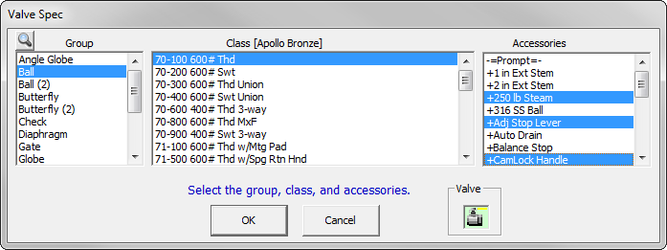
- Double click on a Valve.
- The Valve Spec screen appears. You can now verify that the selection is correct. If any accessories are needed, they can be selected here by clicking on the accessory to highlight it. You can select as many accessories as you want.
Note: For industrial contractors, you may want to select QUOTED valves since you may only be interested in getting the labor for the item. - Click to return to the Spec screen.
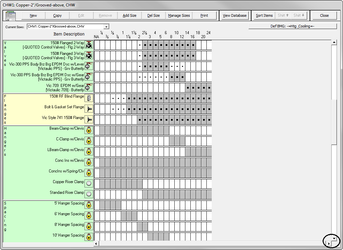
To see more items on this Spec screen, click the down arrow on the bottom right side of the screen. The screen scrolls down.
Exercise 19: Edit the Flanges in a Spec
Change the Flanges so they are accurate for our Job.
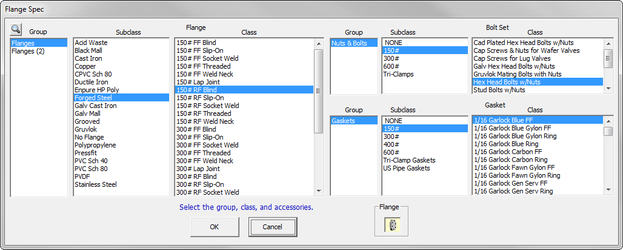
- Double click on a Flange.
- You can now verify that the selection is correct. Bolt sets and gaskets are also selected here for automatic takeoff with each flange. Click to return to the Spec screen.
Exercise 20: Edit the Hangers in a Spec
Change all the Hanger components so they are accurate for our Job.
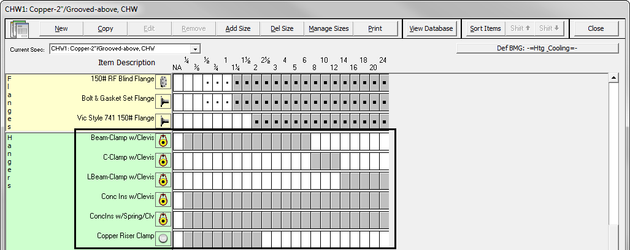
Keep in mind you can have up to 7 hangers per Specification (including Riser Clamps). In addition, the hanger that is first (at the top) of the “Hanger†section in the spec will be the default hanger that shows up in the Takeoff screen. If the job is an all concrete job, you may want to move that to the top using the Shift Command. This will eliminate extra clicking when you get to Takeoff.
Notice as you scroll down the specification screen, you can see the variety of hangers that are available.
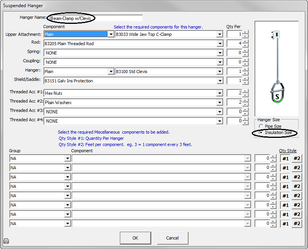
Double click on a hanger. You can now verify that the selection is correct. All of the components shown will be calculated for each hanger of this type that is being used in Takeoff.
Notice the dot next to “Insulation Size” is selected. This means the hanger is sized to include the pipe diameter plus insulation thickness (x2). If Pipe Size is selected, the hanger is sized to only pipe diameter (no insulation).
Verify that the insulation thickness is correct so that the hanger size and sleeves are calculated correctly. (This is required for the proper over sizing of hangers.) Click to return to the Spec screen.
Adding a Hanger (for Excavation)
You can add a new hanger.
- Go to the specification where you would like to add the hanger.
- Click .
- A pull down list appears.
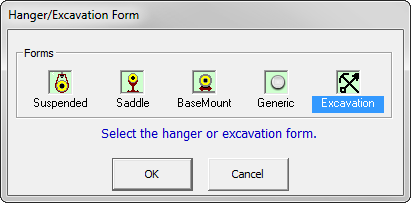
- Click on Hanger/Excav. A screen appears with Hanger/Excavation Forms where you can select which hanger you would like to add.
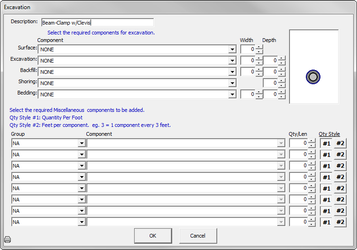
NOTE: Click on for your underground pipe. - Complete the hanger form as necessary.
Exercise 21: Edit the Hanger Spacing in a Spec
Scroll down to view more items. Look at the Hanger Spacing along the left-hand column.
NOTE: If hanger spacing is not selected for a specific size range, then the system cannot calculate hangers automatically.NOTE: If hanger spacing is not selected for a specific size range, then the system cannot calculate hangers automatically.
Exercise 22: Changing the Insulation Thickness in a Spec
Change the insulation thickness so it is accurate for your Job.
Notice on the following screen that the 1″ Insulation is specified from ¼” up to 1½” pipe diameter. (This is shown by the gray boxes.)
- Double click on the Insulation thickness.
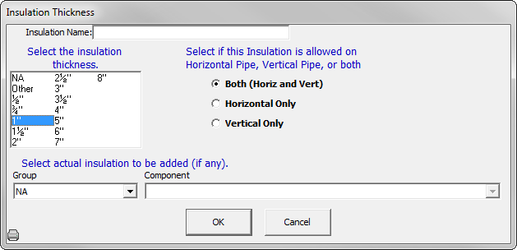
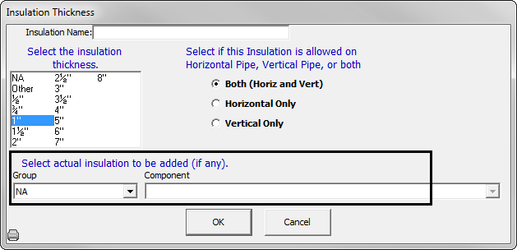
- Insulation Thickness appears.
- You can now verify that the selection is correct. Click to return to the Spec screen.
Adding Material Cost of Insulation into Your Estimate
For most contractors, the insulation thickness is used so that the system will oversize hangers and sleeves automatically for you. If you self-perform your pipe insulation, you may want to select an insulation group and component for your spec. You will be generating a material cost and installation hours for doing pipe insulation.
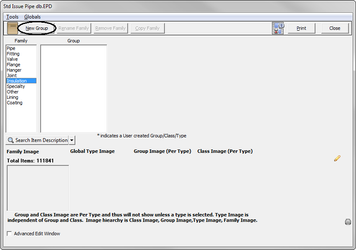
You need to create the group in the database.You need to create the group in the database.
Exercise 23: Adding an Insulation Thickness to a Spec
When you select at the top of the Spec screen, a pulldown list appears. You have a choice to add any group of items: Pipe, Fitting, Valve, etc.When you select at the top of the Spec screen, a pulldown list appears. You have a choice to add any group of items: Pipe, Fitting, Valve, etc.
- Select Insulation from the pulldown list. The Insulation Thickness screen appears.
- Select the new insulation thickness you would like to add.
- Click to return to the Spec screen. Your new insulation thickness has been added.
Exercise 24: Edit the Specialties in a Spec
To see Specialty items, scroll down on the Spec Screen. In specialties, you’ll see such items as Dielectric Unions, Nipples, Sleeves, and O-lets. Again, select the items for the size ranges that each item is to be available (used for).
Exercise 25: Assigning Bookmarks to a Spec
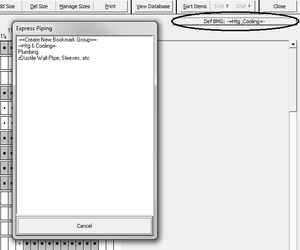
We’ve expanded a spec beyond pipe, valves, and fittings. You can assign a bookmark to a specific spec. You'll see how this applies in Takeoff.
NOTE: No other automatically generated items “come along” with bookmarks.
Exercise 26: Saving Your Spec
Once you are happy with the changes you made to the specification, click .
©2022 ConstructConnect, Inc. All rights reserved.

